Step 1: Navigate to the Languages Menu
First, navigate to the Languages menu. You can access it by hovering your mouse pointer over the settings, i.e. the gear icon in the top right corner. A drop-down menu should then open with the sub-item “Languages”. Click on “Languages” there. The menu should then open.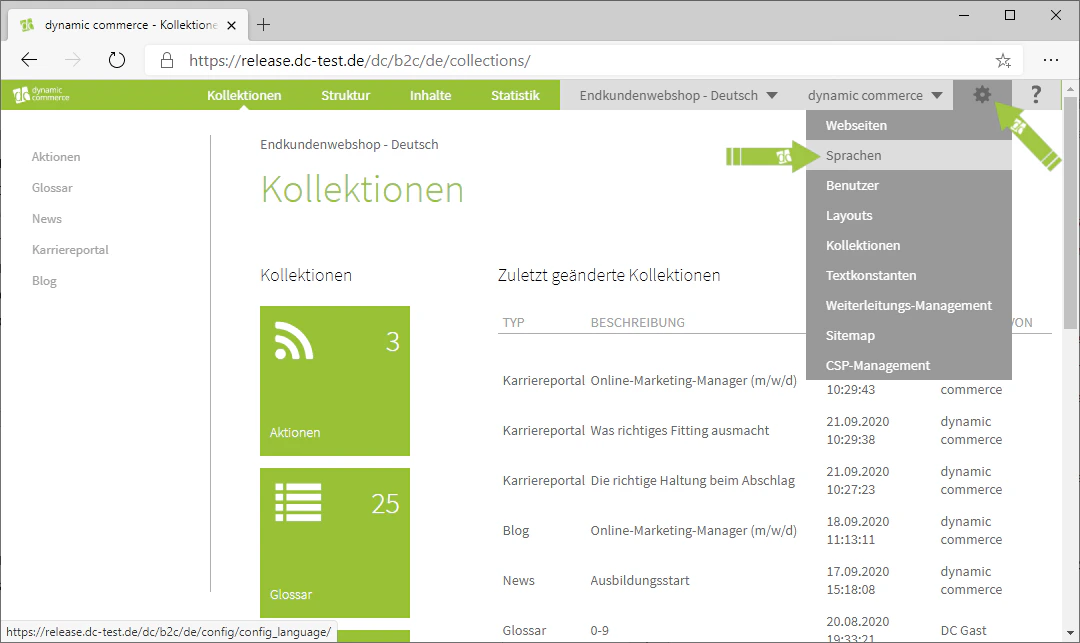
Step 2: Create a New Language
Click on the “Plus” icon with the label “New” below it to create a new language. A window should then open in which you can create a new language.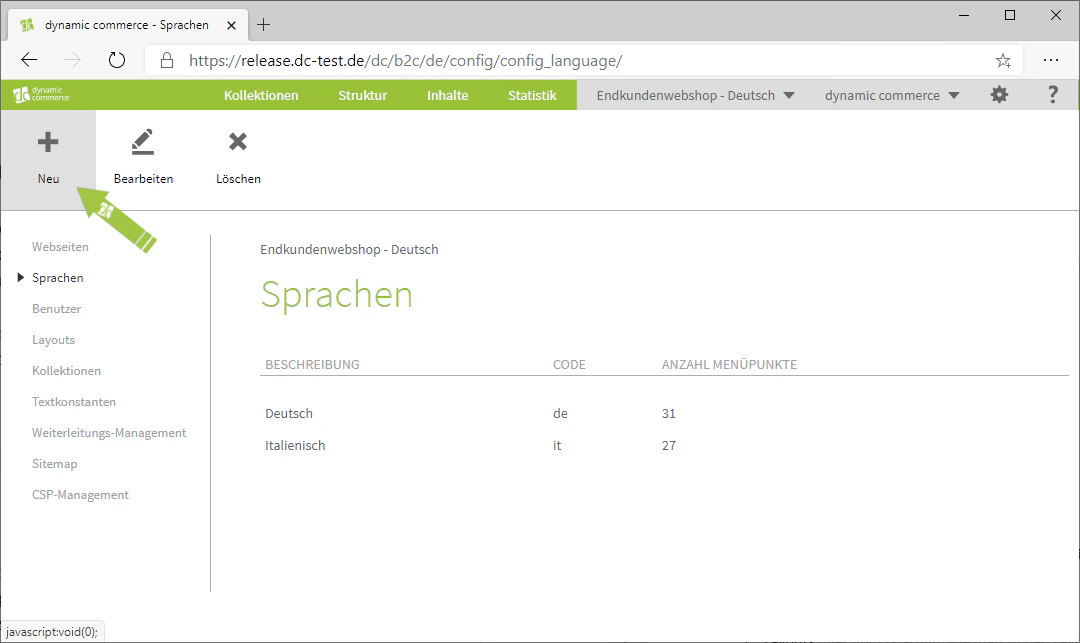
Step 3: Select Language Codes and Description
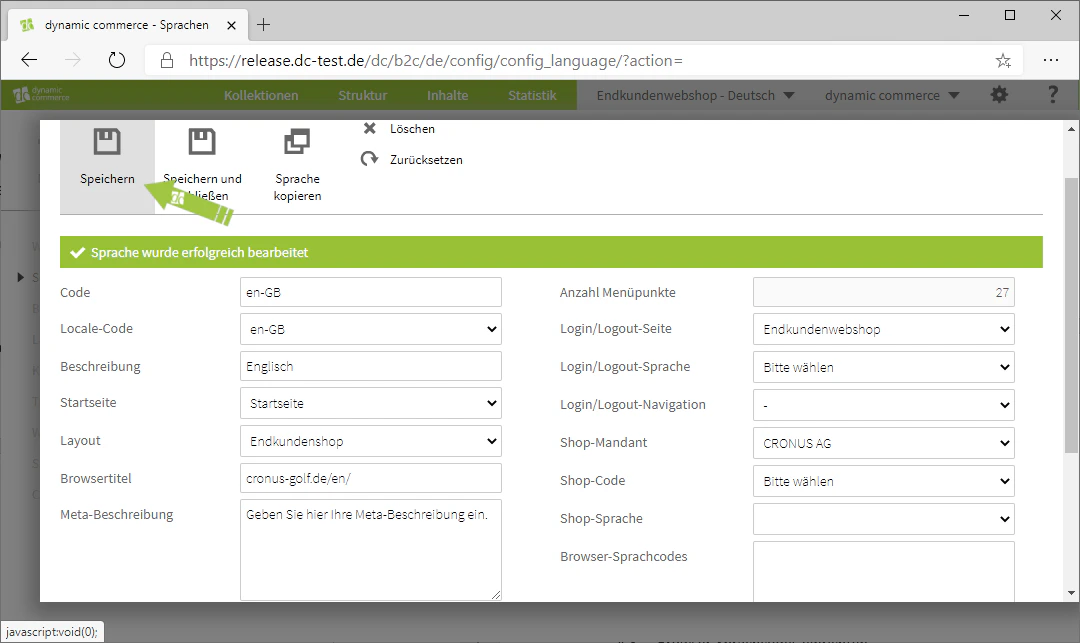
Then select a code and a description. These are generally freely selectable, are not displayed on your website, and serve only for clarity. Nevertheless, it is advisable to use the respective language as the description and the locale code as the code. Simply select the locale code from the drop-down according to the official abbreviations for the respective language along with the associated country. In our example, we are creating the language English, which is why we also choose this as the description. The locale code for our example is therefore “en-GB”, which also gives us the code.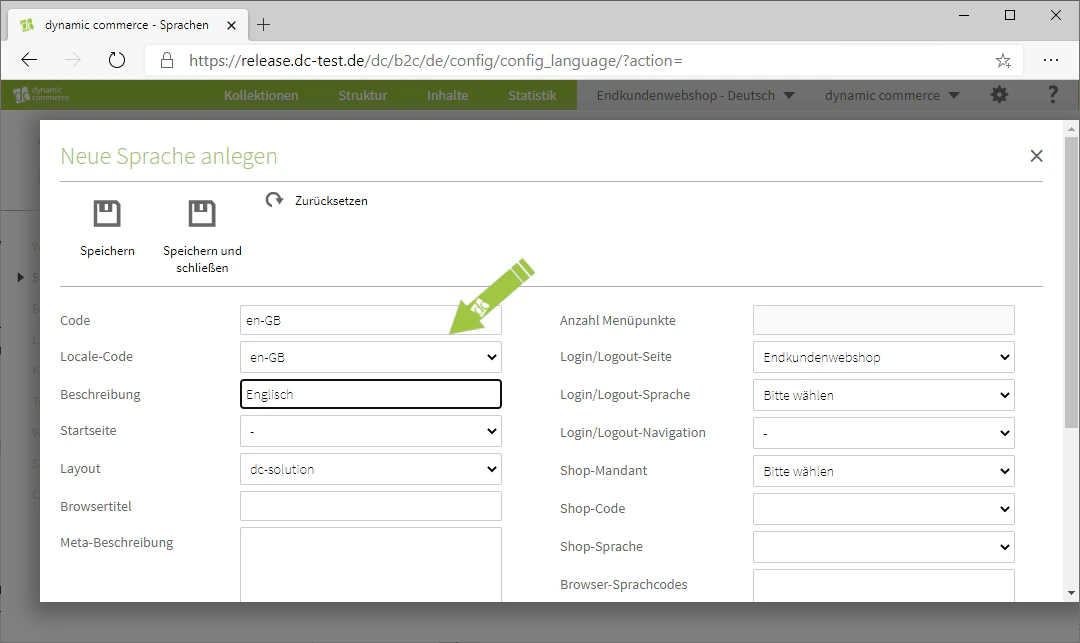
Step 4: Select Home Page and Layout
Now select the home page and the layout that the pages with the newly created language should have. As the home page, we select the standard home page here, and as the layout we use the end-customer shop layout, since the end result is intended to be the English version of the B2C shop.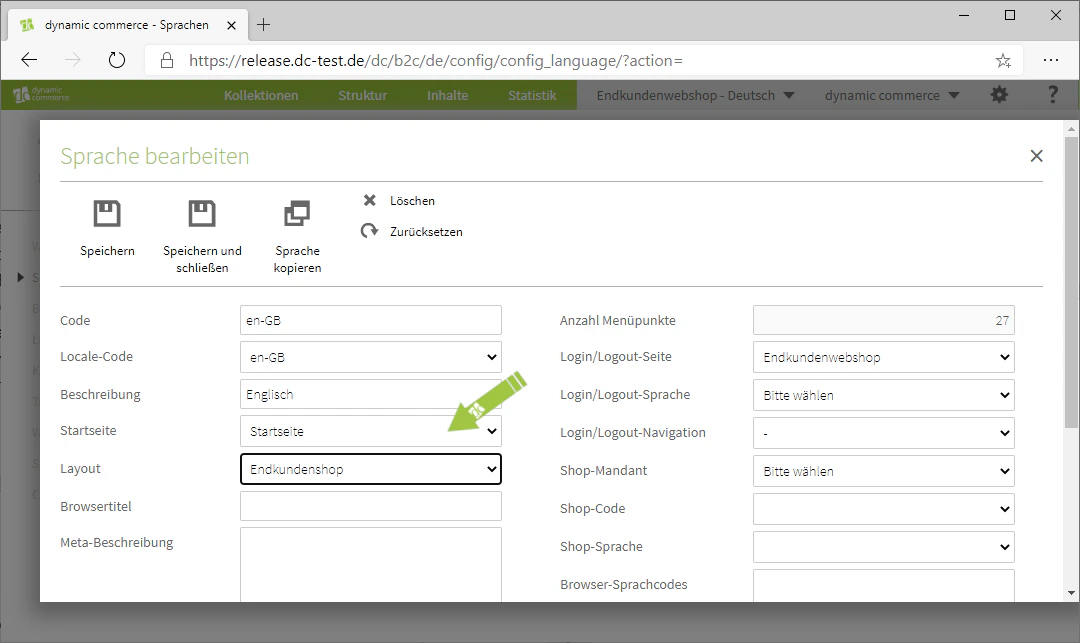
Step 5: Select Browser Title
You should then select a browser title. Normally, the URL of the website is used as the browser title, followed by the respective language abbreviation between two ”/”. In the example, as already mentioned, the language is English, which is why we use “en” as the language abbreviation. The URL of our site is “cronus-golf.de”. We therefore use “cronus-golf.de/en/” as the browser title.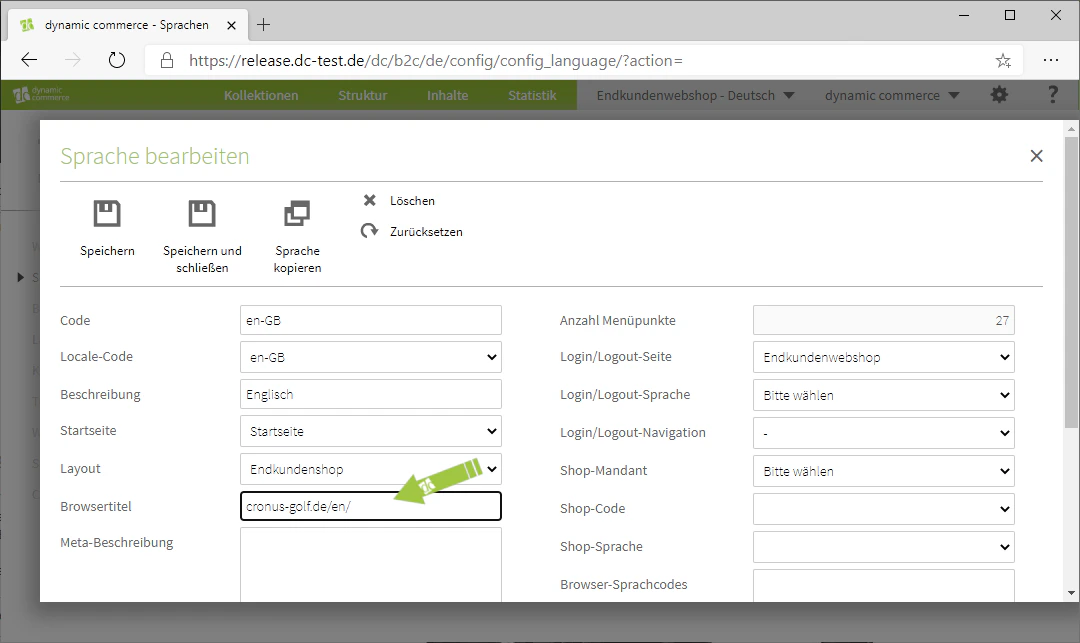
Step 6: Select Meta Description and Meta Keywords
You can now also enter a meta description and meta keywords for SEO optimisation. You should choose a “short description of up to approximately 160 characters” as the meta description. This description is usually displayed in search engines below the link to your page (SERP snippet). It should therefore be meaningful and unique.As meta keywords, you should define keywords that reflect the content of your created page. If a user searches for these keywords in a search engine, your page can be found as a result.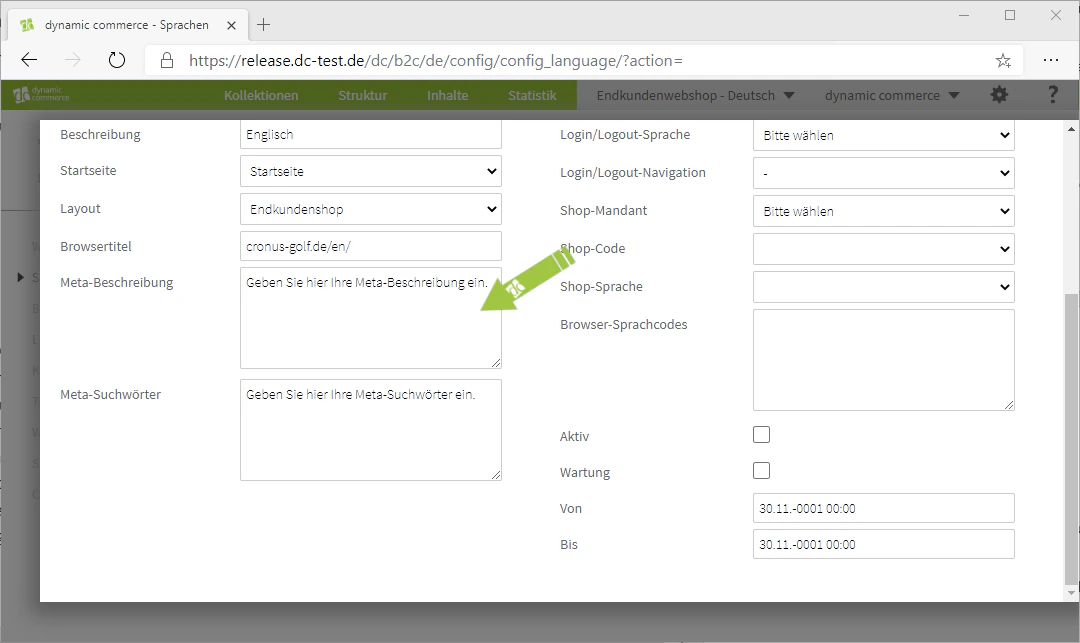
Step 7: Configure Login/Logout Settings
Then configure the login and logout settings. If you require or need a login, first select the login/logout page. Then select the login/logout language, which should of course correspond to the language just created. Then use the login/logout navigation to specify which page the user should be directed to after logging in.In our example, this is the end-customer web shop, which is why no login or logout is intended. We therefore simply leave these fields empty.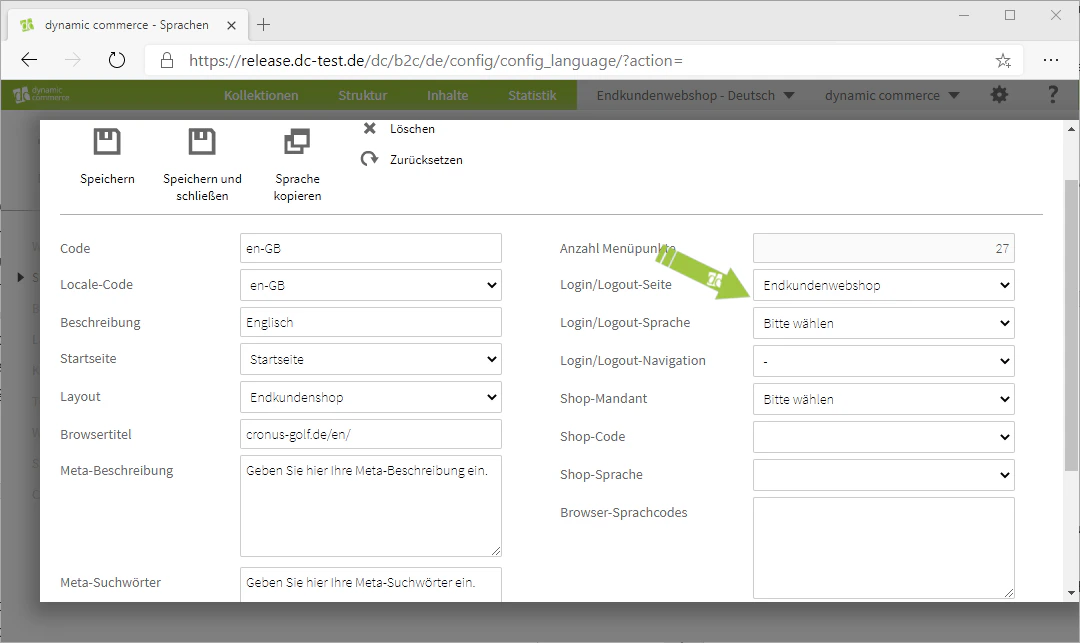
Step 8: Configure Shop Settings
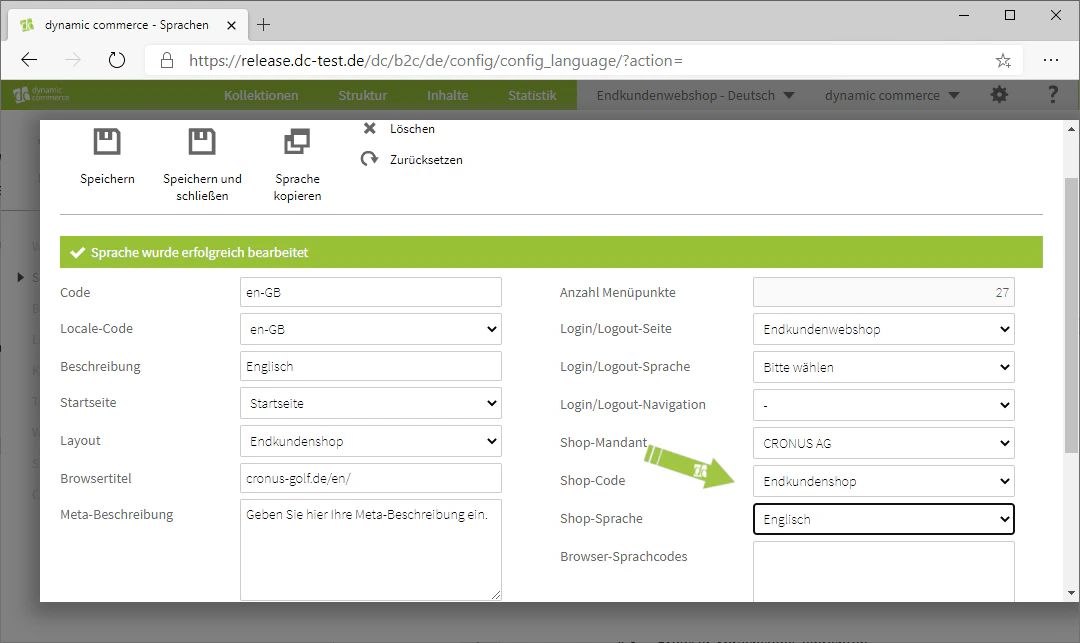
Then define the shop settings. To do this, first select a shop client. You should select your company here. Then save the language so that you can open the drop-down for shop code and shop language. Then select your shop code and the respective shop language.In our example, the shop client is “CRONUS AG”. Since we want to create a B2C web shop in English, our shop code is therefore “End-Customer Shop” and the language is “English”.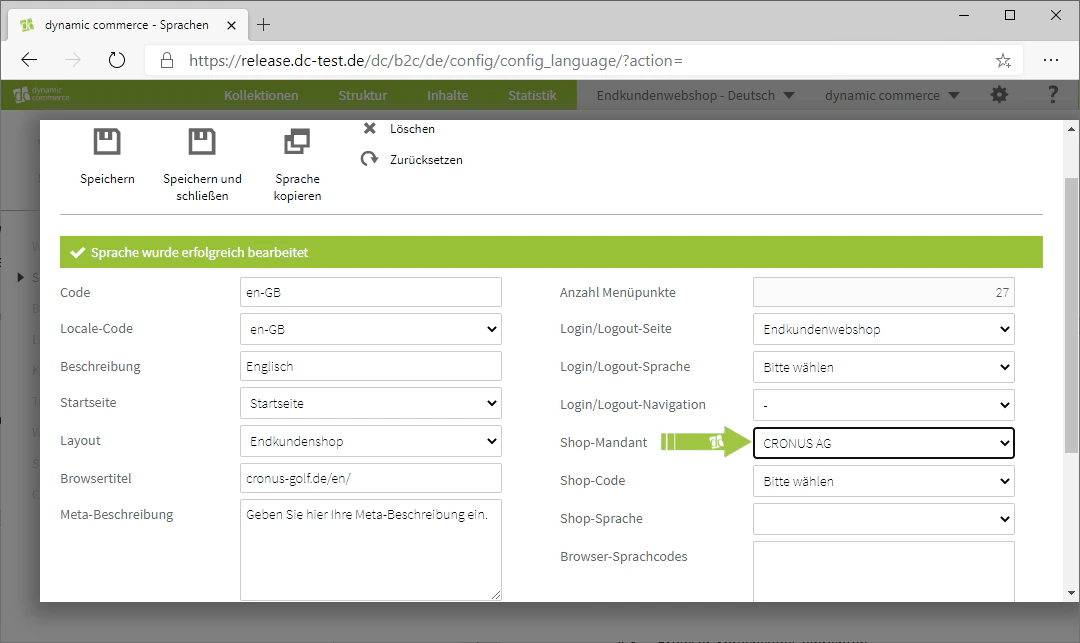
Step 9: Select Browser Language Codes and Set Active
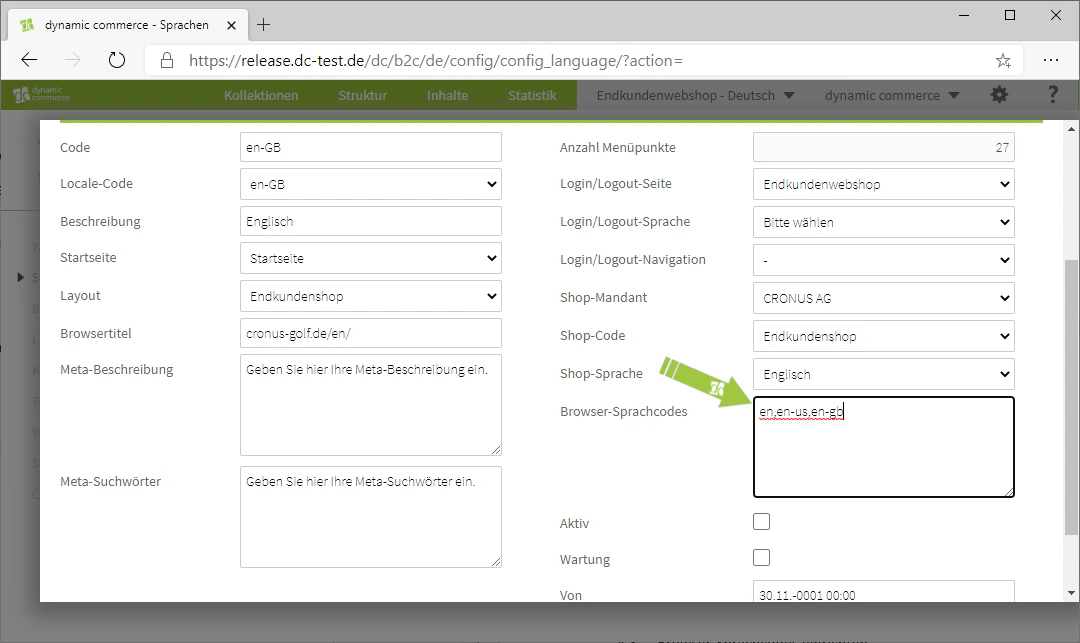
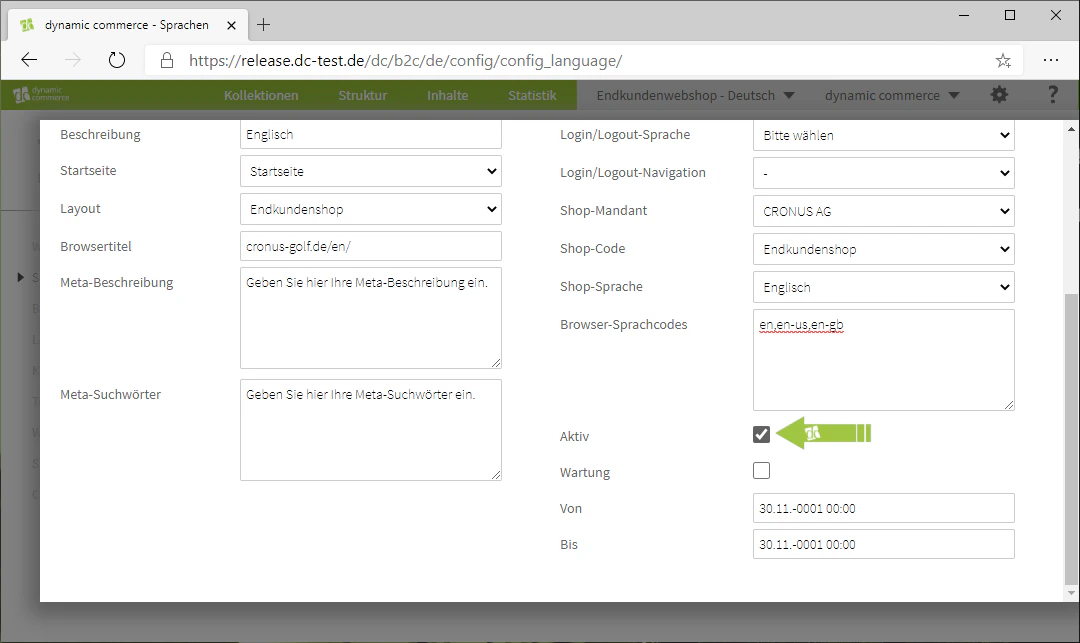
Now select the browser language codes. Browser language codes generally always consist of two letters. These represent the language. A sub-language code can also be appended, which again consists of two letters reflecting the respective country. A list of these language codes can be found in the drop-down for the locale code.In our example, this is an English-language page, which is why we assign the general language code “en”. Since both England and the USA are English-speaking, we also assign the additional codes “en-US” and “en-GB”. These are simply separated from each other by a comma.Last but not least, set the page to active and please do not forget to save everything.
Related Topics
Create Websites
Create a new website and assign it to a language.
Layouts
Design layouts and layout classes per language.
Text Constants
Centrally maintain multilingual texts.