Step 1: Navigate to CSP-Management
First, navigate to the CSP-Management. To do so, hover your mouse over the settings icon — the gear wheel in the upper right corner — and select “CMS-Management” from the drop-down menu that appears. You should now be in the settings for your CSP-Management.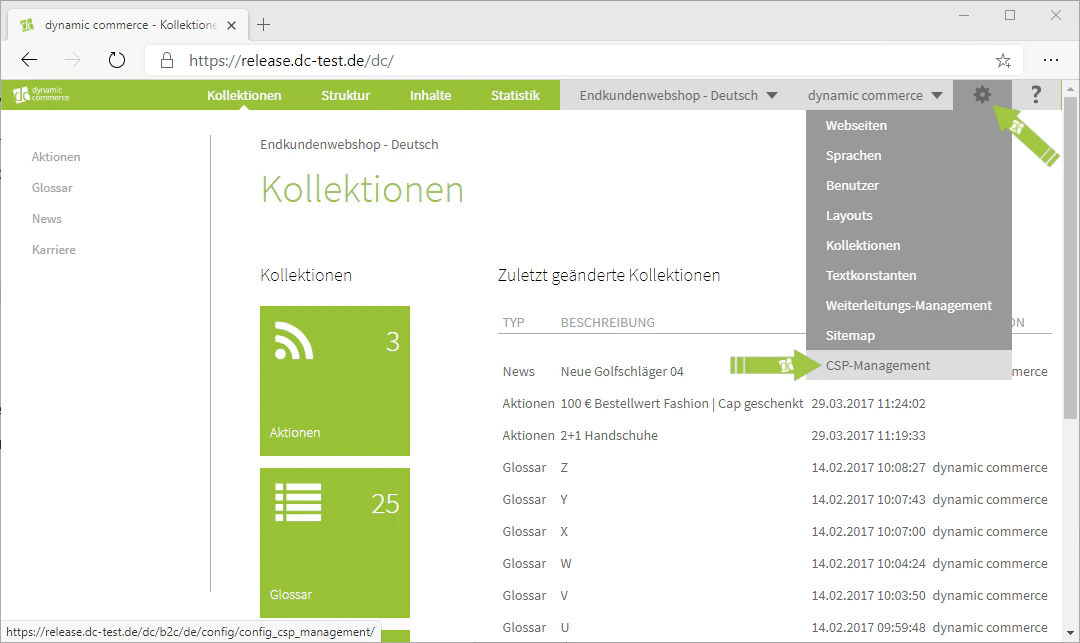
Step 2: Create a new CSP header
Here you can create a new CSP header. To do this, click the “Plus” icon with the label “New” below it. A window with the heading “Create CSP Header” should open. A CSP header consists of a header type and a header value. The header type defines the content type, while the header value determines where the content may originate from.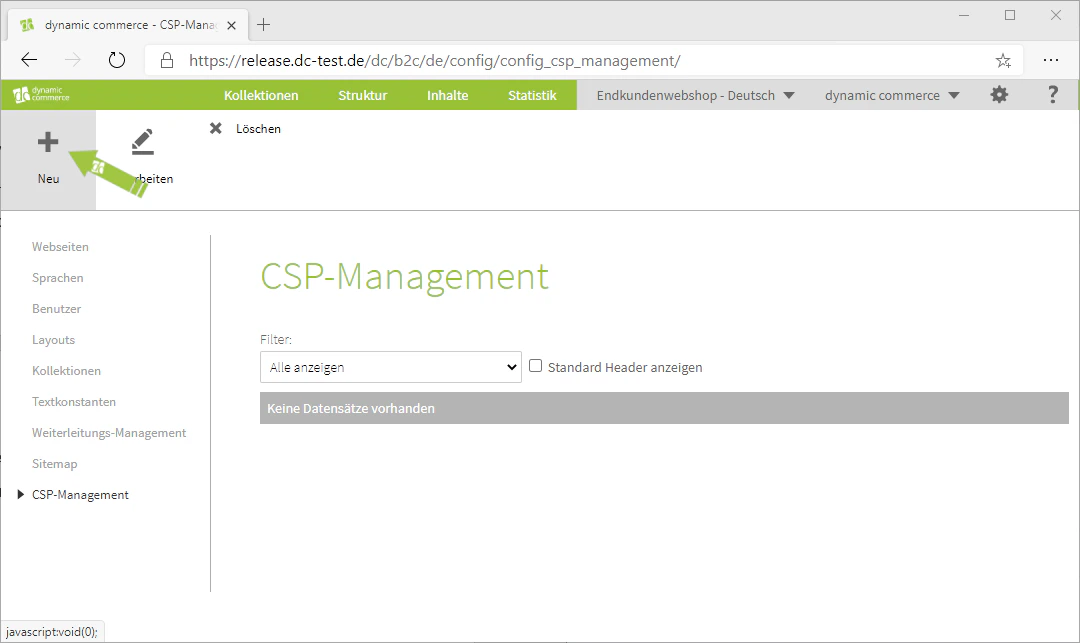
Step 3: Select the header type
First, select a header type from the corresponding drop-down. For example, using “default-src” allows you to define the default value for all header types. Alternatively, “img-src” lets you specify the permitted sources for images. Comprehensive documentation on the various header types is available in English from Mozilla or in German from SELFHTML. In our example, we want to define that the visitor’s browser should by default be allowed to display all content from the dc site. Therefore, we select “default-src” as the header type.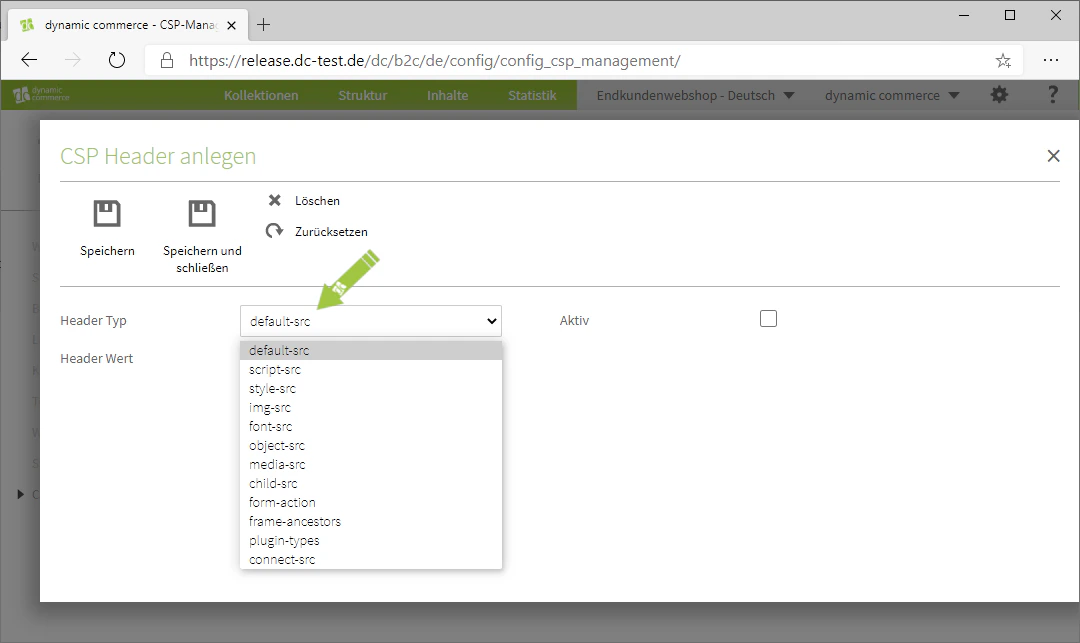
Step 4: Define the header value
Next, select a header value. The header value determines the source from which the external data originates. For example, you can enter a URL to allow the previously selected header type from that site. It is also possible to specify other values, such as “none”, to block this header type entirely. In our example, we enter the URL of the dc site as the header value, since we want to allow content from that site.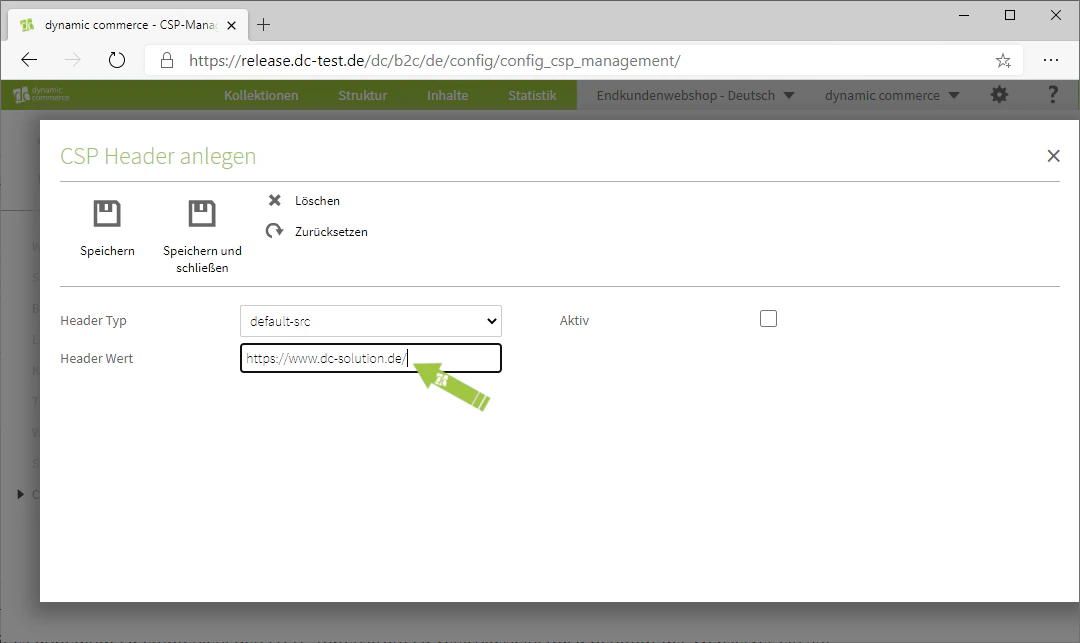
Step 5: Set active and save
Now set the CSP header to active so that it takes effect. To do this, check the corresponding checkbox. Finally, save your settings. You have now successfully created a CSP header.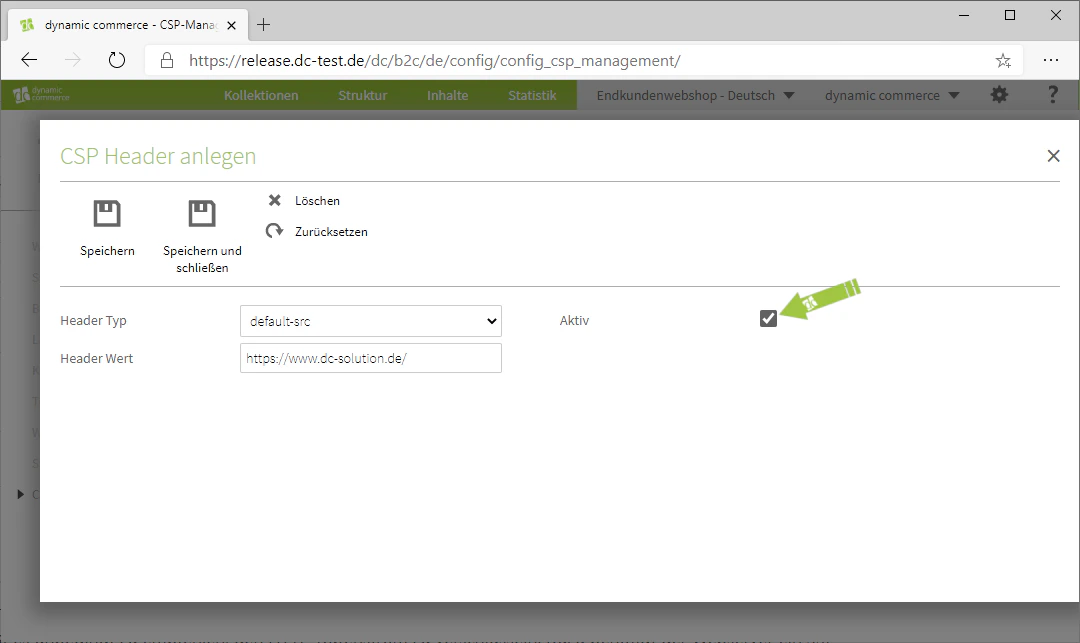

The CSP header has been created, set to active, and saved.
Related Topics
General Navigation
Orientation in the CMS and an overview of all tabs.
Switch Website
Switch between websites.
Redirects
Set up URL redirects.