Step 1: Navigate to the Text Constants Menu
First, navigate to the text constants menu. You can access it by hovering over the settings, i.e. the gear icon in the top right, and clicking on “Text Constants” in the drop-down menu.You should now be in this menu.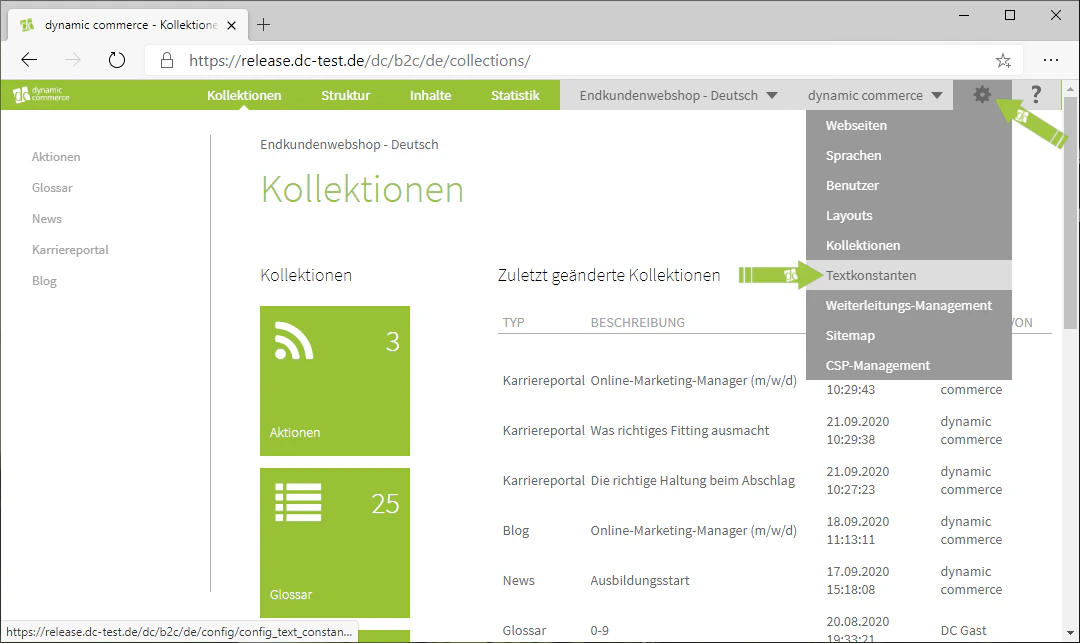
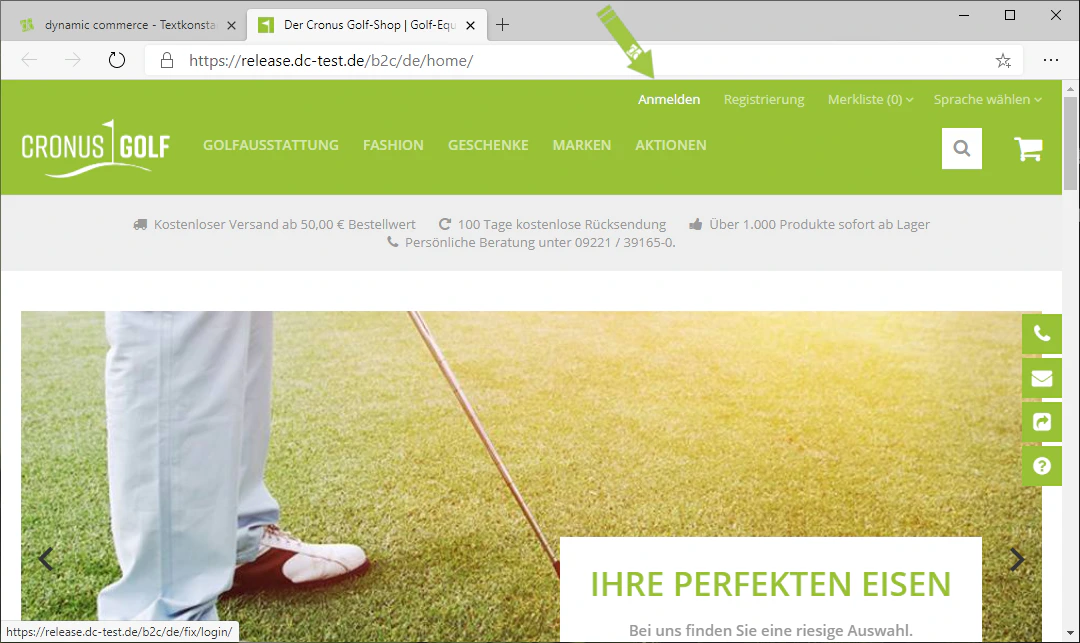
Step 2: Activate Maintenance View
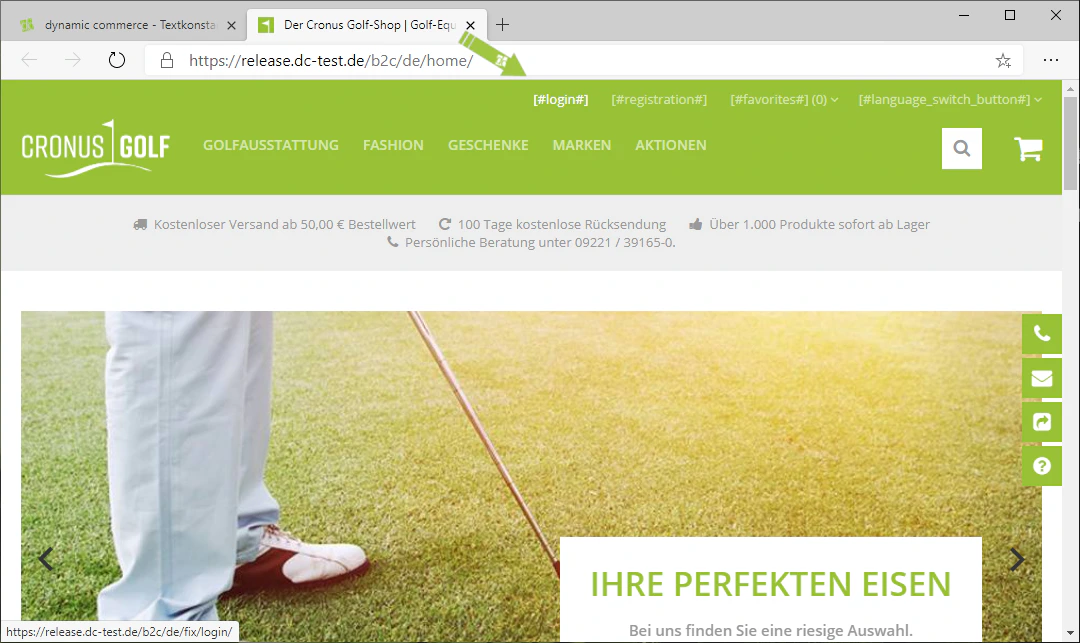
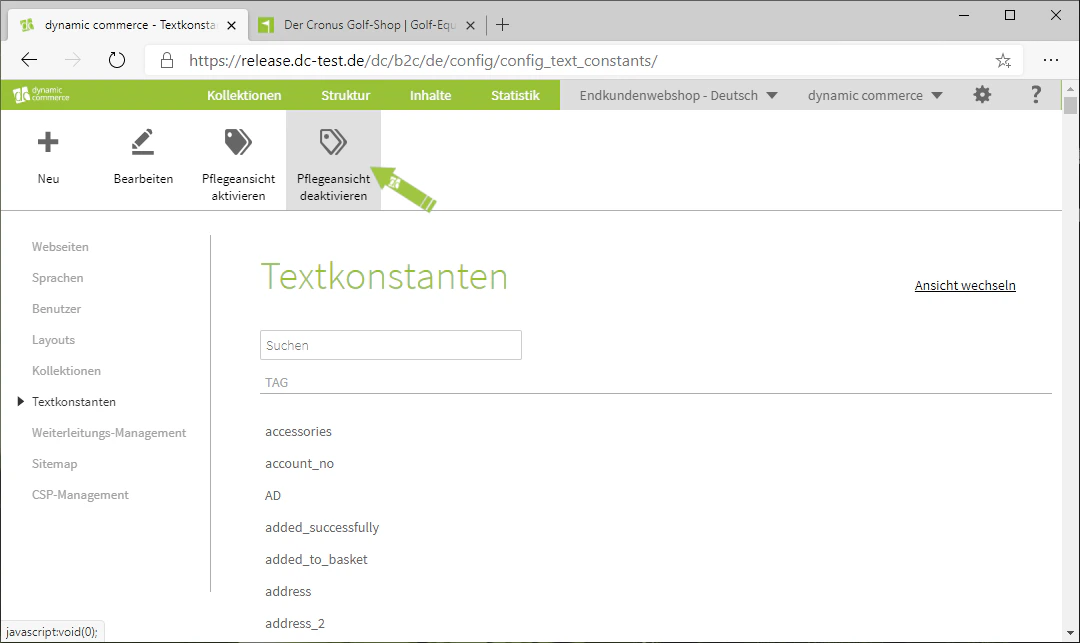
To identify the text constants, open the maintenance view by clicking on the icon in the top left with the label “Activate Maintenance View” below it.This opens your page in the frontend. Instead of displaying the text stored in the respective text constants, it shows the name of each text constant. This name or tag is displayed in square brackets between hash symbols. For example, it looks like this: [#login#]. The name of this text constant would then be “login”.This allows you to determine which texts are text constants and what they are called.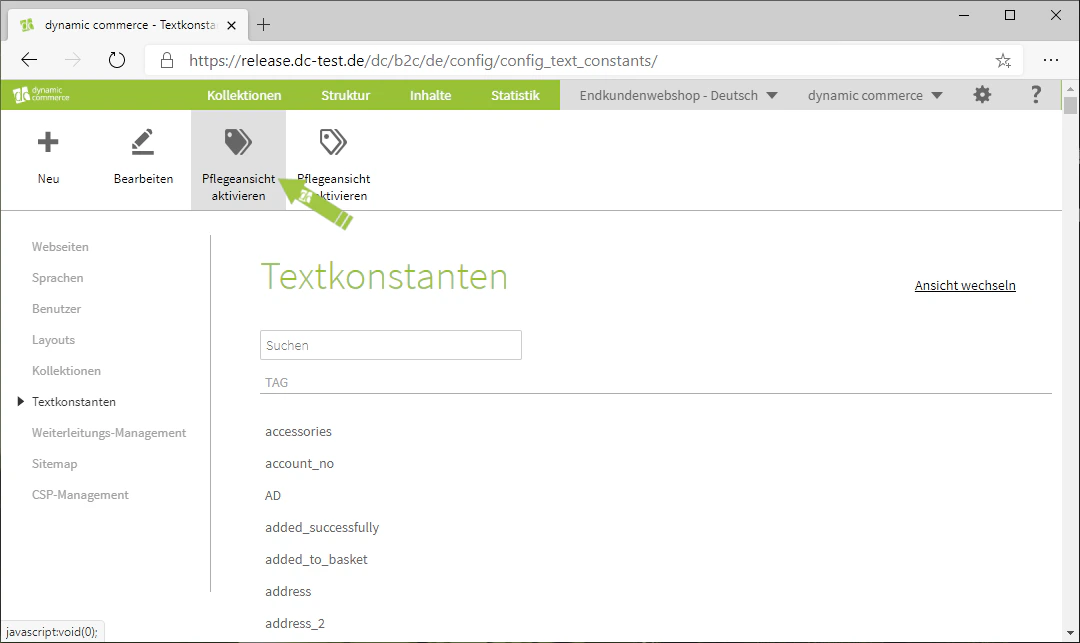
Step 3: Create or Edit a Text Constant
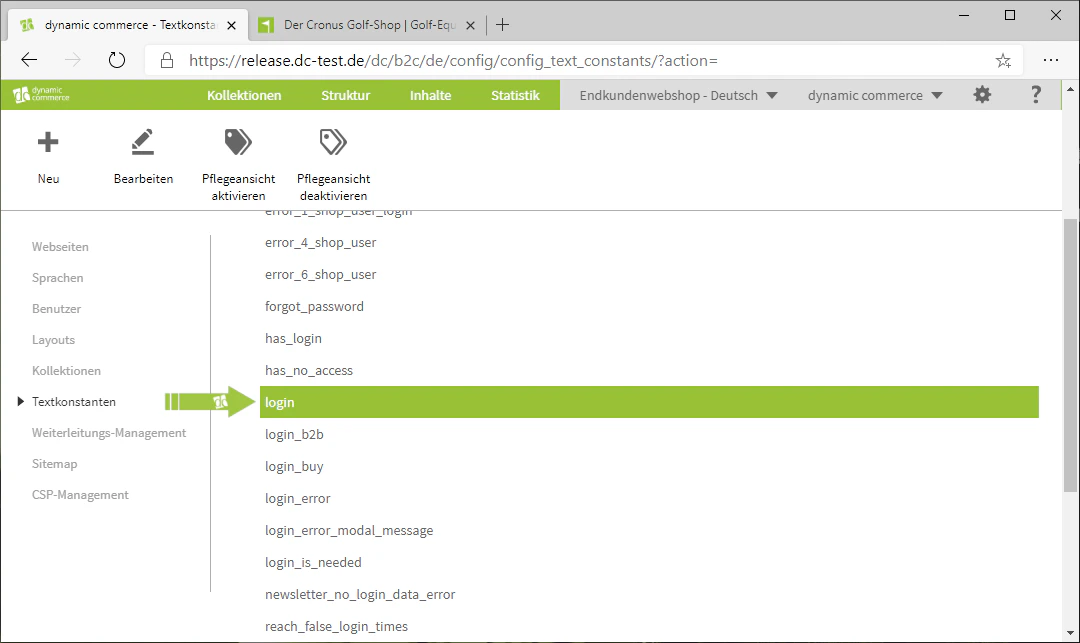
Back in the CMS, you can create a new text constant by clicking on the “Plus” icon with the label “New” below it.By double-clicking on a text constant, you can edit it. Using the search field displayed above all text constants, you can search for a constant by the name shown in the maintenance view.In our example, we want to edit the text constant “login”, i.e. the text in the “Log In” button.Therefore, we search for “login” using the search field and edit the entry by double-clicking on it.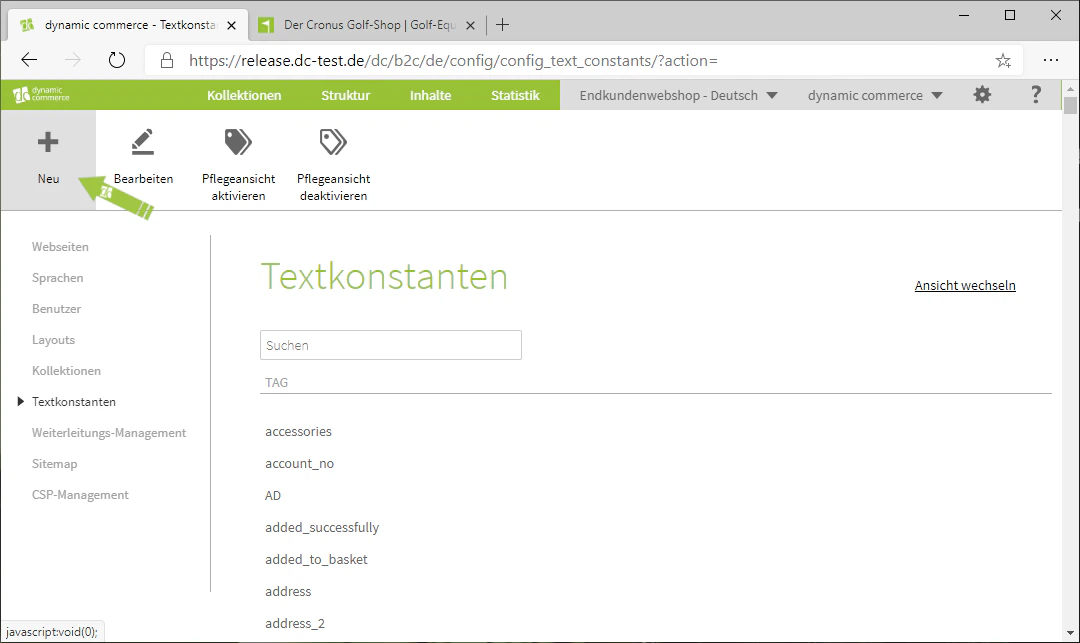
Step 4: Define the Text Constant Tag
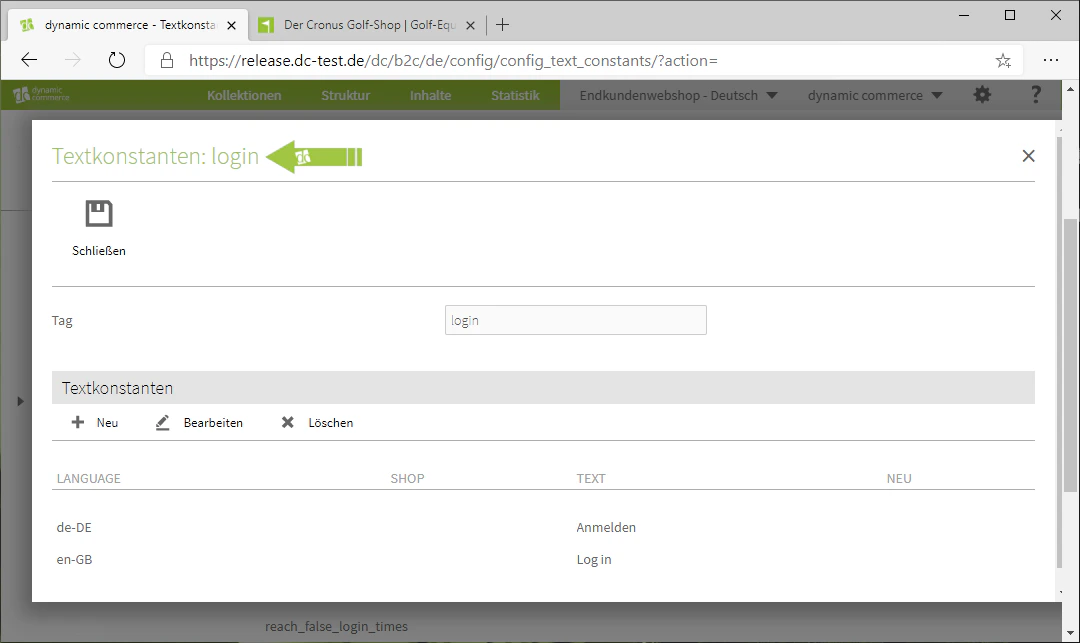
If you have decided to create a new text constant, you must first define a tag and a text directly.The tag here is the name of the text constant, which is displayed in the maintenance view.In addition, there is immediately the option to maintain the text in multiple languages. The languages listed there are based on the languages you have created for your website.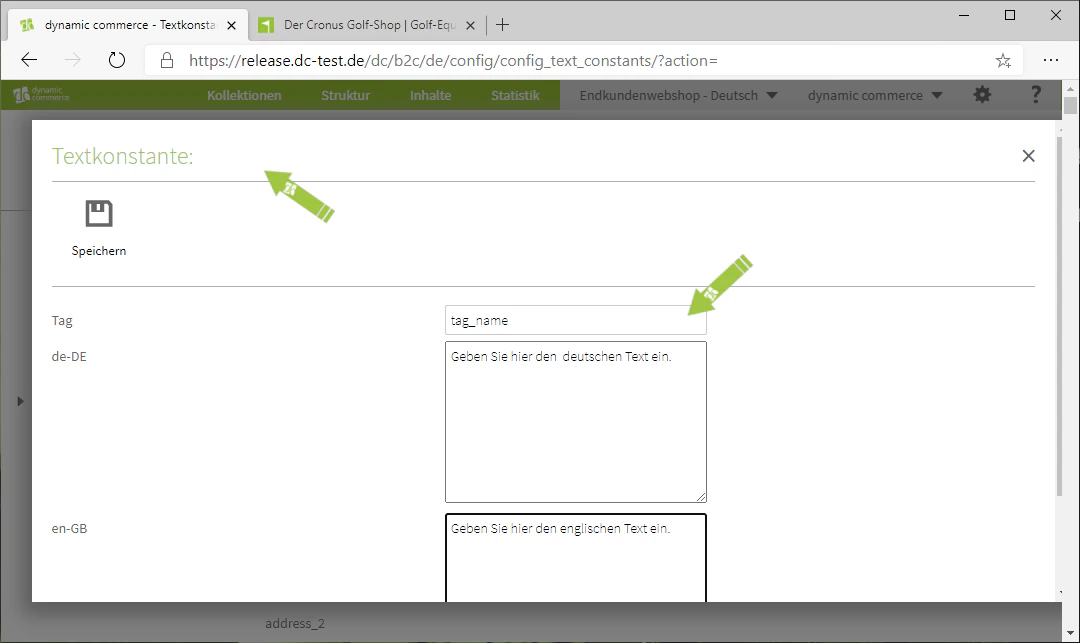
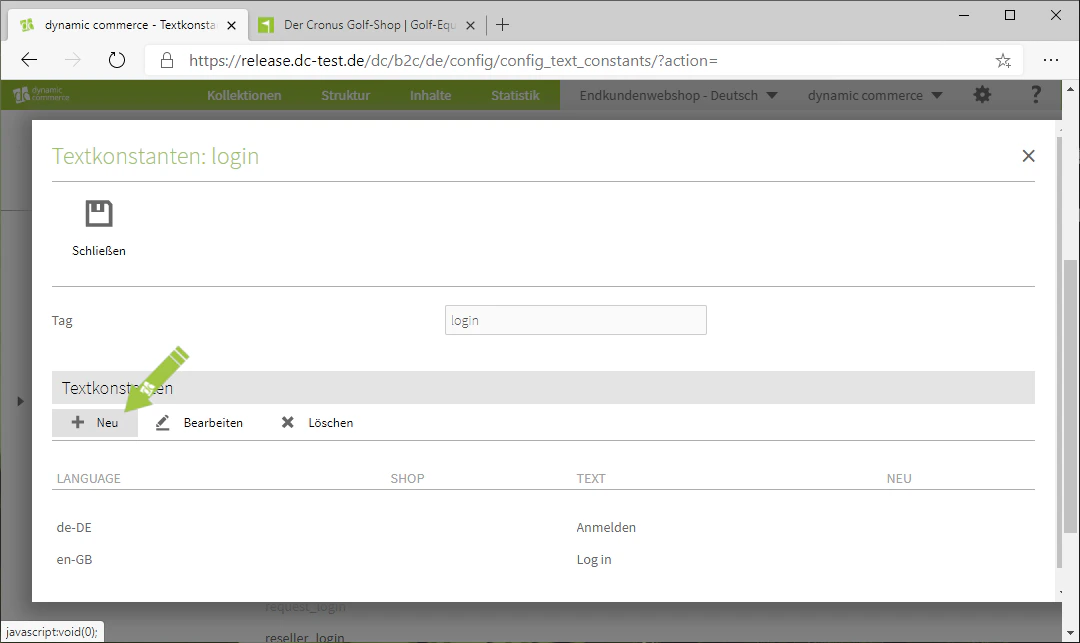
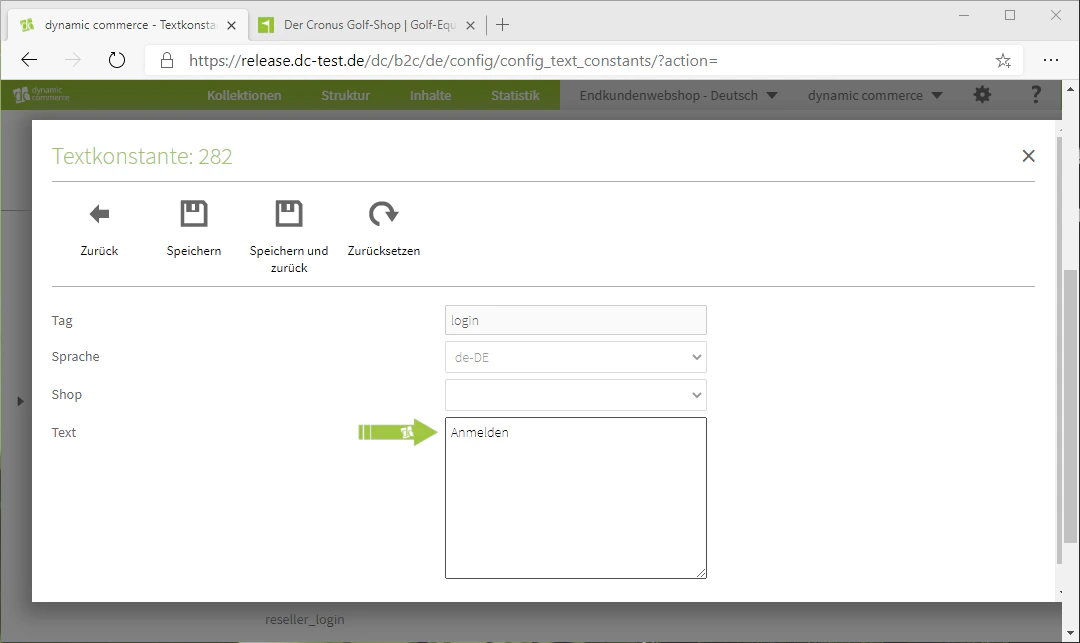
Step 5: Create and Edit New Text
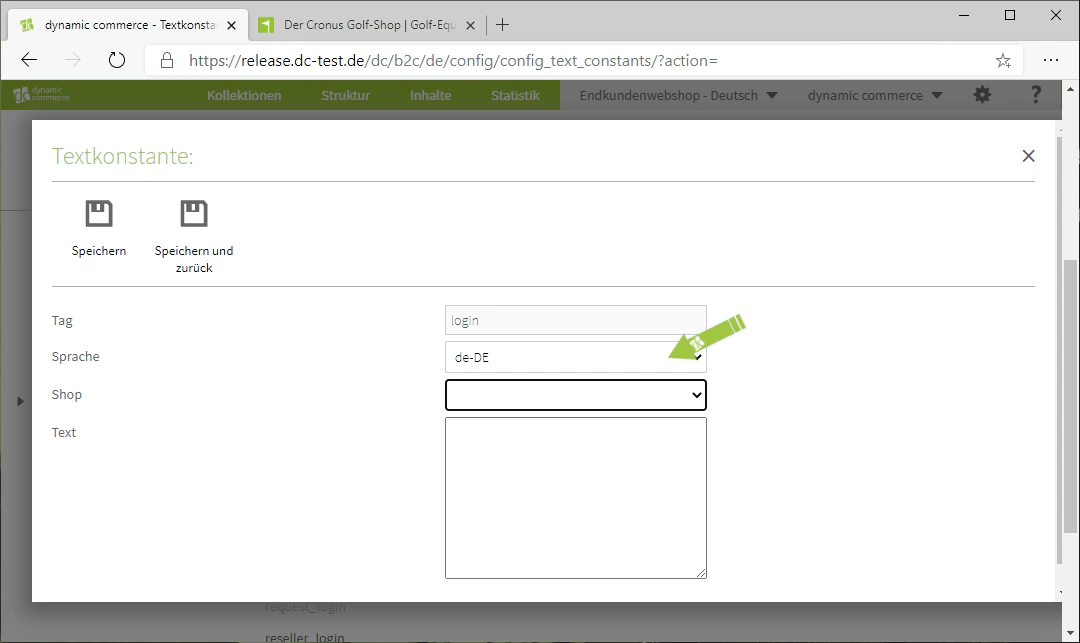
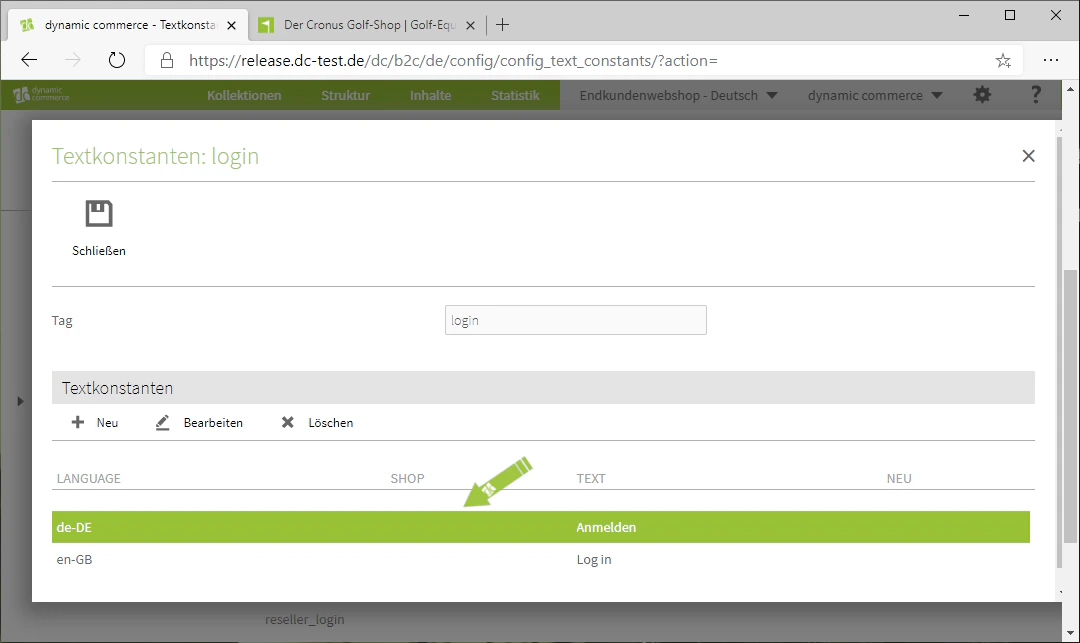
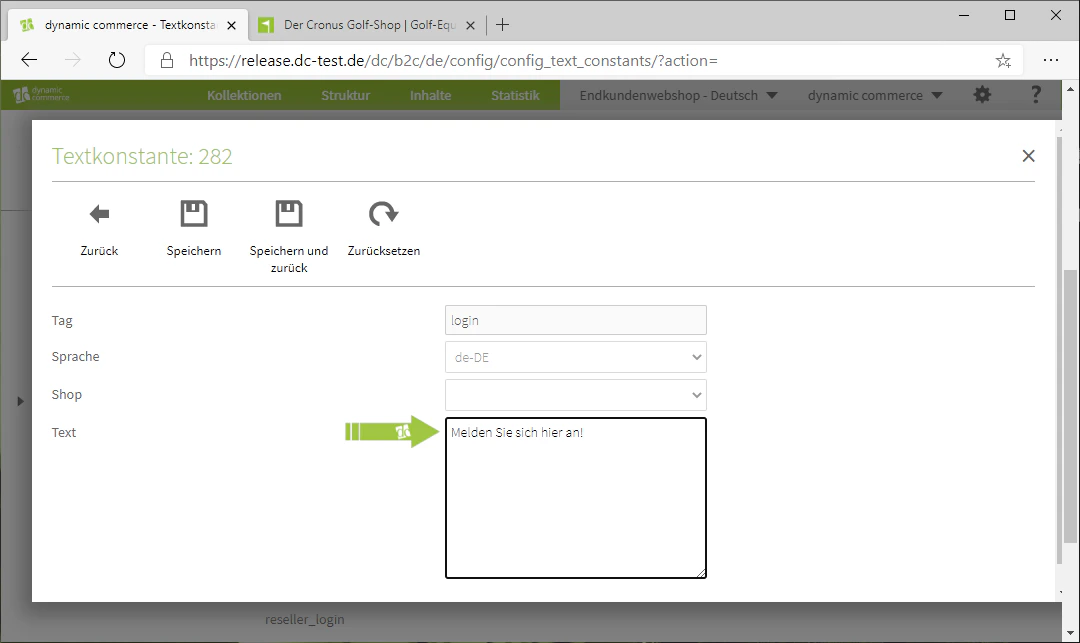
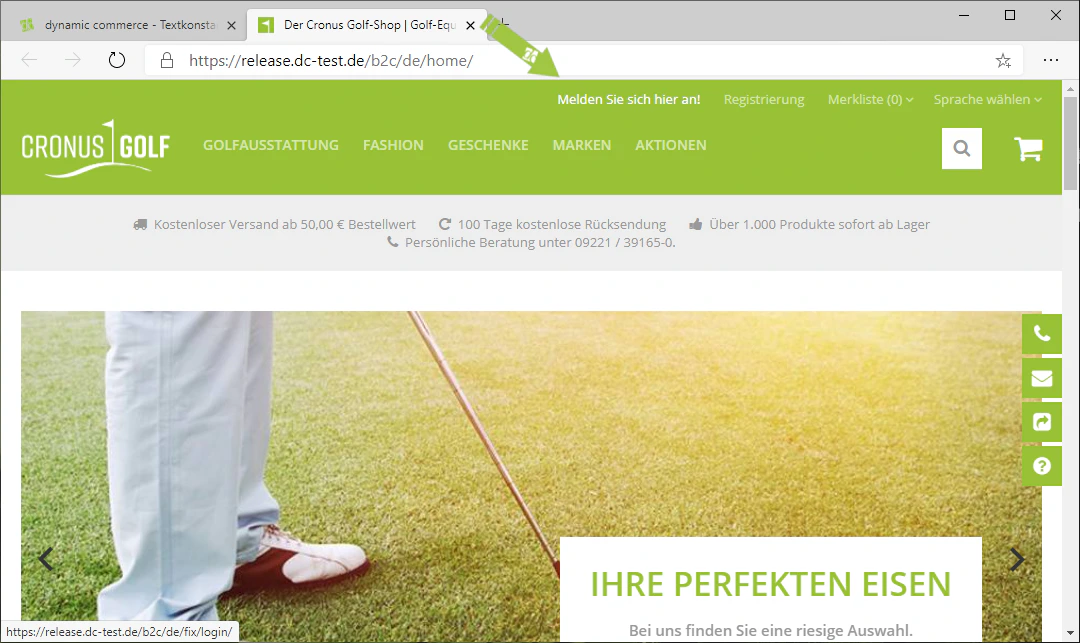
If you now want to edit a text constant, the tag is already defined.There you can create a new text by clicking on “New” under the heading “Text Constants”. This is useful, for example, to maintain a new language for the respective text constant.Afterwards, you must select the language to which the text should be assigned. You also have the option to select which website the text constant was created for.If you want to edit an existing text, you can do so as usual by double-clicking on the respective text.In the window that opens, the text can be edited.In our example, we want to change the text from “Log In” to “Sign in here!”. Therefore, we simply enter the new text now.After clicking Save, the change is already visible on the website.
Related Topics
Languages
Create and manage languages for your website.
Create Content
Create and edit the content of a page.
General Navigation
Initial orientation in the CMS and structure of the interface.