Step 1: Open the Webshop Campaigns Overview
Navigate to the Webshop Campaigns section by entering “Webshop Campaigns” in the search.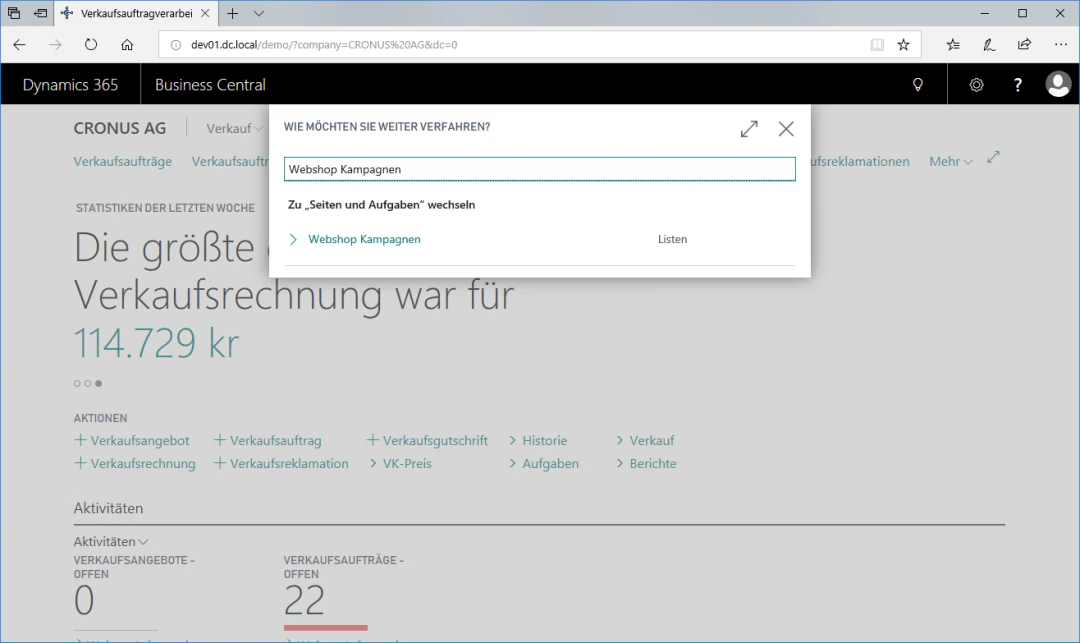
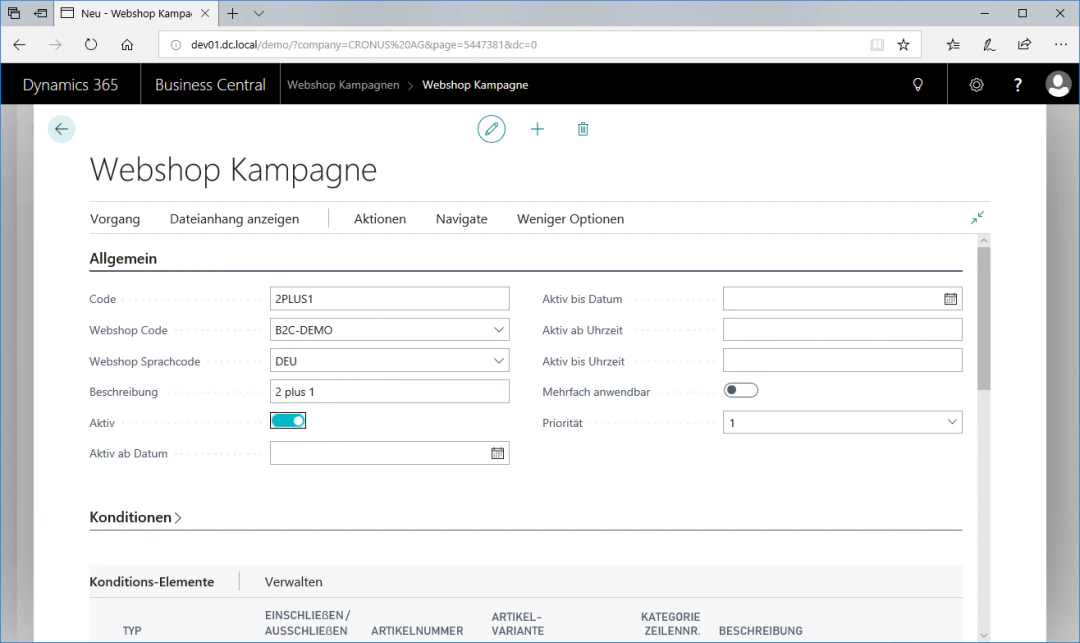
Step 2: Create a Webshop Campaign
To create a campaign, select the FastTab “New”. This takes you to the Webshop Campaigns overview. Here you navigate to the menu item “General”. In our example, we want to create a “2Plus1 Promotion” for a webshop in the German language. For this example configuration, we select the following settings:Code: 2PLUS1Webshop Code: B2C-DemoWebshop Language Code: DEUDescription: 2 plus 1Active: Check the box
Step 3: Define Conditions
To define specific conditions for the promotion, open the menu item “Conditions”. In our example, we want a customer who has purchased 2 copies of the same webshop item to receive a third copy free of charge added to their order. For this example configuration, we enter a 2 in the field “Min. quantity of individual item”.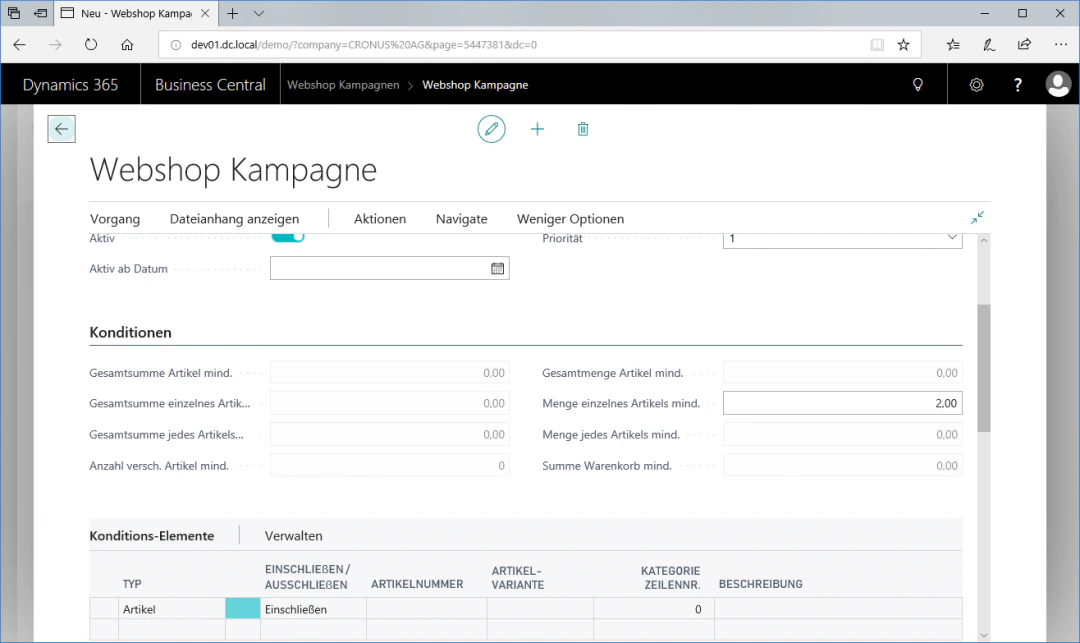
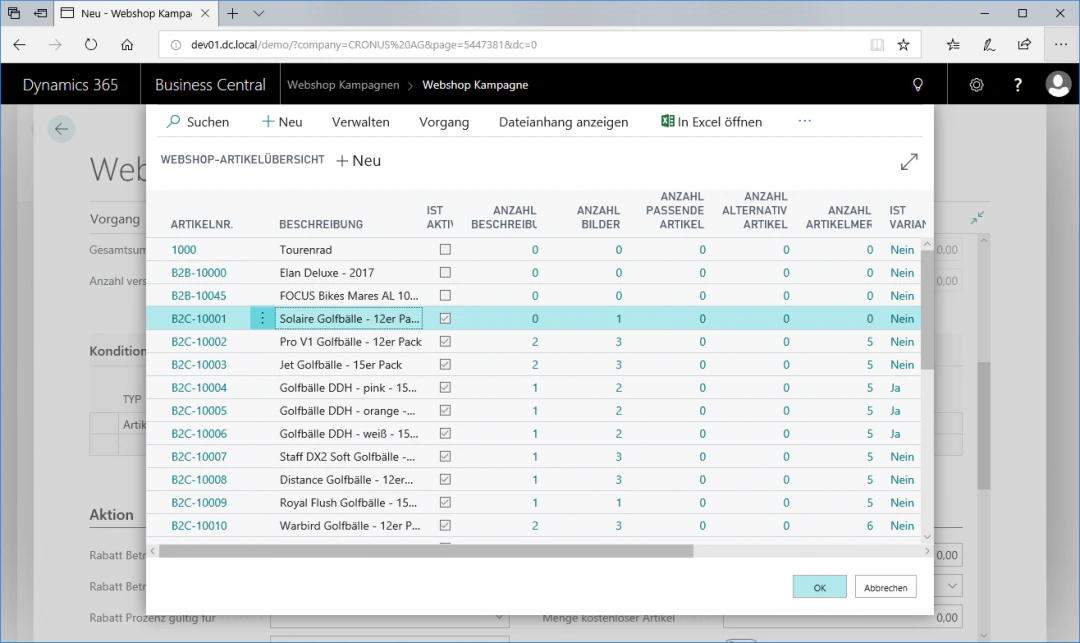
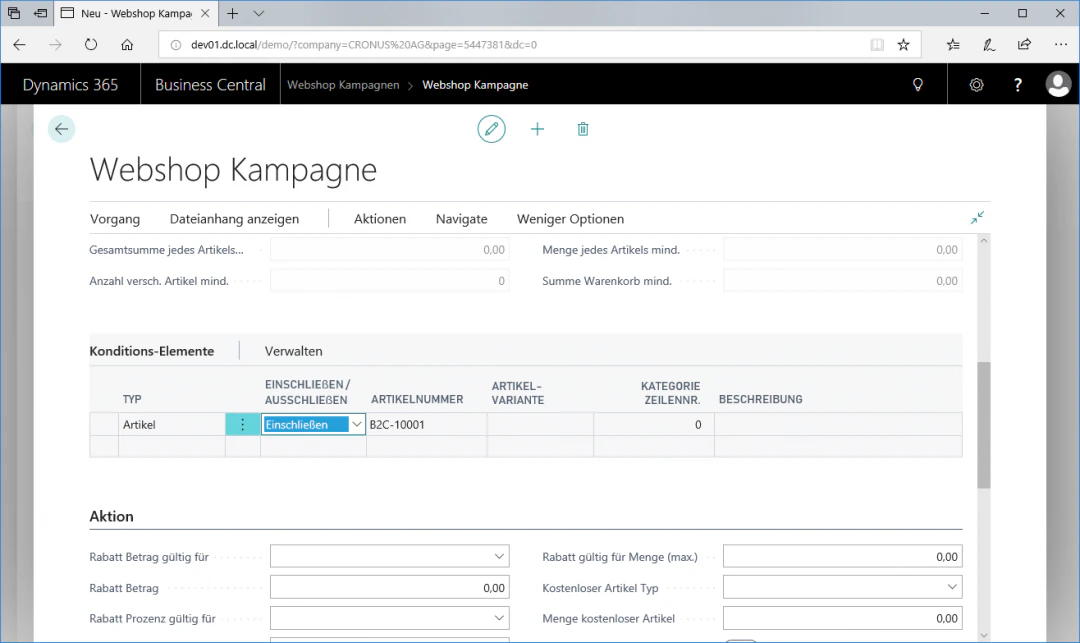
Step 4: Define Condition Elements
To define an item as a condition element, open the menu item “Condition Elements”. Here you add the items to which a subsequently selected promotion is to be applied. Scroll to the end of the condition elements table to add a new item. Click in the first empty row and then on the “Item Number” column to access the webshop item overview. Here you select the item “Solaire Golf Balls – Pack of 12” with item number “B2C-10001”.In addition, select “Include” in the “Include/Exclude” field, which includes the respective item in the promotion. Alternatively, you can select “Exclude”, which excludes the item from the promotion.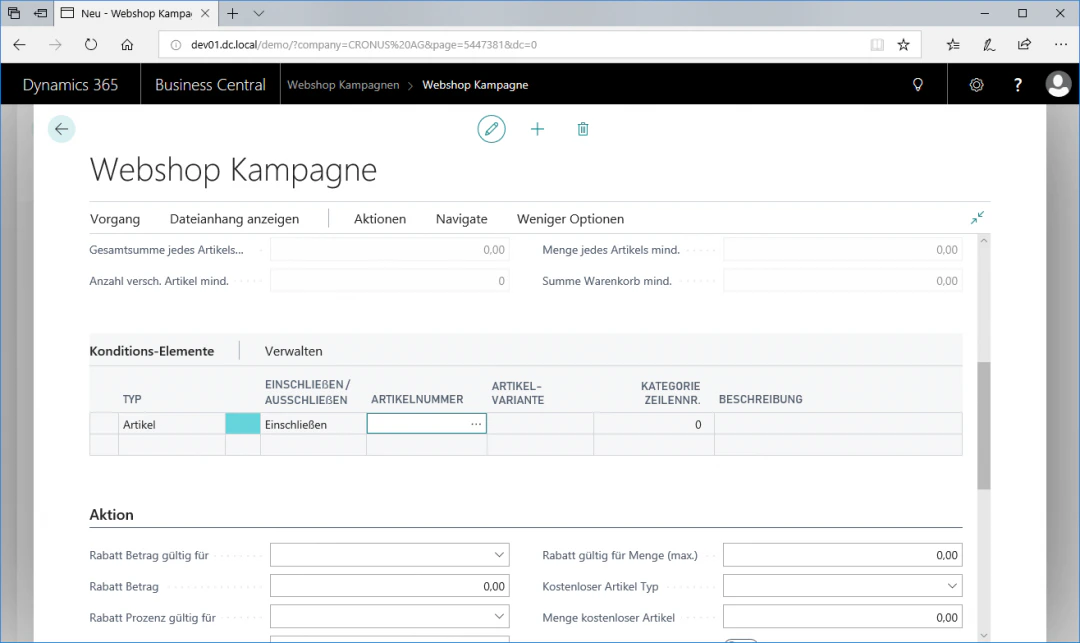
Step 5: Define the Promotion
To define a promotion, open the menu item “Promotion”. In our example, we want a third copy to be added to the order free of charge when 2 copies of the selected condition item are purchased. For this example configuration, we select the following settings:Free Item Type: Current Condition ItemQuantity of Free Item: 1.00Please note that the “Quantity of Free Item” field must not contain 0, as otherwise all additional webshop items would be added to the order free of charge when 2 copies of the condition item are purchased!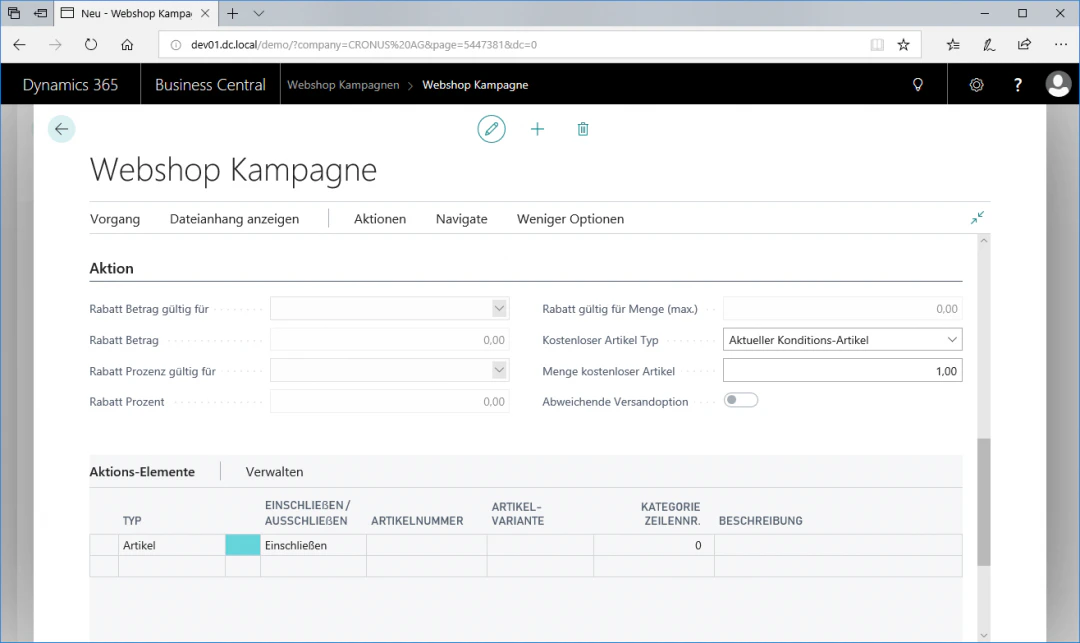
Step 6: Update the Campaign
To synchronise the campaign with the webshop system, click on the FastTab “Update Campaign” in the “Process” menu ribbon. This updates all campaigns that have been changed since the last update. All modified campaigns are also automatically updated with the next full data update.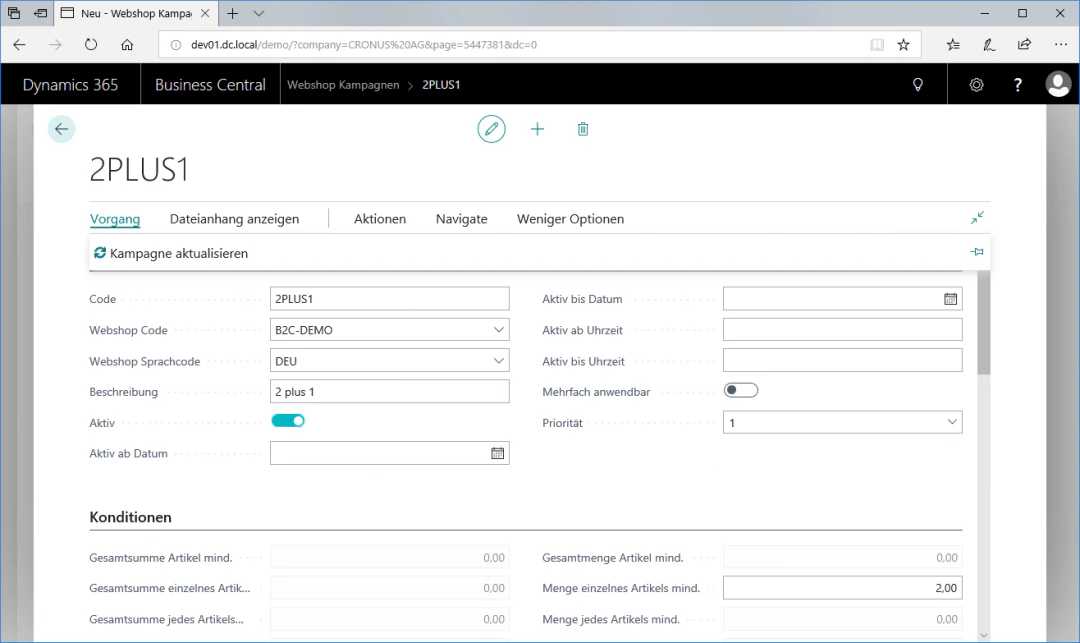
Related Topics
Set Up Discount Vouchers
Create discount vouchers with codes.
Set Up Webshop Items
Maintain items for the webshop.