
1
Step 1: Open the customer list
Navigate to the Customers area by entering “Customers” in the search.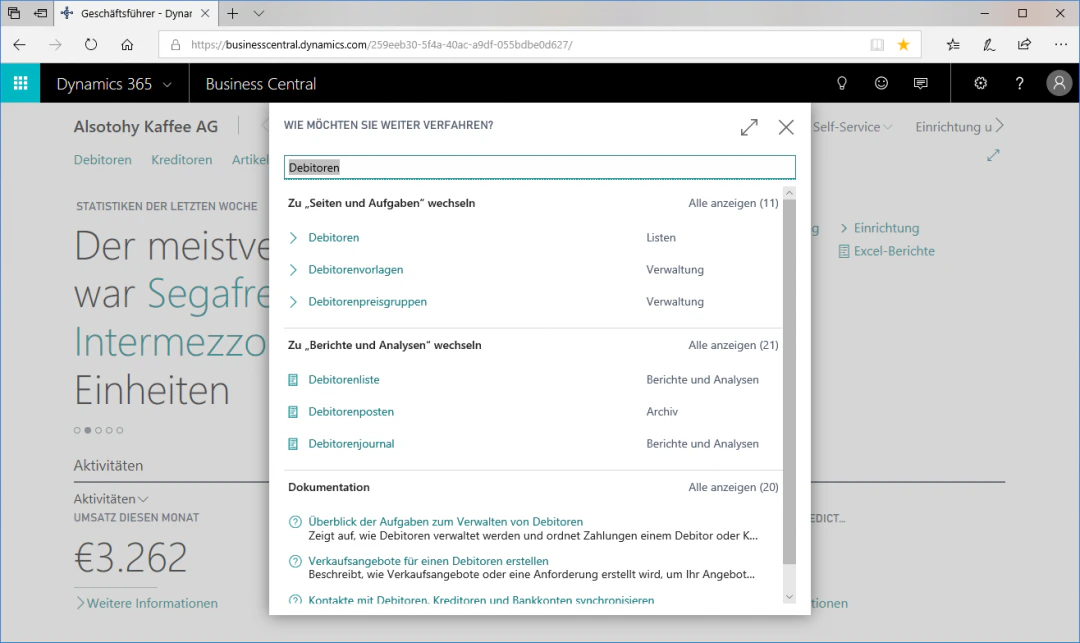
2
Step 2: Open the customer card
Select the row with the desired customer that you want to enable for the web shop, in this case “Gilde Jupiter Versicherungs AG”.Click the “Edit” FastTab in the “Manage” ribbon to open the customer card.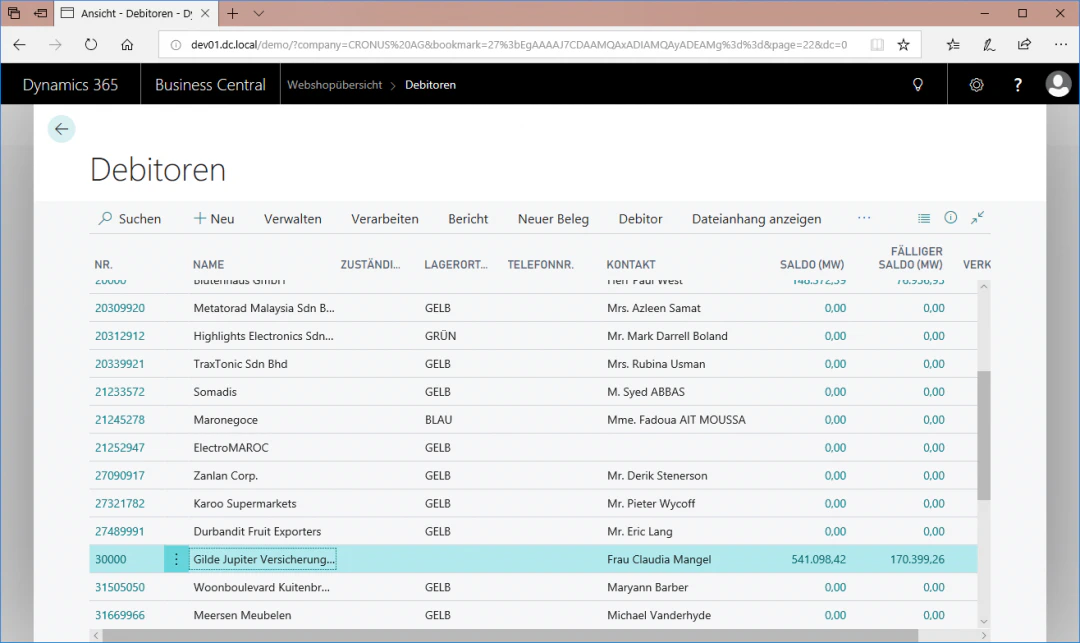
3
Step 3: Define e-commerce data
Scroll all the way down in the customer card and click the “E-Commerce” menu item. In our example, we want to enable the customer for a b2b shop with a German language code.For this example configuration, we select the following settings:Web shop shop code: “CRONUS-B2B”Web shop language code: “DEU”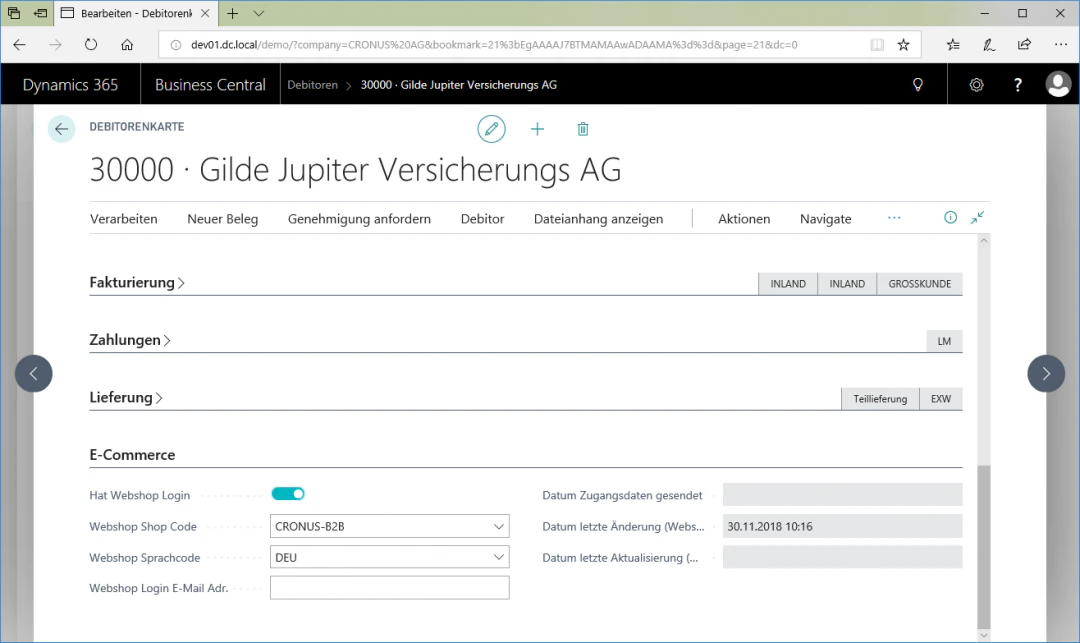
4
Step 4: Send email
To be able to send the web shop access credentials to the customer, you must enter the customer’s email address in the “Web shop login email addr.” field. In our example, we enter lorenz@contoso.com and click the “Send access credentials” FastTab in the “Process” ribbon.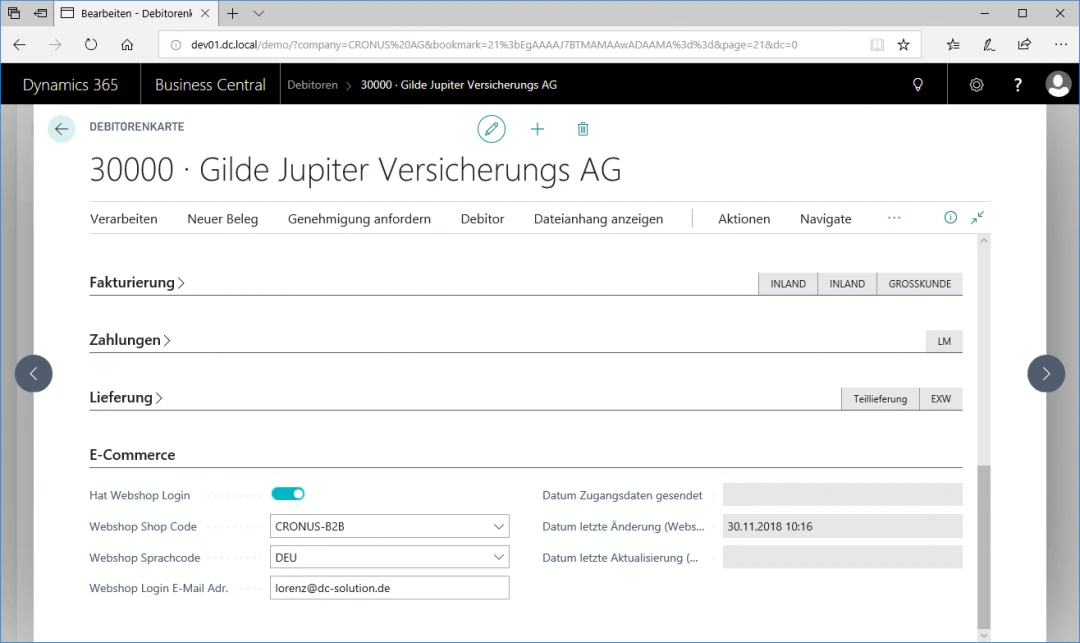
5
Step 5: Test customer access
To verify that the sent access credentials and the customer access to the web shop work properly, click the “Open customer access” FastTab in the “Process” ribbon. If this takes you to the customer area of the web shop, you have successfully enabled the customer.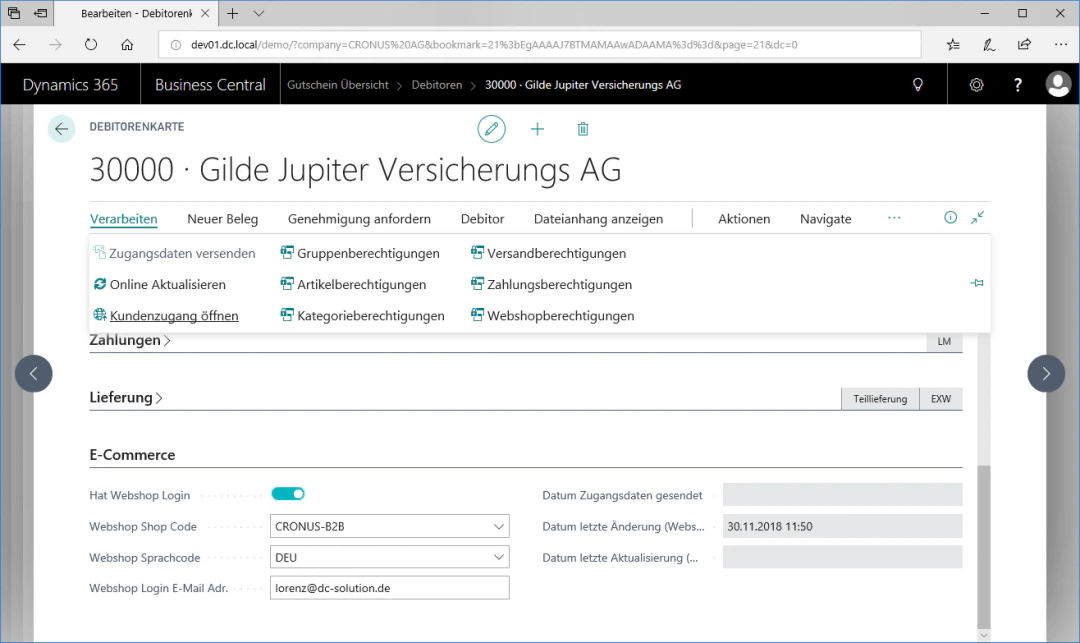
Related Topics
Enabling a Salesperson for the Web Shop
Activate a salesperson for the web shop.
Setting Up Item Permissions
Control item visibility per customer.