> ## Documentation Index
> Fetch the complete documentation index at: https://docs.dc.ag/llms.txt
> Use this file to discover all available pages before exploring further.
# dynamic content - Create Pages
> Create, configure, and optimize new pages in dynamic content for search engines.
We will show you here how to create a new page.
You can fill this page with content afterwards according to your wishes. Information on how to create such content and further details can be found here.
In addition, the pages created in this way should also be made accessible via our navigation so that visitors to your website can find them. We will explain how this works here.
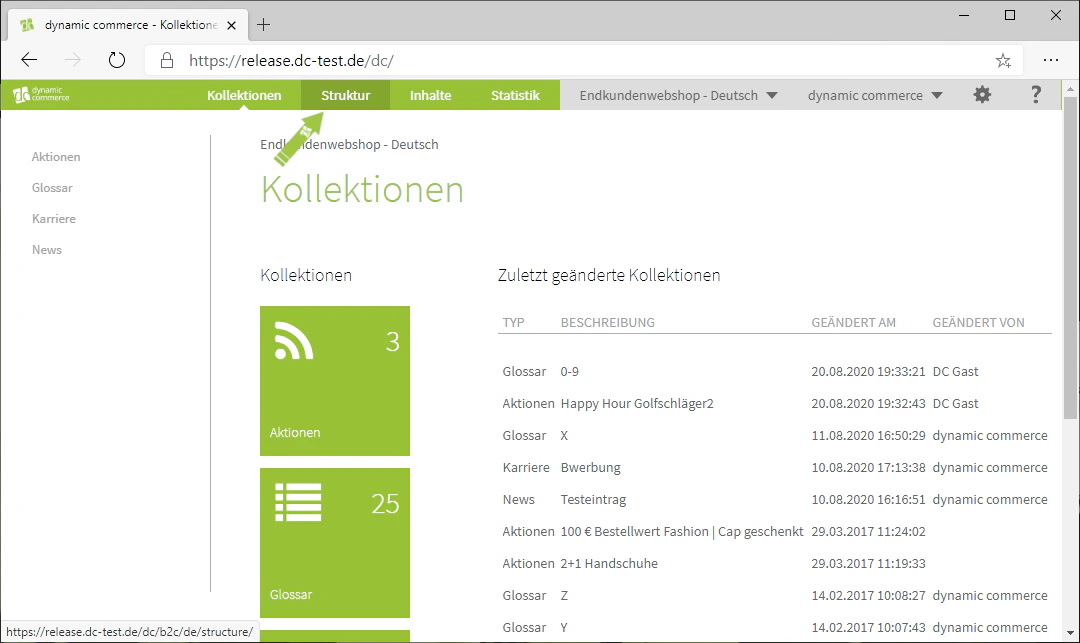
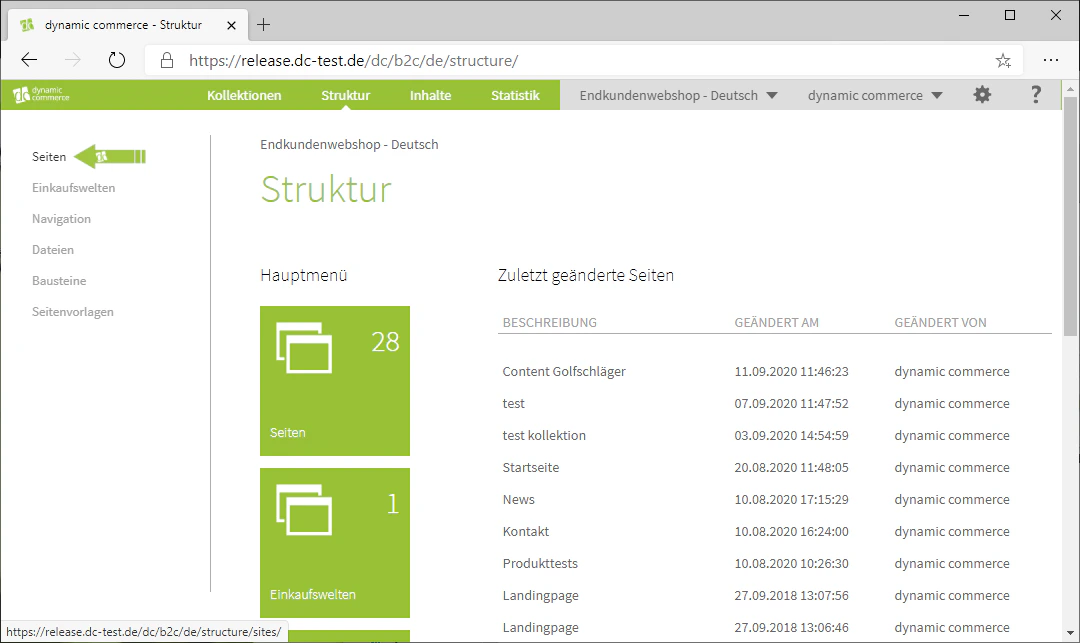
## Step 1: Navigate to the Pages Overview
First, navigate to the pages overview by clicking on the "Structure" tab at the top and then opening the "Pages" menu on the right side of the screen.
You should now have arrived at the Pages menu.
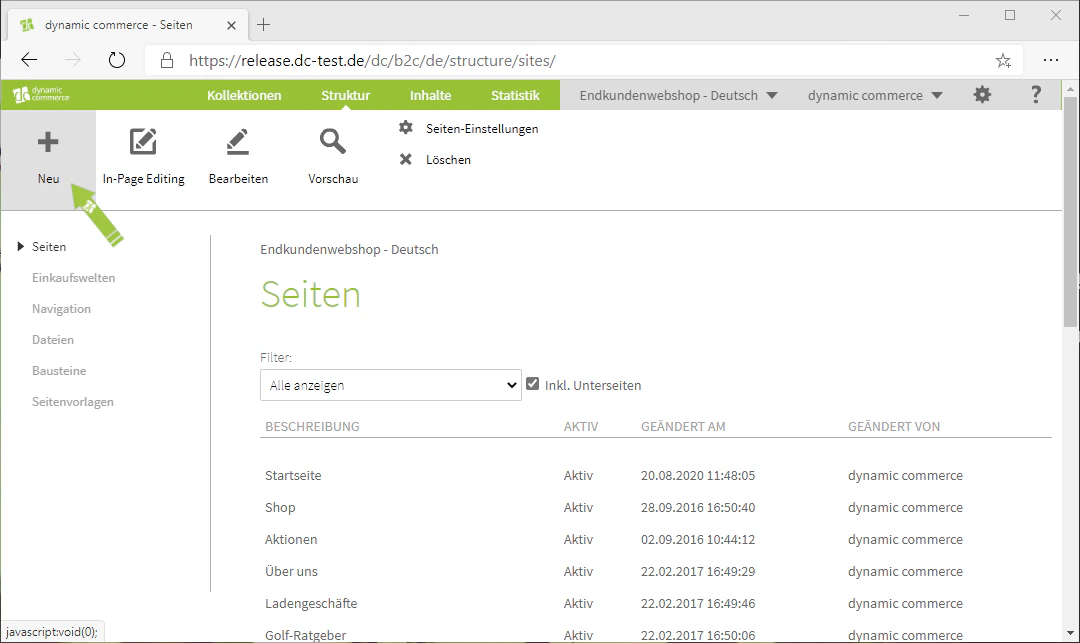
 ## Step 2: Create a New Page
Now open the menu for creating a new page by clicking the plus icon in the upper left, below which "New" is displayed. If you want to edit an existing page, you can also open this menu by double-clicking on the name of the page.
This should open a window with the heading "Create New Page", in which you can then configure the settings for your page.
## Step 2: Create a New Page
Now open the menu for creating a new page by clicking the plus icon in the upper left, below which "New" is displayed. If you want to edit an existing page, you can also open this menu by double-clicking on the name of the page.
This should open a window with the heading "Create New Page", in which you can then configure the settings for your page.
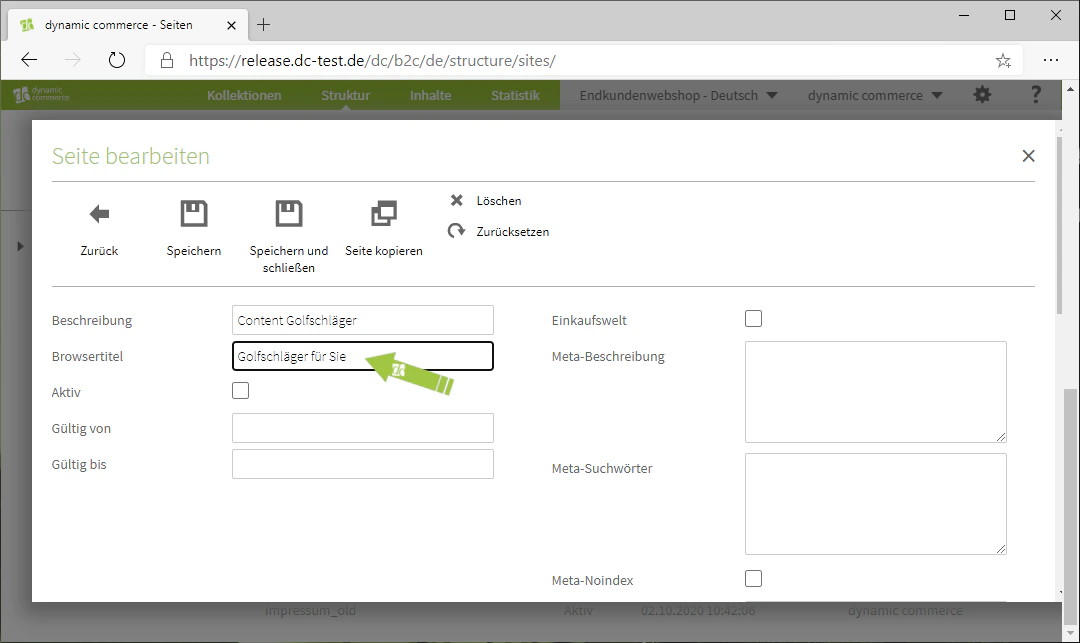
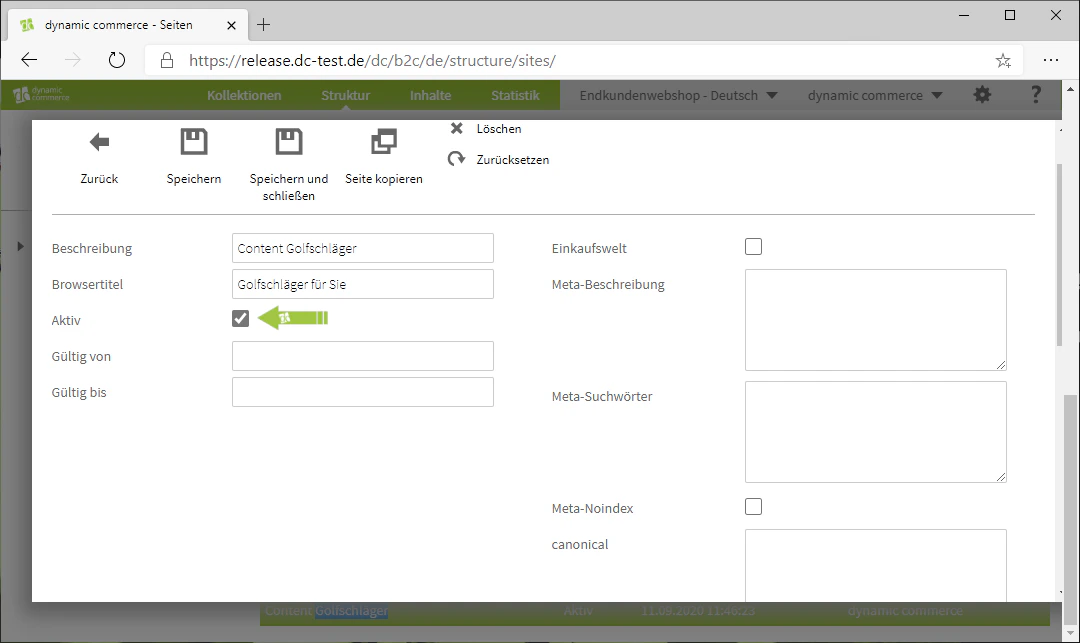
 ## Step 3: Choose Description and Browser Title
Now, in the menu that has just opened, first define a description and a browser title.
You can freely choose the description of the page; it serves only your own reference, as it is not visible in the frontend, i.e. on your page.
You should, however, pay attention to the browser title, as it is displayed in the browser tab for visitors to this page. It should contain no more than approximately 60 characters (to be precise: 580 pixels).
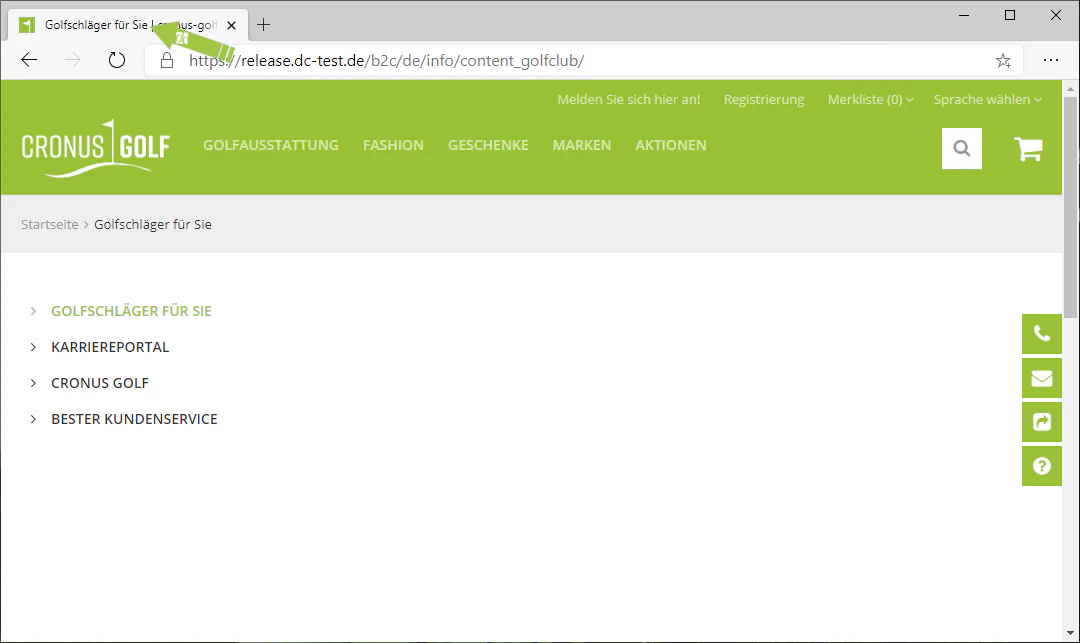
In our example, we have a content page about golf clubs, so we describe our page as "Content Golf Clubs" and choose "Golf Clubs for You" as the browser title, as this is what should be displayed at the top of the browser.
## Step 3: Choose Description and Browser Title
Now, in the menu that has just opened, first define a description and a browser title.
You can freely choose the description of the page; it serves only your own reference, as it is not visible in the frontend, i.e. on your page.
You should, however, pay attention to the browser title, as it is displayed in the browser tab for visitors to this page. It should contain no more than approximately 60 characters (to be precise: 580 pixels).
In our example, we have a content page about golf clubs, so we describe our page as "Content Golf Clubs" and choose "Golf Clubs for You" as the browser title, as this is what should be displayed at the top of the browser.
 ## Step 4: Set Page to Active
You now need to set the page to active so that it can be displayed at all. This is done by checking the "Active" checkbox.
To the right of it, you can also declare the page as a shopping world. This is possible simply by checking the "Shopping World" checkbox. This allows you to link the created page to a product category. Further information on this can be found here.
In our example, however, this is not intended to be a shopping world, which is why we uncheck the box again.
## Step 4: Set Page to Active
You now need to set the page to active so that it can be displayed at all. This is done by checking the "Active" checkbox.
To the right of it, you can also declare the page as a shopping world. This is possible simply by checking the "Shopping World" checkbox. This allows you to link the created page to a product category. Further information on this can be found here.
In our example, however, this is not intended to be a shopping world, which is why we uncheck the box again.
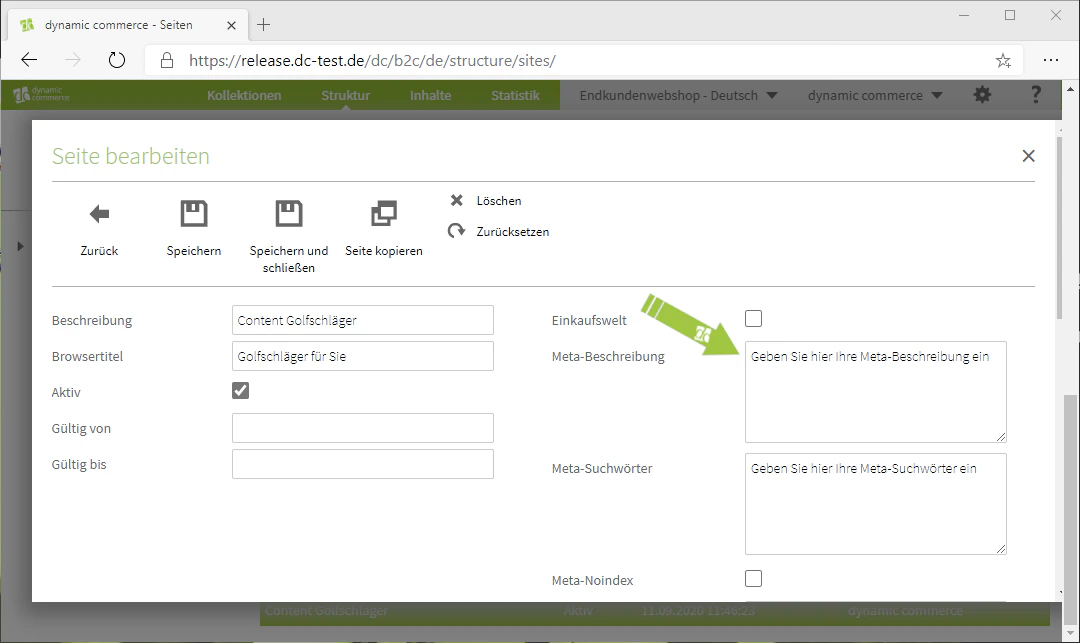
 ## Step 5: Enter Meta Description and Meta Keywords
You can now enter a meta description and meta keywords for SEO optimization.
You should choose a short meta description of up to approximately 160 characters describing the created page. This description is usually displayed in search engines below the link to your page (SERP snippet). It should therefore be meaningful and unique.
As meta keywords, you should define keywords that reflect the content of your created page. If a user searches for these keywords in a search engine, your page can be found as a result.
If you check the "Meta Noindex" box, your page cannot be found by search engines.
Furthermore, if you have multiple URLs pointing to the same page, you should specify these URLs under "canonical", as most search engines will suggest or display the page less frequently if the same content exists under multiple URLs. Search engines do this to avoid duplicates.
## Step 5: Enter Meta Description and Meta Keywords
You can now enter a meta description and meta keywords for SEO optimization.
You should choose a short meta description of up to approximately 160 characters describing the created page. This description is usually displayed in search engines below the link to your page (SERP snippet). It should therefore be meaningful and unique.
As meta keywords, you should define keywords that reflect the content of your created page. If a user searches for these keywords in a search engine, your page can be found as a result.
If you check the "Meta Noindex" box, your page cannot be found by search engines.
Furthermore, if you have multiple URLs pointing to the same page, you should specify these URLs under "canonical", as most search engines will suggest or display the page less frequently if the same content exists under multiple URLs. Search engines do this to avoid duplicates.
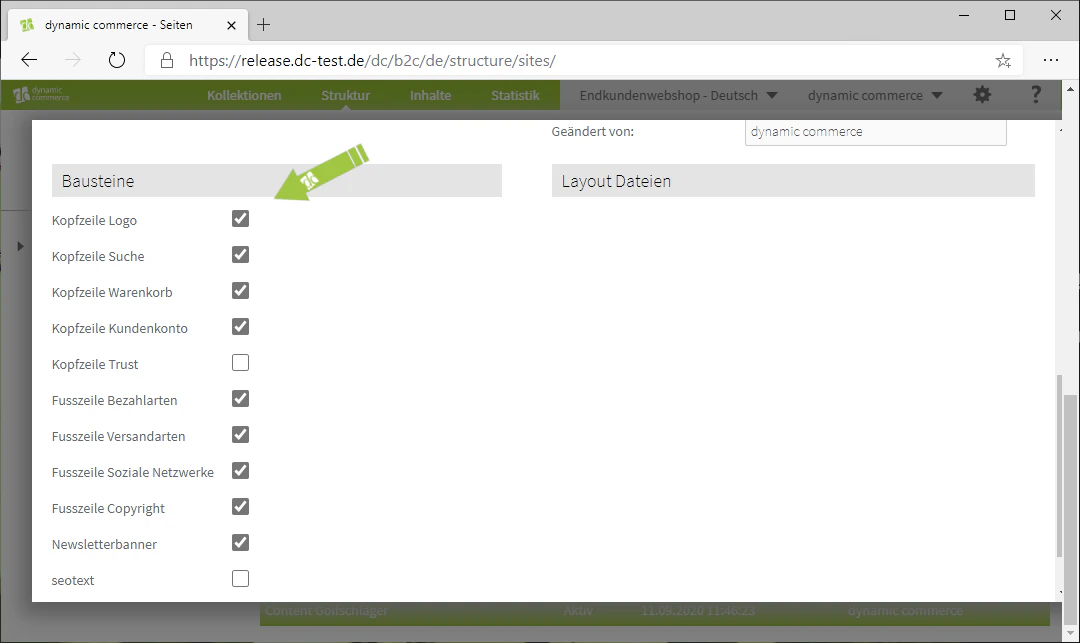
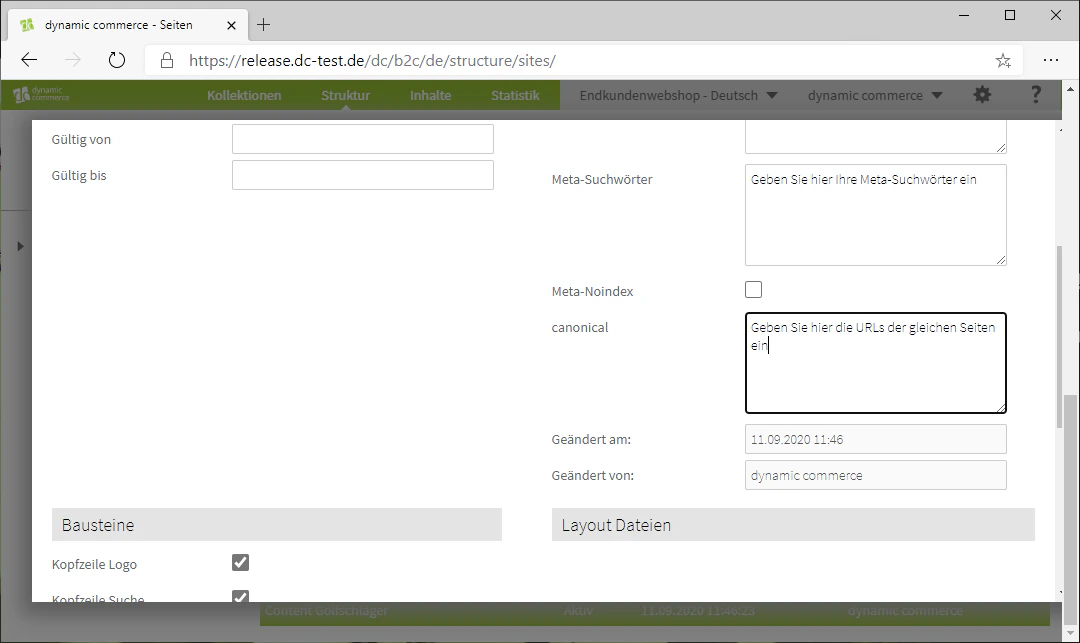 ## Step 6: Select Building Blocks
Finally, you can select which building blocks should be displayed on your page by checking the boxes at the bottom.
All building blocks created by us and by you are displayed there. We will explain how to create such building blocks here.
## Step 6: Select Building Blocks
Finally, you can select which building blocks should be displayed on your page by checking the boxes at the bottom.
All building blocks created by us and by you are displayed there. We will explain how to create such building blocks here.
 ## Related Topics
Assign created pages to the navigation so that visitors can find them.
Declare pages as shopping worlds and replace categories.
Modify building blocks and create new ones.
Fill created pages with content.
## Related Topics
Assign created pages to the navigation so that visitors can find them.
Declare pages as shopping worlds and replace categories.
Modify building blocks and create new ones.
Fill created pages with content.