> ## Documentation Index
> Fetch the complete documentation index at: https://docs.dc.ag/llms.txt
> Use this file to discover all available pages before exploring further.

# dynamic content - Creating Slideshows

> Create slideshows with images, headings, and automatic transition effects – ideal for banners.

Here we show you how to create a slideshow. Slideshows allow you to display images and maintain one or more texts for those images, which are then shown within the image.

The feature enables automatic switching between images and is particularly well suited for banners on the home page.

<Note>
  This guide is part of the [Content Types](/docs/en/dynamic-content/user-guide/inhaltsarten). We show you how to create content in general under [Creating and Editing Content](/docs/en/dynamic-content/user-guide/inhalte-erstellen).
</Note>

<Steps>
  <Step>
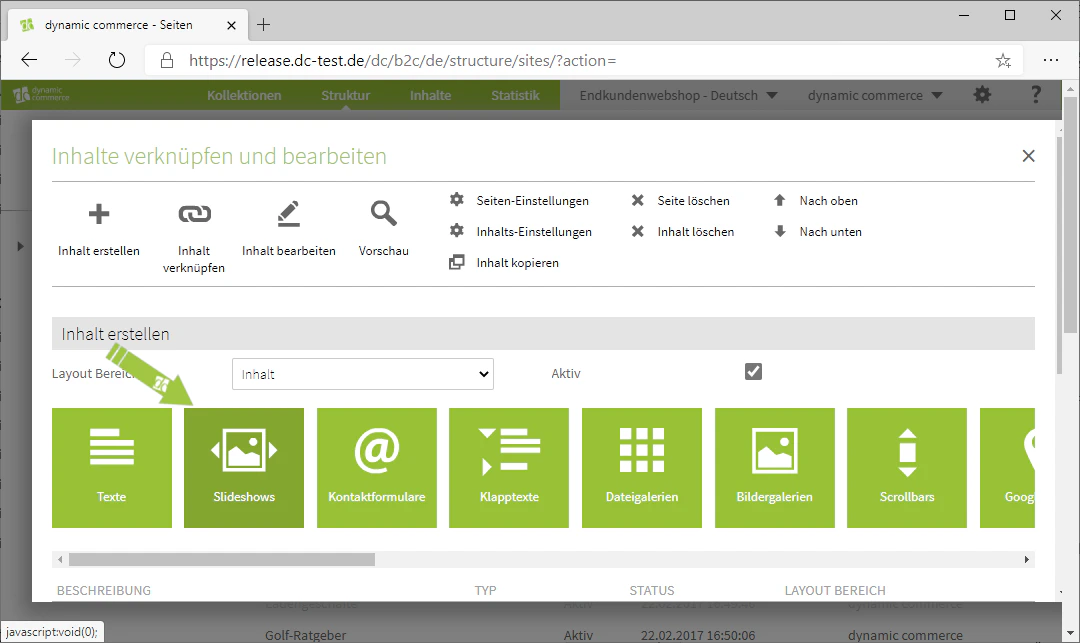
    ## Step 1: Select the Content Type

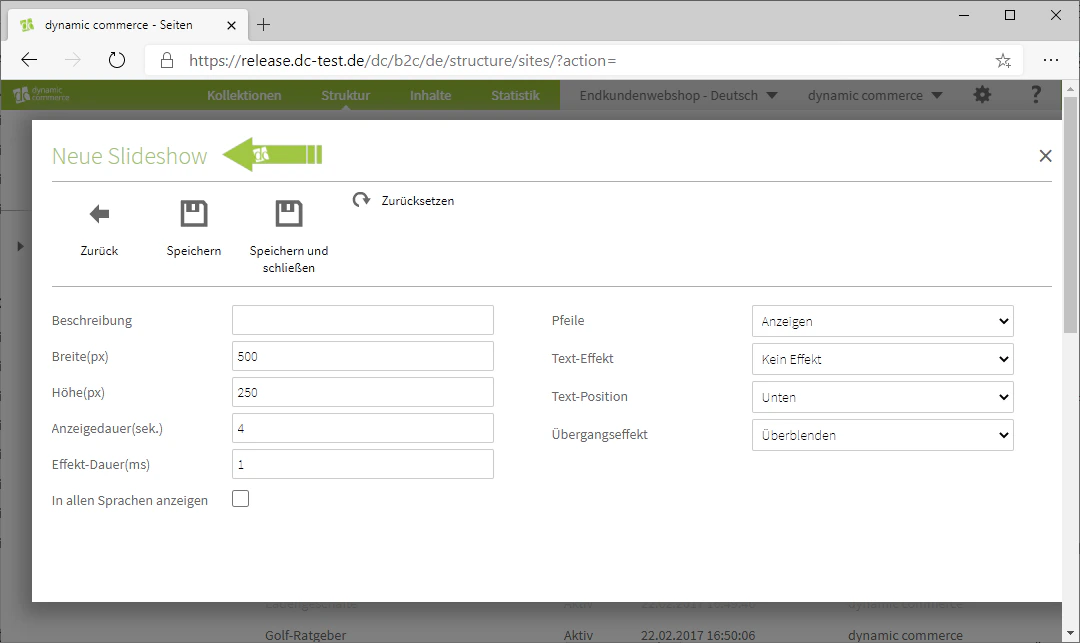
    First, select the content type "Slideshows" when creating a new content item. A window with the heading "New Slideshow" should then open.

    <Columns cols={2}>
      <Column>
        <Frame>
          <img src="https://mintcdn.com/dcag/DlKD43HGX8h1zbMf/images/dynamic-content/inhaltsarten/slideshows/inhaltsart-slideshows.png?fit=max&auto=format&n=DlKD43HGX8h1zbMf&q=85&s=78de79d853c658588c0a38d19e70d755" alt="Selecting the Slideshows content type" width="1080" height="643" data-path="images/dynamic-content/inhaltsarten/slideshows/inhaltsart-slideshows.png" />
        </Frame>
      </Column>

      <Column>
        <Frame>
          <img src="https://mintcdn.com/dcag/DlKD43HGX8h1zbMf/images/dynamic-content/inhaltsarten/slideshows/neue-slideshow.png?fit=max&auto=format&n=DlKD43HGX8h1zbMf&q=85&s=5fe138106be06e47aa166dc3f668858e" alt="New Slideshow window" width="1080" height="643" data-path="images/dynamic-content/inhaltsarten/slideshows/neue-slideshow.png" />
        </Frame>
      </Column>
    </Columns>
  </Step>

  <Step>
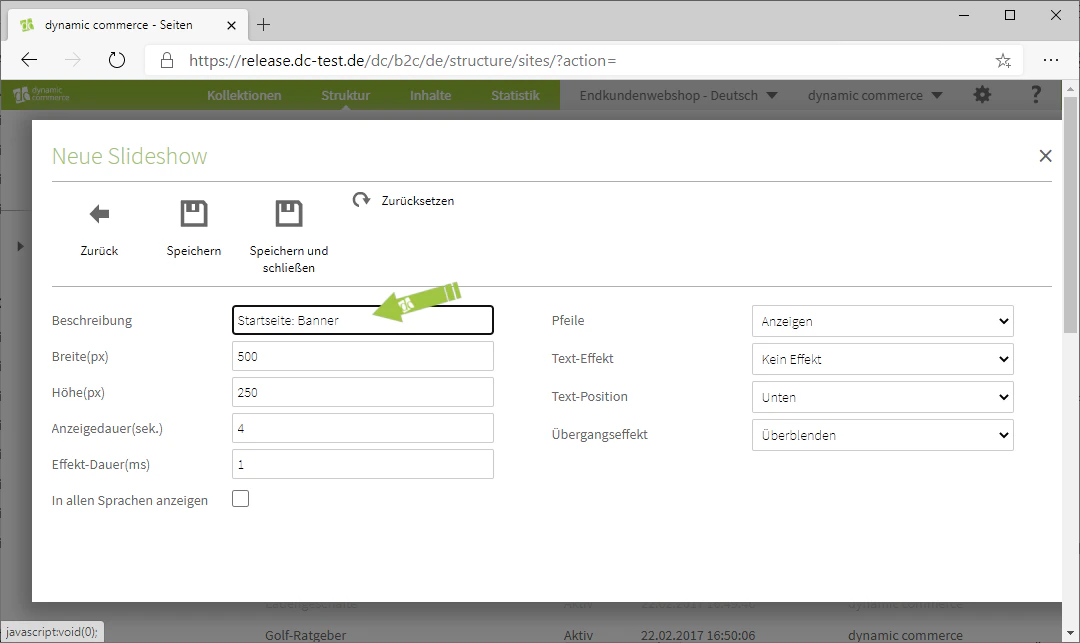
    ## Step 2: Choose a Description

    Begin by choosing a description for your slideshow. This is for organisational purposes only and will not be displayed on the selected page.

    <Frame>
      <img src="https://mintcdn.com/dcag/DlKD43HGX8h1zbMf/images/dynamic-content/inhaltsarten/slideshows/beschreibung.png?fit=max&auto=format&n=DlKD43HGX8h1zbMf&q=85&s=0e7d49a85f31e37a7f6d5a1884c0839b" alt="Enter the slideshow description" width="1080" height="643" data-path="images/dynamic-content/inhaltsarten/slideshows/beschreibung.png" />
    </Frame>
  </Step>

  <Step>
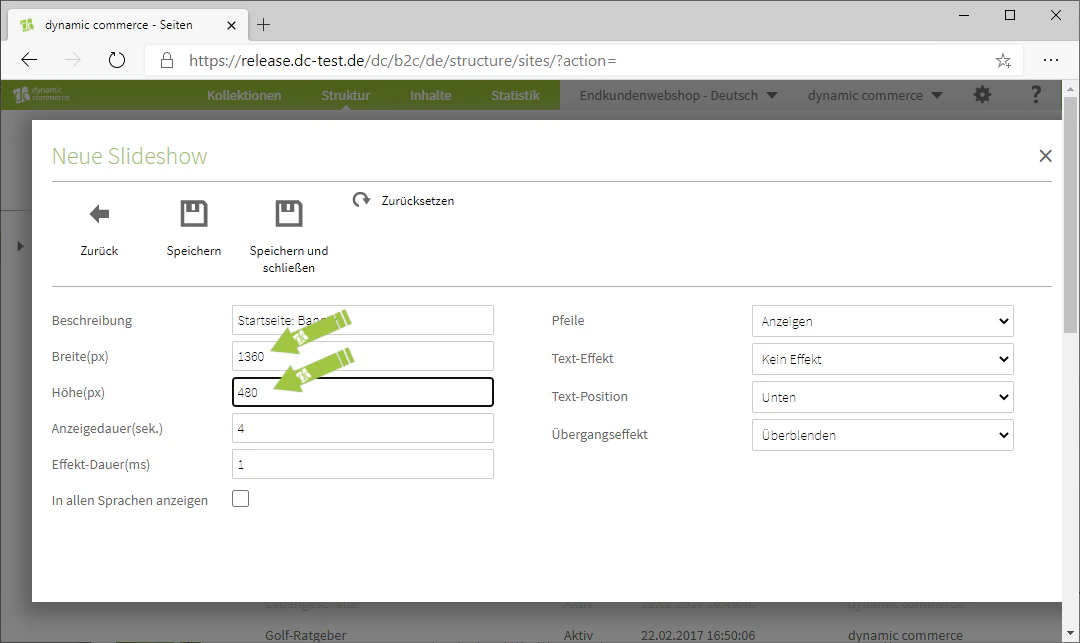
    ## Step 3: Choose Height and Width

    Next, select an appropriate height and width. Please note that you should at least match these to the aspect ratio of the images.

    <Frame>
      <img src="https://mintcdn.com/dcag/DlKD43HGX8h1zbMf/images/dynamic-content/inhaltsarten/slideshows/hoehe-und-breite.png?fit=max&auto=format&n=DlKD43HGX8h1zbMf&q=85&s=5c0dc188973032a825de421cb70f5325" alt="Define the height and width of the slideshow" width="1080" height="643" data-path="images/dynamic-content/inhaltsarten/slideshows/hoehe-und-breite.png" />
    </Frame>
  </Step>

  <Step>
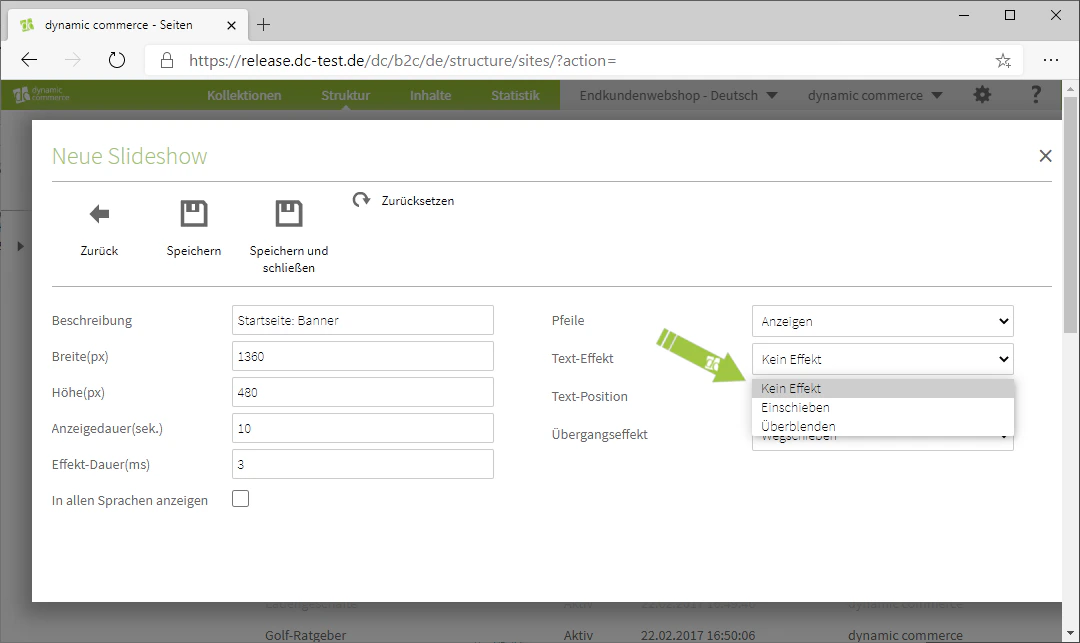
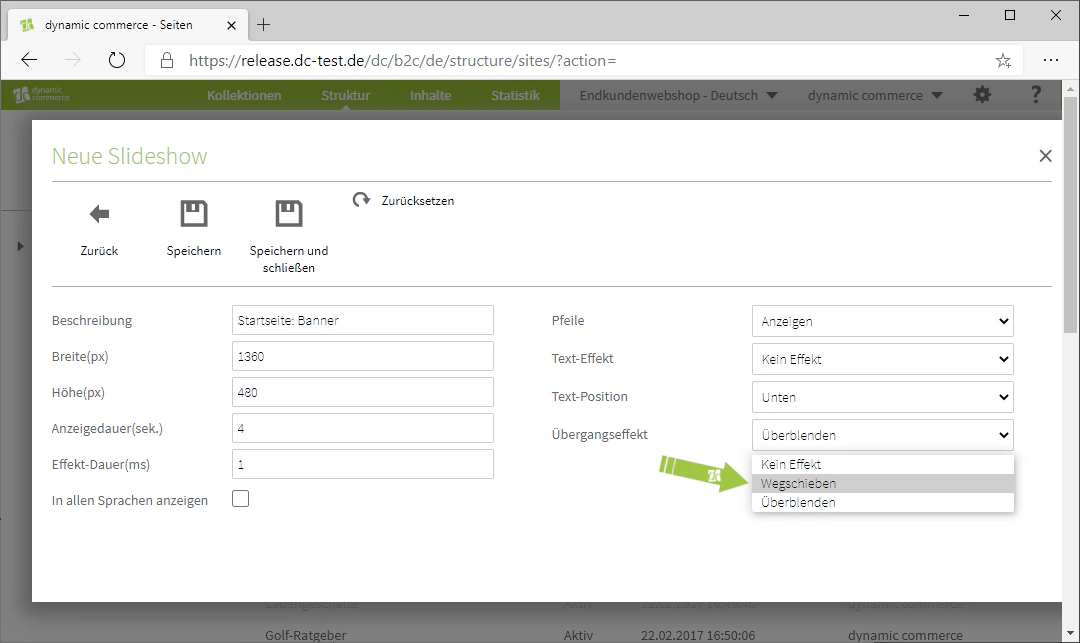
    ## Step 4: Choose Effects

    Here you can select a separate effect for both the text transition and the image transition.

    <Columns cols={2}>
      <Column>
        <Frame>
          <img src="https://mintcdn.com/dcag/DlKD43HGX8h1zbMf/images/dynamic-content/inhaltsarten/slideshows/text-effekte.png?fit=max&auto=format&n=DlKD43HGX8h1zbMf&q=85&s=2b7773e2dd0476bf0d332c8b1a99a7e2" alt="Select text transition effect" width="1080" height="643" data-path="images/dynamic-content/inhaltsarten/slideshows/text-effekte.png" />
        </Frame>
      </Column>

      <Column>
        <Frame>
          <img src="https://mintcdn.com/dcag/DlKD43HGX8h1zbMf/images/dynamic-content/inhaltsarten/slideshows/uebergangseffekt.png?fit=max&auto=format&n=DlKD43HGX8h1zbMf&q=85&s=272bdfdf833850629a7a9184d9669d6c" alt="Select image transition effect" width="1080" height="643" data-path="images/dynamic-content/inhaltsarten/slideshows/uebergangseffekt.png" />
        </Frame>
      </Column>
    </Columns>
  </Step>

  <Step>
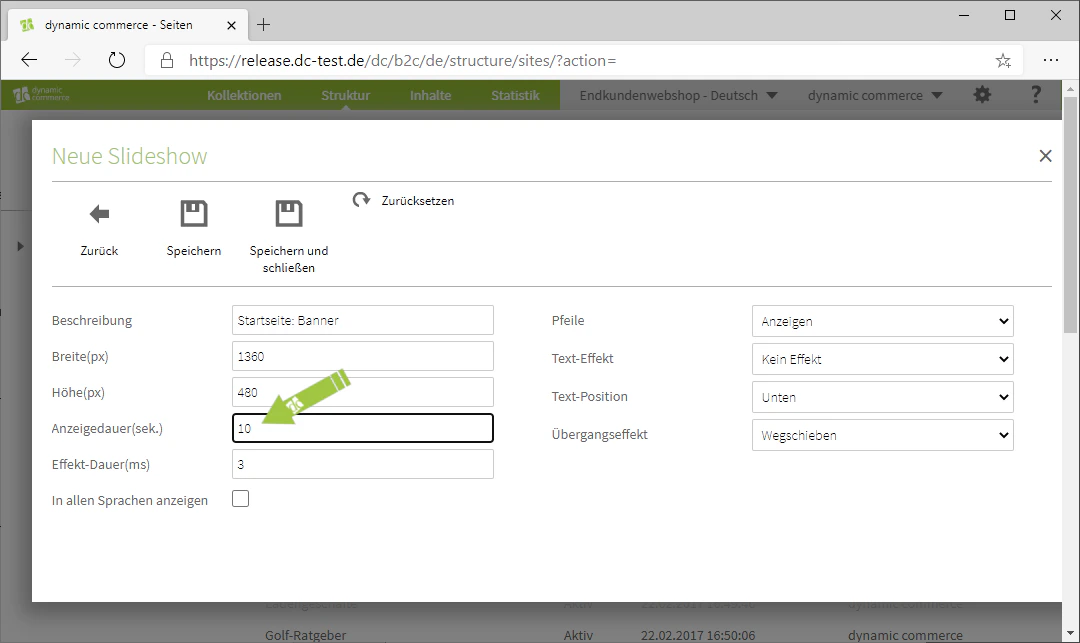
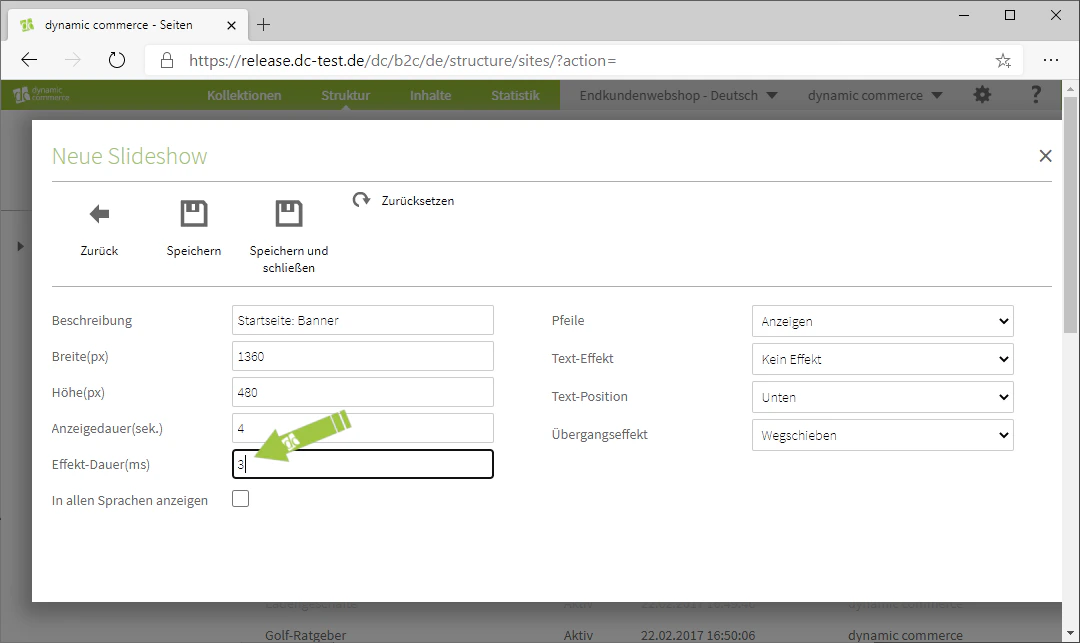
    ## Step 5: Set Display and Effect Duration

    You can now define the duration of the effect. This duration is to be entered in milliseconds in the corresponding field labelled "Effect Duration (ms)".

    <Columns cols={2}>
      <Column>
        <Frame>
          <img src="https://mintcdn.com/dcag/DlKD43HGX8h1zbMf/images/dynamic-content/inhaltsarten/slideshows/anzeigedauer.png?fit=max&auto=format&n=DlKD43HGX8h1zbMf&q=85&s=b4c7a5ddc3ee03e0ba7e4c6d7878c525" alt="Set the display duration of the slideshow" width="1080" height="643" data-path="images/dynamic-content/inhaltsarten/slideshows/anzeigedauer.png" />
        </Frame>
      </Column>

      <Column>
        <Frame>
          <img src="https://mintcdn.com/dcag/DlKD43HGX8h1zbMf/images/dynamic-content/inhaltsarten/slideshows/effekt-dauer.png?fit=max&auto=format&n=DlKD43HGX8h1zbMf&q=85&s=e45595da106c0ae08bee4ee51ce2bc81" alt="Enter effect duration in milliseconds" width="1080" height="643" data-path="images/dynamic-content/inhaltsarten/slideshows/effekt-dauer.png" />
        </Frame>
      </Column>
    </Columns>
  </Step>

  <Step>
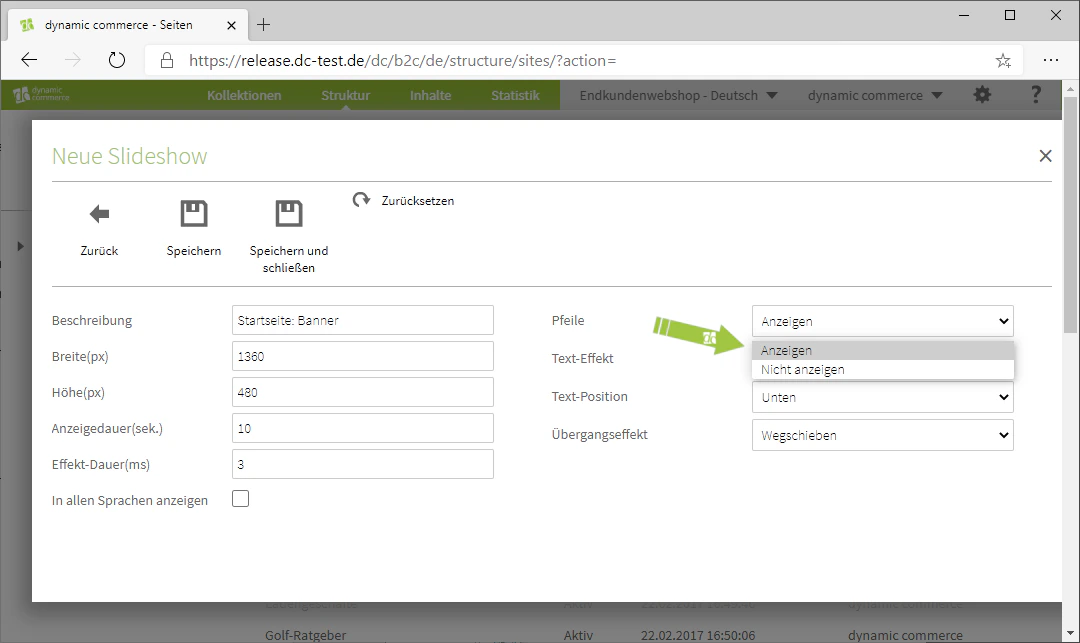
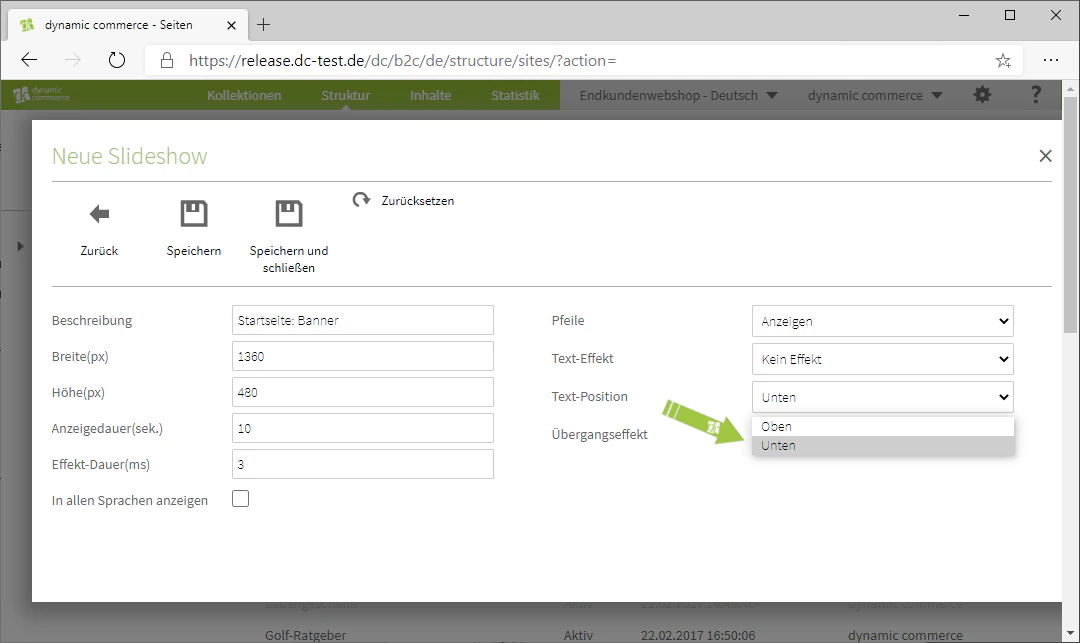
    ## Step 6: Set Arrow Display and Text Position

    In the drop-down next to "Arrows" you can specify whether arrows should be displayed to the left and right of the images. Then define the text position and save the slideshow.

    <Columns cols={3}>
      <Column>
        <Frame>
          <img src="https://mintcdn.com/dcag/DlKD43HGX8h1zbMf/images/dynamic-content/inhaltsarten/slideshows/pfeile.png?fit=max&auto=format&n=DlKD43HGX8h1zbMf&q=85&s=1634a58cdc47a4c22ca4d190a79587b6" alt="Set arrow display for the slideshow" width="1080" height="643" data-path="images/dynamic-content/inhaltsarten/slideshows/pfeile.png" />
        </Frame>
      </Column>

      <Column>
        <Frame>
          <img src="https://mintcdn.com/dcag/DlKD43HGX8h1zbMf/images/dynamic-content/inhaltsarten/slideshows/text-position.png?fit=max&auto=format&n=DlKD43HGX8h1zbMf&q=85&s=e2e20a86dd58877a7a2dbda21f98818b" alt="Position of the text in the slideshow" width="1080" height="643" data-path="images/dynamic-content/inhaltsarten/slideshows/text-position.png" />
        </Frame>
      </Column>

      <Column>
        <Frame>
          <img src="https://mintcdn.com/dcag/DlKD43HGX8h1zbMf/images/dynamic-content/inhaltsarten/slideshows/speichern.png?fit=max&auto=format&n=DlKD43HGX8h1zbMf&q=85&s=be2ebb6d355a963eeadcd2da210d99c8" alt="Save the slideshow" width="1080" height="643" data-path="images/dynamic-content/inhaltsarten/slideshows/speichern.png" />
        </Frame>
      </Column>
    </Columns>
  </Step>

  <Step>
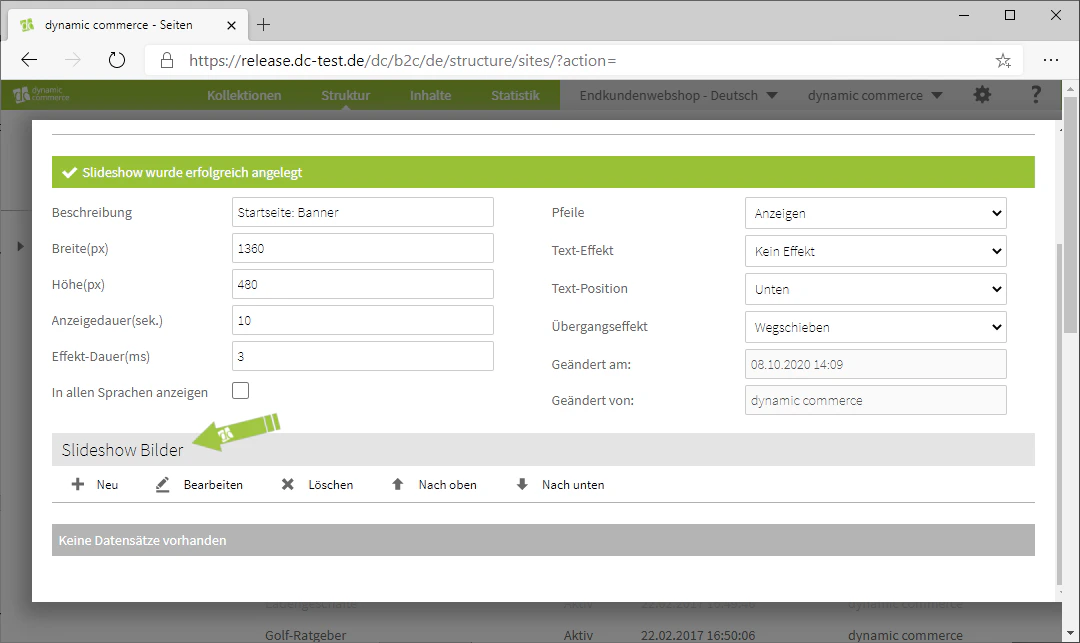
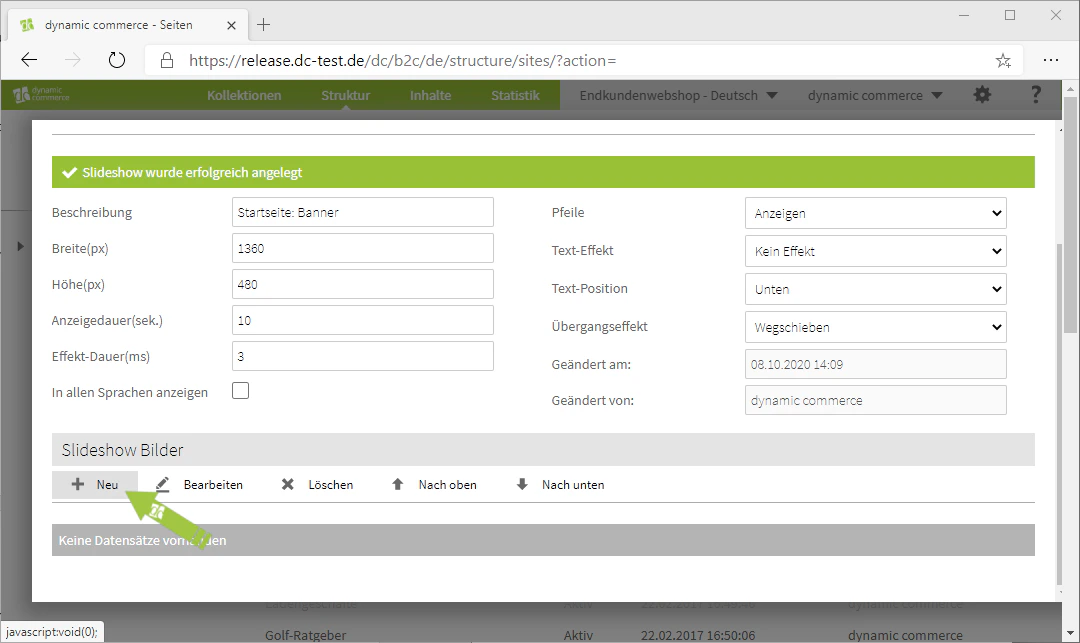
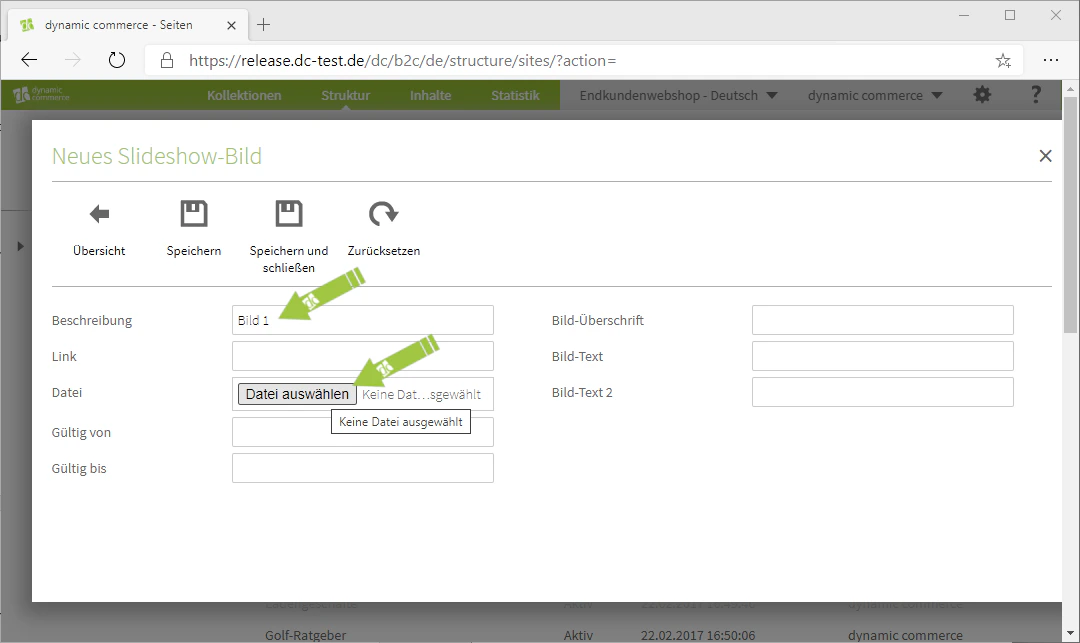
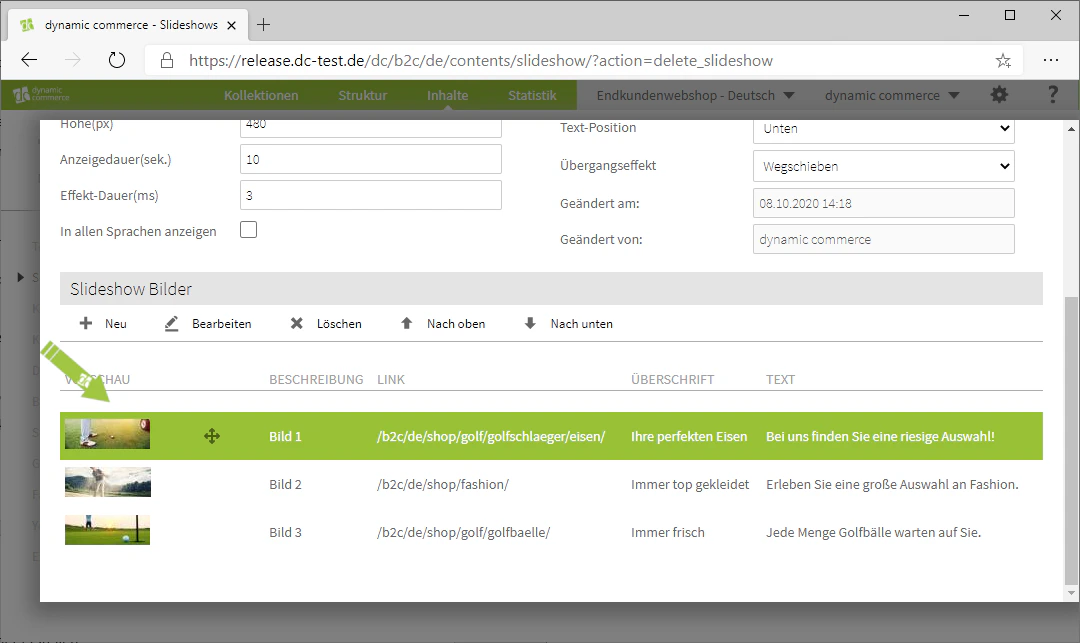
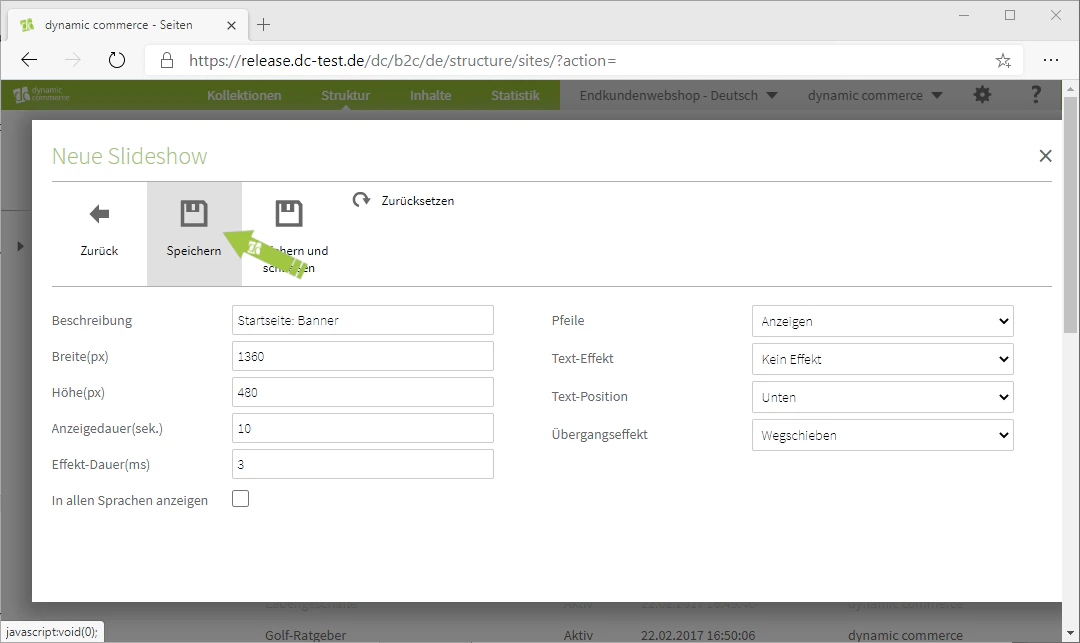
    ## Step 7: Upload Images

    After saving, a new list named "Slideshow Images" should have appeared at the bottom. Here you can upload individual images, choose a description and a file, and add a link and a preview image.

    <Columns cols={2}>
      <Column>
        <Frame>
          <img src="https://mintcdn.com/dcag/DlKD43HGX8h1zbMf/images/dynamic-content/inhaltsarten/slideshows/bilder-pflegen.png?fit=max&auto=format&n=DlKD43HGX8h1zbMf&q=85&s=2e80ddd52a7b57e06b59c2bf0ec1f1e8" alt="Manage slideshow images" width="1080" height="643" data-path="images/dynamic-content/inhaltsarten/slideshows/bilder-pflegen.png" />
        </Frame>
      </Column>

      <Column>
        <Frame>
          <img src="https://mintcdn.com/dcag/DlKD43HGX8h1zbMf/images/dynamic-content/inhaltsarten/slideshows/neue-bilder-hochladen.png?fit=max&auto=format&n=DlKD43HGX8h1zbMf&q=85&s=9e0d88db7f8ead02ad213df9d6835f93" alt="Upload new images" width="1080" height="643" data-path="images/dynamic-content/inhaltsarten/slideshows/neue-bilder-hochladen.png" />
        </Frame>
      </Column>
    </Columns>

    <Columns cols={2}>
      <Column>
        <Frame>
          <img src="https://mintcdn.com/dcag/DlKD43HGX8h1zbMf/images/dynamic-content/inhaltsarten/slideshows/beschreibung-und-datei.png?fit=max&auto=format&n=DlKD43HGX8h1zbMf&q=85&s=1c5268ce85fda89ad30f3bb447bac9ff" alt="Enter description and file" width="1080" height="643" data-path="images/dynamic-content/inhaltsarten/slideshows/beschreibung-und-datei.png" />
        </Frame>
      </Column>

      <Column>
        <Frame>
          <img src="https://mintcdn.com/dcag/DlKD43HGX8h1zbMf/images/dynamic-content/inhaltsarten/slideshows/link-und-vorschaubild.png?fit=max&auto=format&n=DlKD43HGX8h1zbMf&q=85&s=a34cbc14c50d3897456078cf6f7b050c" alt="Add link and preview image" width="1080" height="643" data-path="images/dynamic-content/inhaltsarten/slideshows/link-und-vorschaubild.png" />
        </Frame>
      </Column>
    </Columns>
  </Step>

  <Step>
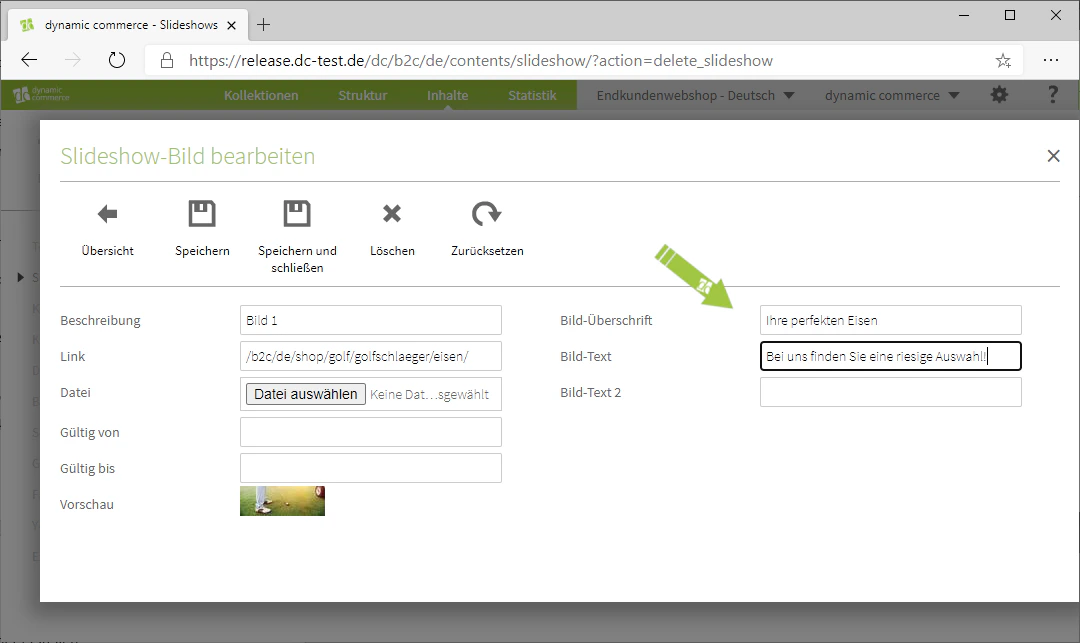
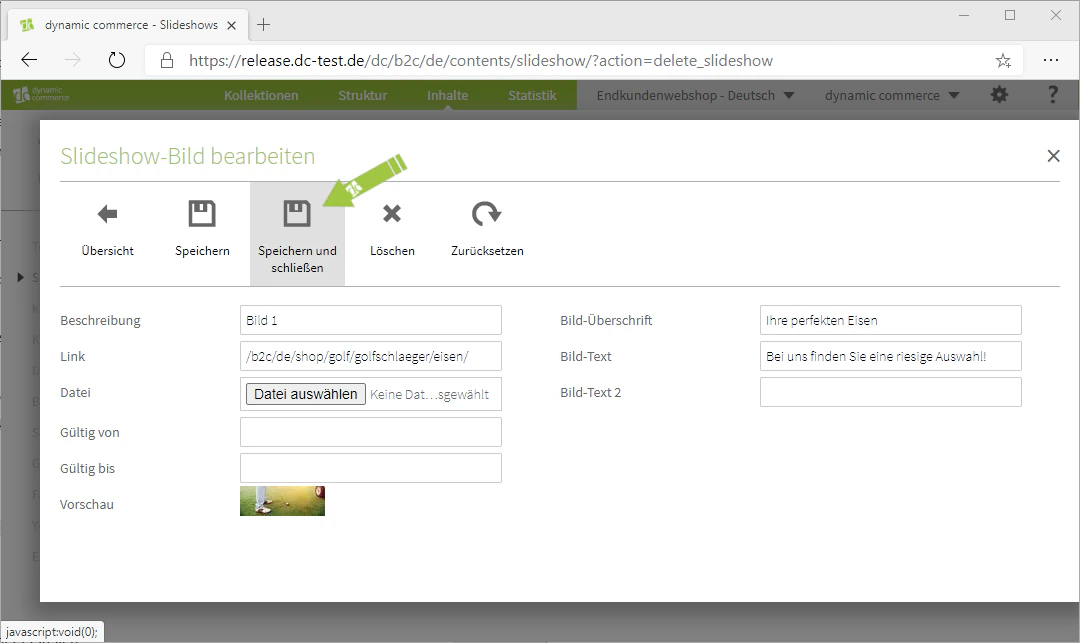
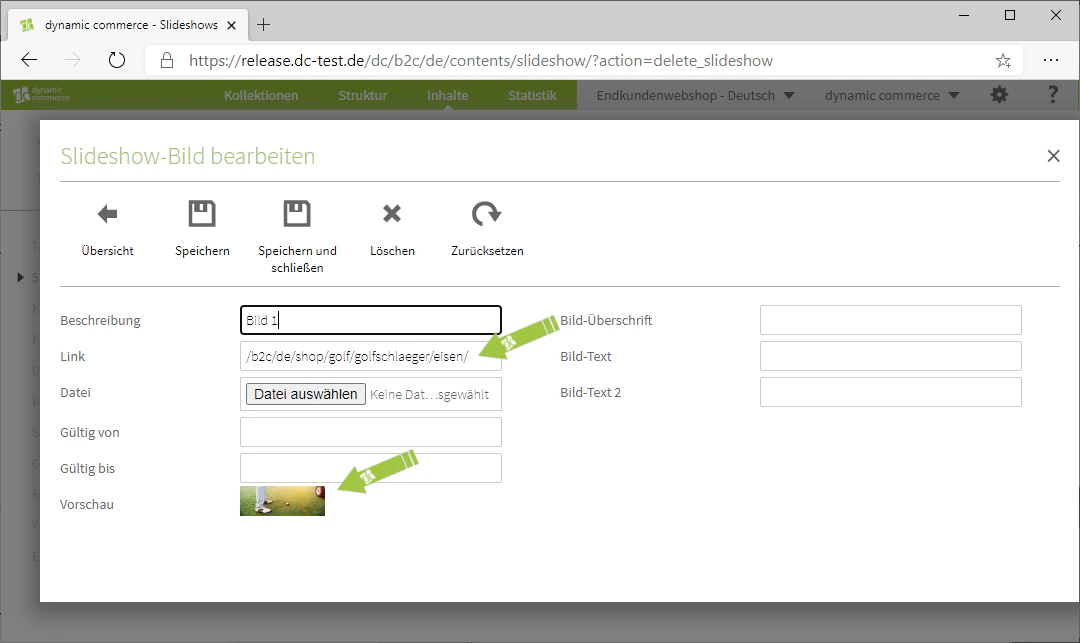
    ## Step 8: Choose Image Heading and Texts

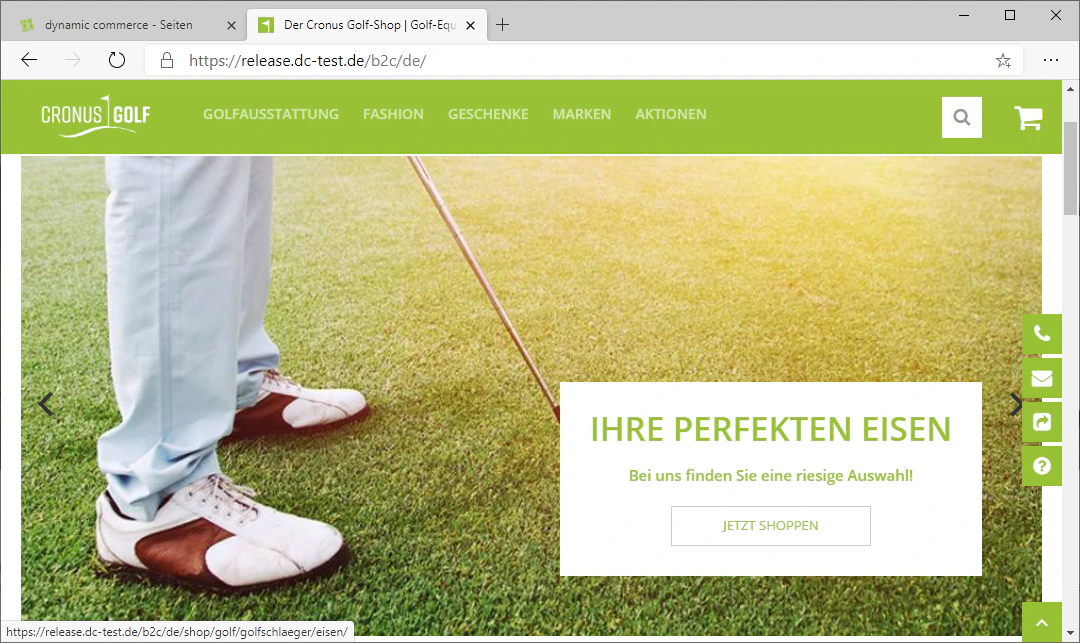
    Now select a suitable image heading and concise yet meaningful image texts. Then save, arrange the images via drag & drop, and review the result.

    <Columns cols={2}>
      <Column>
        <Frame>
          <img src="https://mintcdn.com/dcag/DlKD43HGX8h1zbMf/images/dynamic-content/inhaltsarten/slideshows/bild-ueberschrift-text.png?fit=max&auto=format&n=DlKD43HGX8h1zbMf&q=85&s=de75d2ebd2526535a0ee040678320651" alt="Maintain image heading and image text" width="1080" height="643" data-path="images/dynamic-content/inhaltsarten/slideshows/bild-ueberschrift-text.png" />
        </Frame>
      </Column>

      <Column>
        <Frame>
          <img src="https://mintcdn.com/dcag/DlKD43HGX8h1zbMf/images/dynamic-content/inhaltsarten/slideshows/speichern-bild.png?fit=max&auto=format&n=DlKD43HGX8h1zbMf&q=85&s=4522fc95f1fa561ba7332c97831c4e7c" alt="Save the slideshow image" width="1080" height="643" data-path="images/dynamic-content/inhaltsarten/slideshows/speichern-bild.png" />
        </Frame>
      </Column>
    </Columns>

    <Columns cols={2}>
      <Column>
        <Frame>
          <img src="https://mintcdn.com/dcag/DlKD43HGX8h1zbMf/images/dynamic-content/inhaltsarten/slideshows/bilder-anordnen.png?fit=max&auto=format&n=DlKD43HGX8h1zbMf&q=85&s=180ebcc052f13024faa6d570fb61041a" alt="Arrange images in the slideshow" width="1080" height="643" data-path="images/dynamic-content/inhaltsarten/slideshows/bilder-anordnen.png" />
        </Frame>
      </Column>

      <Column>
        <Frame>
          <img src="https://mintcdn.com/dcag/DlKD43HGX8h1zbMf/images/dynamic-content/inhaltsarten/slideshows/beispiel-slideshow.png?fit=max&auto=format&n=DlKD43HGX8h1zbMf&q=85&s=4bbd61d9c665e5286d44562d636b1e85" alt="Example view of a completed slideshow" width="1080" height="643" data-path="images/dynamic-content/inhaltsarten/slideshows/beispiel-slideshow.png" />
        </Frame>
      </Column>
    </Columns>
  </Step>
</Steps>

## Related Topics

<CardGroup cols={2}>
  <Card title="Content Types" icon="shapes" href="/docs/en/dynamic-content/user-guide/inhaltsarten">
    Overview of all available modules.
  </Card>

  <Card title="Creating and Editing Content" icon="pen-to-square" href="/docs/en/dynamic-content/user-guide/inhalte-erstellen">
    Create content on pages.
  </Card>

  <Card title="Image Galleries" icon="image" href="/docs/en/dynamic-content/user-guide/inhaltsarten/bildergalerien">
    Display images as a classic gallery.
  </Card>
</CardGroup>
