> ## Documentation Index
> Fetch the complete documentation index at: https://docs.dc.ag/llms.txt
> Use this file to discover all available pages before exploring further.
# dynamic content - Display Collection Preview
> Display selected collection entries as a preview on a page.
In the following, we will show you how to create a collection preview.
Unlike the "Collection" module, this does not display all collection entries, but only selected ones. This is used, for example, to highlight currently running promotions or the latest news posts on the home page.
To use this module, you must have previously created a collection. In addition, the collection should already be assigned to another page. It is also advantageous if some collection entries have already been maintained.
This guide is part of the [Content Types](/docs/en/dynamic-content/user-guide/inhaltsarten). We show you how to create content in general under [Creating and Editing Content](/docs/en/dynamic-content/user-guide/inhalte-erstellen).
Please note that we only explain here how the collection preview module works. This assumes that you have created a page on which the content can be displayed. It is also assumed that you have already reached the window for creating content.
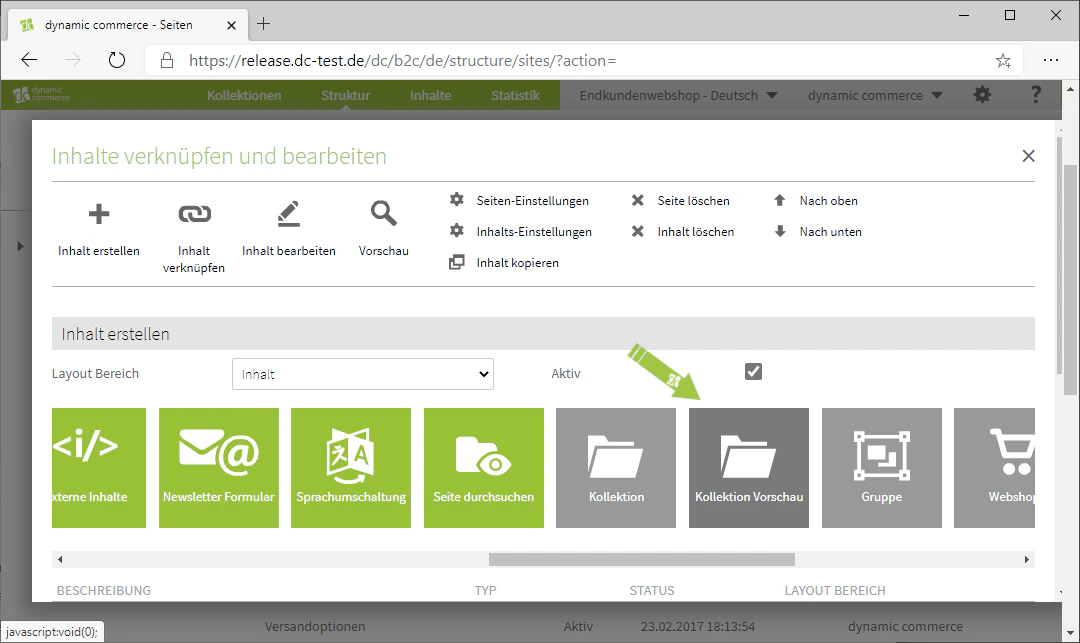
## Step 1: Select the Content Type "Collection Preview"
First, when creating content, select the content type "Collection Preview".
A window with the heading "Link Collection Preview" should now open. Here you can configure the settings for your collection preview.
In our example, we are on the home page of our website. Here we want to display the promotions that are currently available in the web shop. For this purpose, we have already created a collection and maintained the three currently running promotions as collection entries.
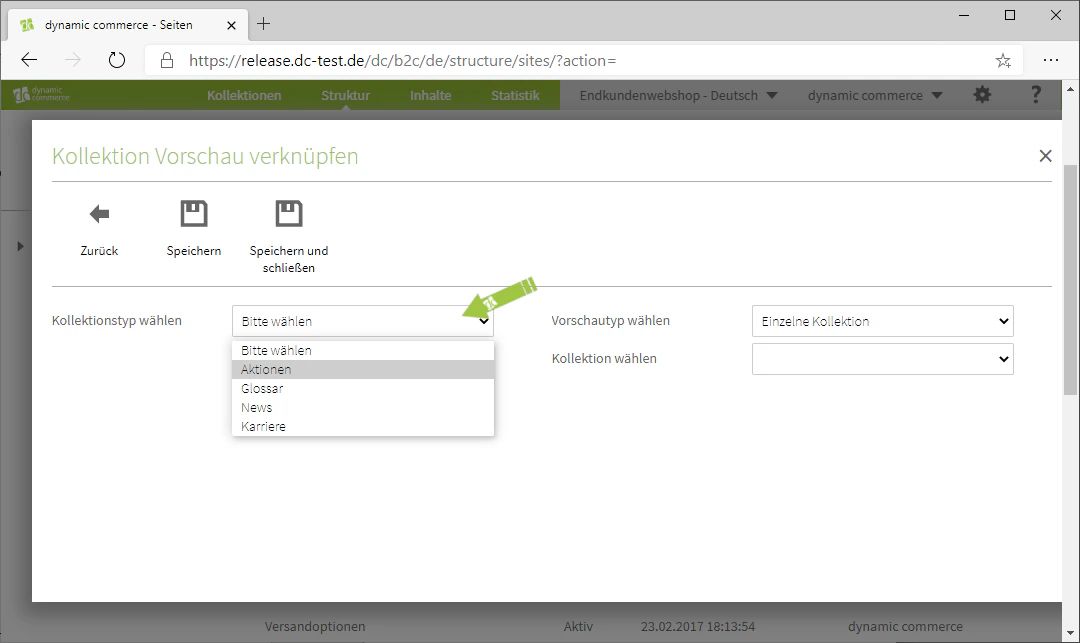
 ## Step 2: Select the Collection Type
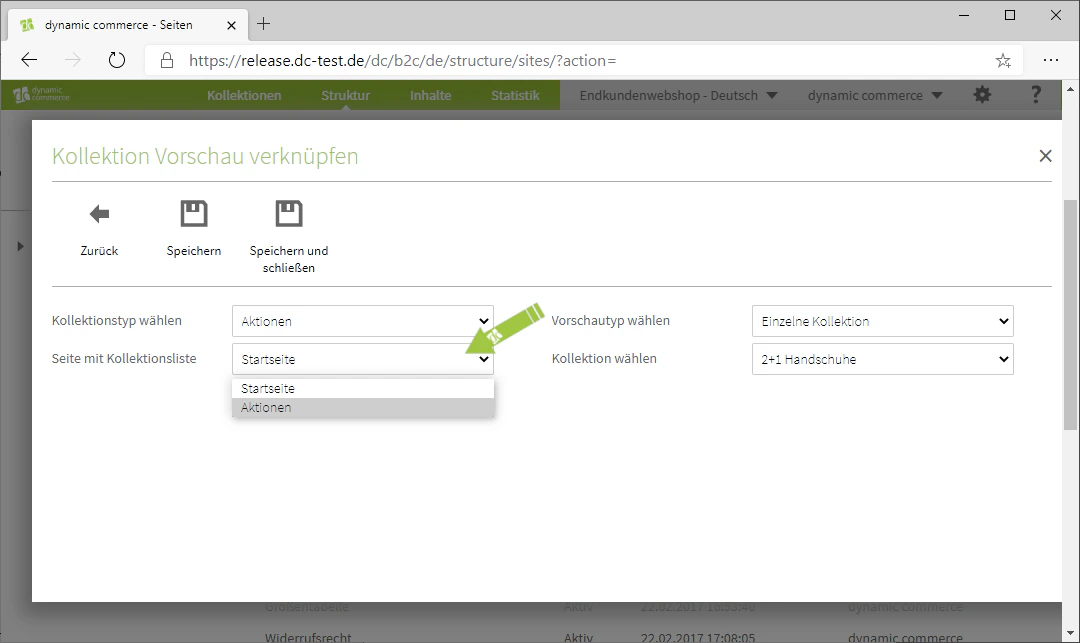
In the window that has just opened, first select a collection type or a collection from the corresponding drop-down. Then, in the "Page with Collection List" drop-down, select the page to which you have assigned the entire collection.
For our example, we select the collection "Promotions" as the collection type. The collection list is located on the "Promotions" page, which is why we also select it in the second field.
## Step 2: Select the Collection Type
In the window that has just opened, first select a collection type or a collection from the corresponding drop-down. Then, in the "Page with Collection List" drop-down, select the page to which you have assigned the entire collection.
For our example, we select the collection "Promotions" as the collection type. The collection list is located on the "Promotions" page, which is why we also select it in the second field.
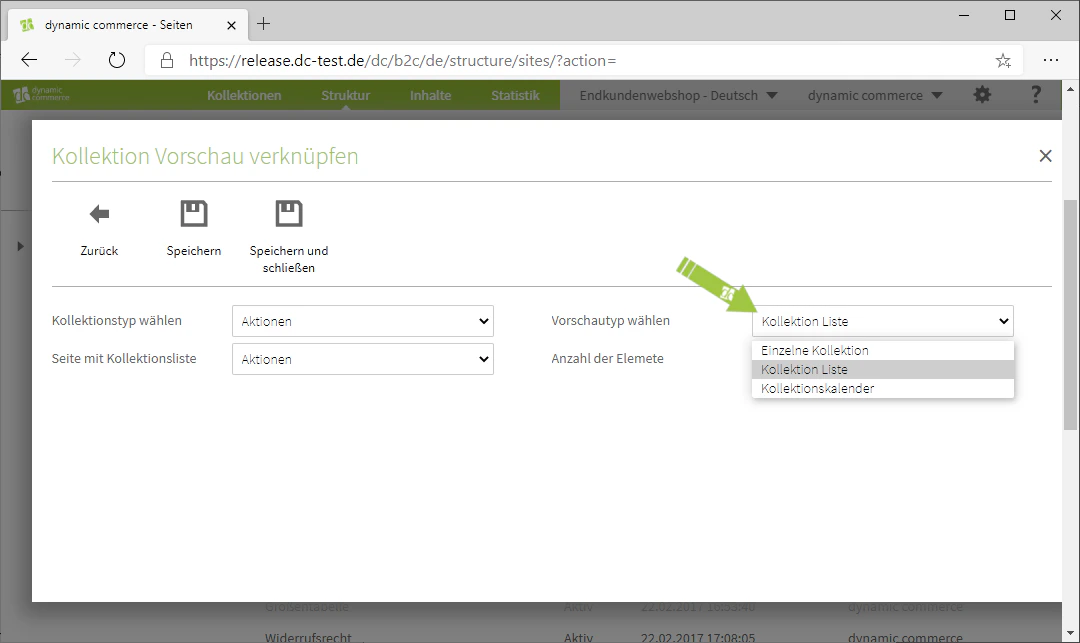
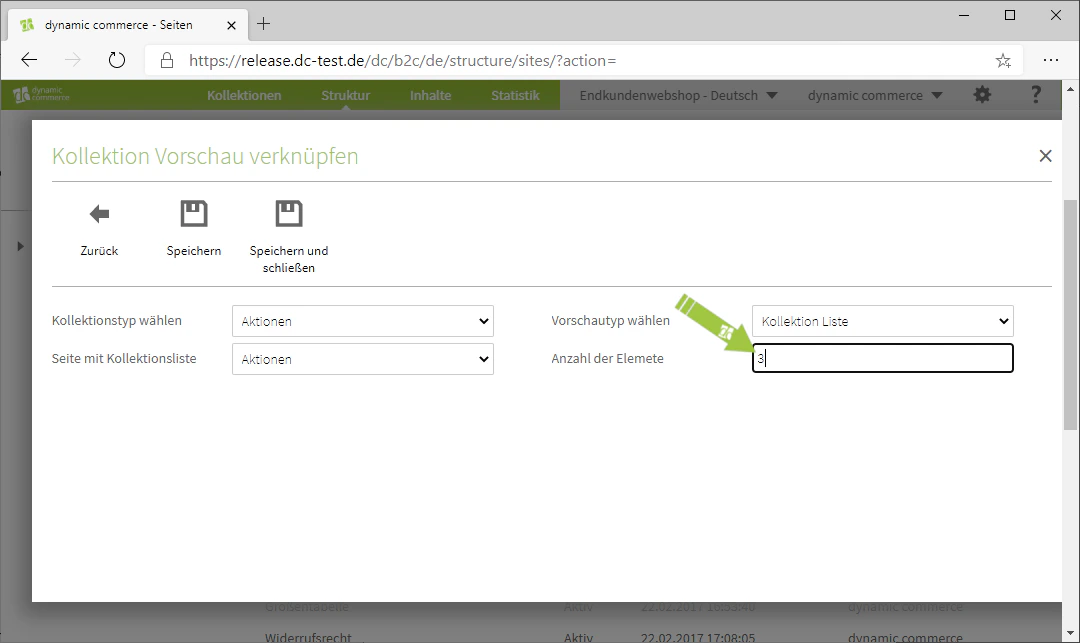
 ## Step 3: Select the Preview Type
Now select the preview type from the drop-down of the same name. Here you have various options, which have usually been customised for you.
In our example, we have chosen the preview type "Collection List", as several promotions are to be displayed in a list. For the number of elements, we set 3, as we currently have three running promotions maintained as collection entries.
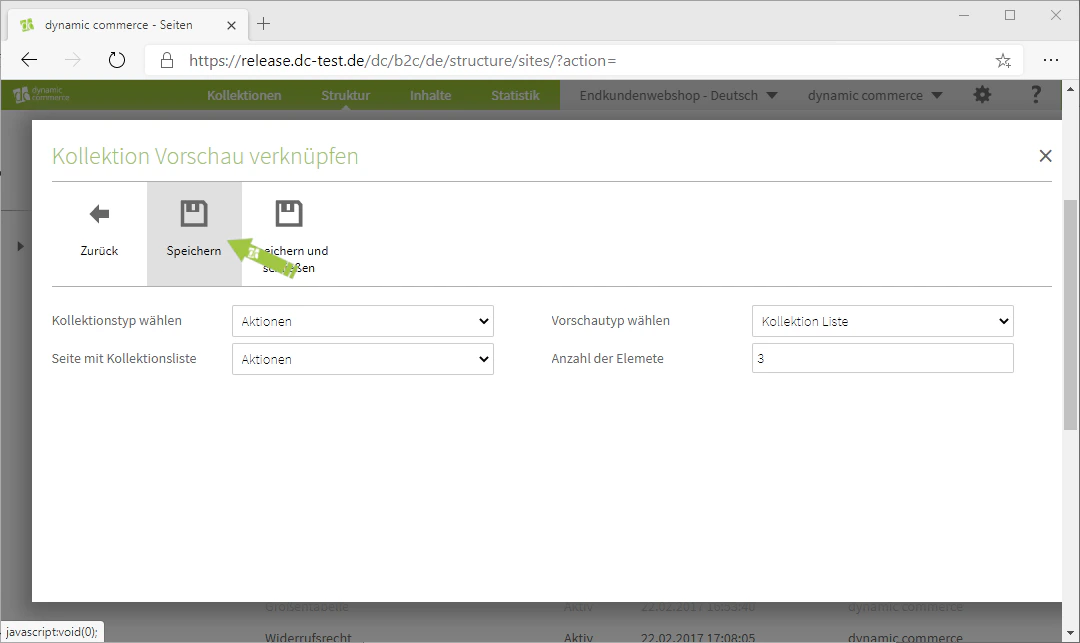
Finally, save everything and the collection preview is now created.
## Step 3: Select the Preview Type
Now select the preview type from the drop-down of the same name. Here you have various options, which have usually been customised for you.
In our example, we have chosen the preview type "Collection List", as several promotions are to be displayed in a list. For the number of elements, we set 3, as we currently have three running promotions maintained as collection entries.
Finally, save everything and the collection preview is now created.
 ## Related Topics
Overview of all available modules.
Create content on pages.
Embed complete collections on a page.
Display selected web shop articles in a scrollable view.
## Related Topics
Overview of all available modules.
Create content on pages.
Embed complete collections on a page.
Display selected web shop articles in a scrollable view.