> ## Documentation Index
> Fetch the complete documentation index at: https://docs.dc.ag/llms.txt
> Use this file to discover all available pages before exploring further.
# dynamic content - Edit and Create Building Blocks
> Edit building blocks such as logos and footers of your website and create new building blocks.
In our CMS, you also have the option to edit the basic building blocks of your website yourself or even create new ones.
This allows you to change and customise important content such as your logo yourself at any time. In addition, you can create new building blocks and thus make changes to parts of your pages, such as a different footer for your support portal.
These building blocks can then be added easily when creating a page with just one click.
In the following, we will show you how to create and edit such building blocks. We will explain in detail how to create a building block, since when editing you simply change the settings that were selected during creation.
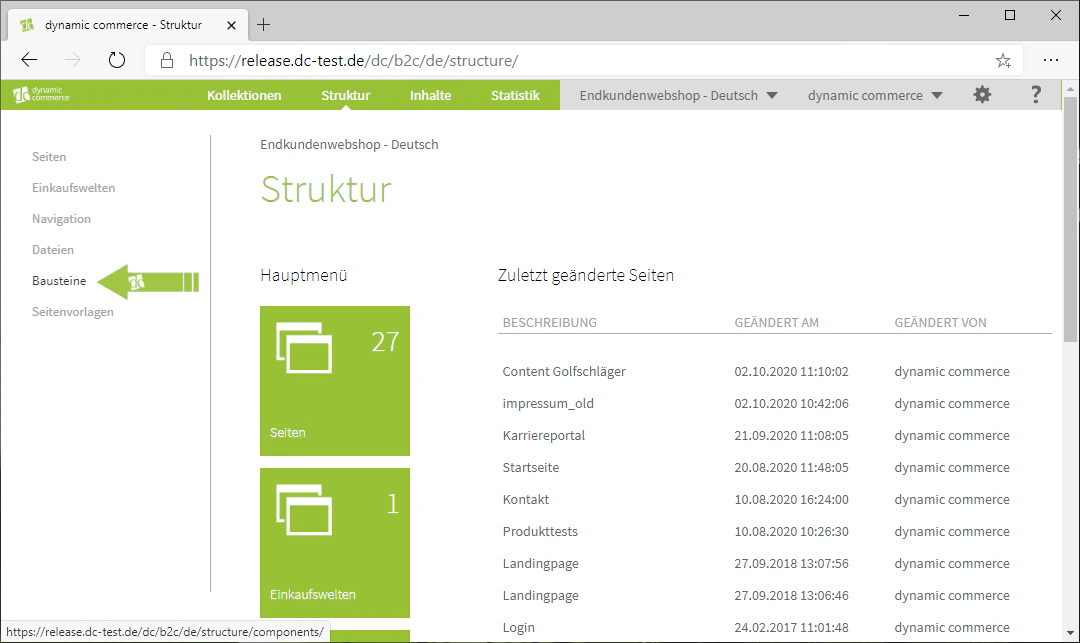
## Step 1: Navigate to the Building Blocks Menu
First, navigate to the building blocks menu. You can access it via the Structure tab in the top bar.
There, click on the "Building Blocks" item in the list on the left side.
You should now have arrived in the building blocks menu.

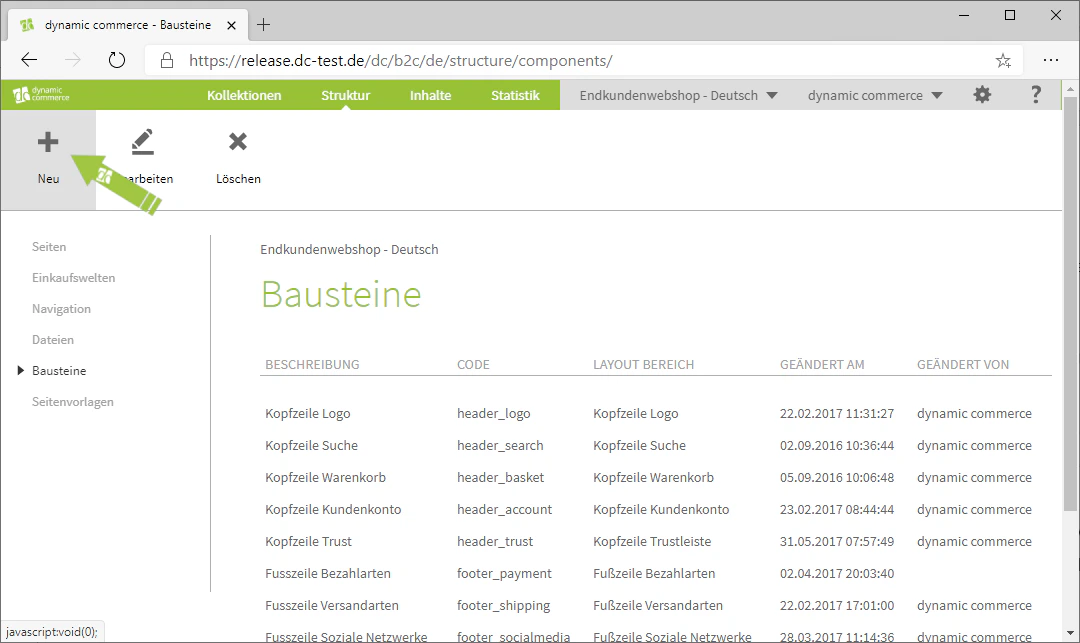
 ## Step 2: Create and Edit a Building Block
You can edit an existing building block simply by double-clicking on it. If you do so, a window with all the settings for that building block will open.
By clicking on the "Plus" with the label "New" below it, you can create a new building block. A window with the heading "Create New Building Block" should then open.
## Step 2: Create and Edit a Building Block
You can edit an existing building block simply by double-clicking on it. If you do so, a window with all the settings for that building block will open.
By clicking on the "Plus" with the label "New" below it, you can create a new building block. A window with the heading "Create New Building Block" should then open.
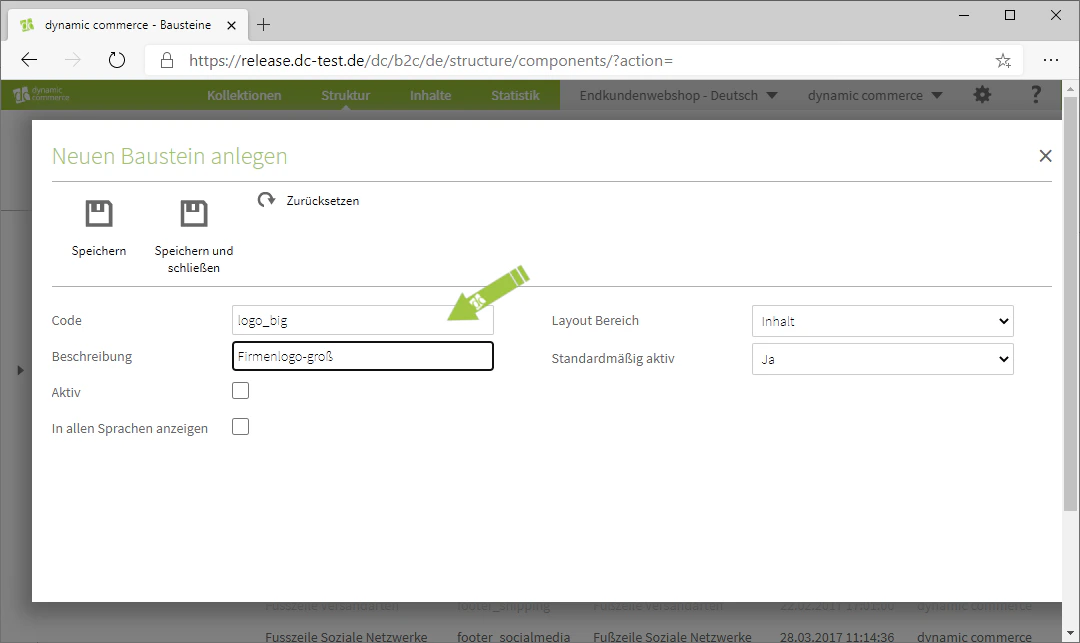
 ## Step 3: Choose Building Block Code and Description
First, select the building block code. As always, this is only for organisational purposes and will not be displayed on your website. Furthermore, the code must not contain umlauts, spaces, or special characters, and we recommend writing it in lowercase.
The description of a building block is also only for organisational purposes.
In our example, we are creating a building block for a larger and more elaborate company logo. Therefore, we choose "logo\_big" as the code and "Company logo large" as the description.
## Step 3: Choose Building Block Code and Description
First, select the building block code. As always, this is only for organisational purposes and will not be displayed on your website. Furthermore, the code must not contain umlauts, spaces, or special characters, and we recommend writing it in lowercase.
The description of a building block is also only for organisational purposes.
In our example, we are creating a building block for a larger and more elaborate company logo. Therefore, we choose "logo\_big" as the code and "Company logo large" as the description.
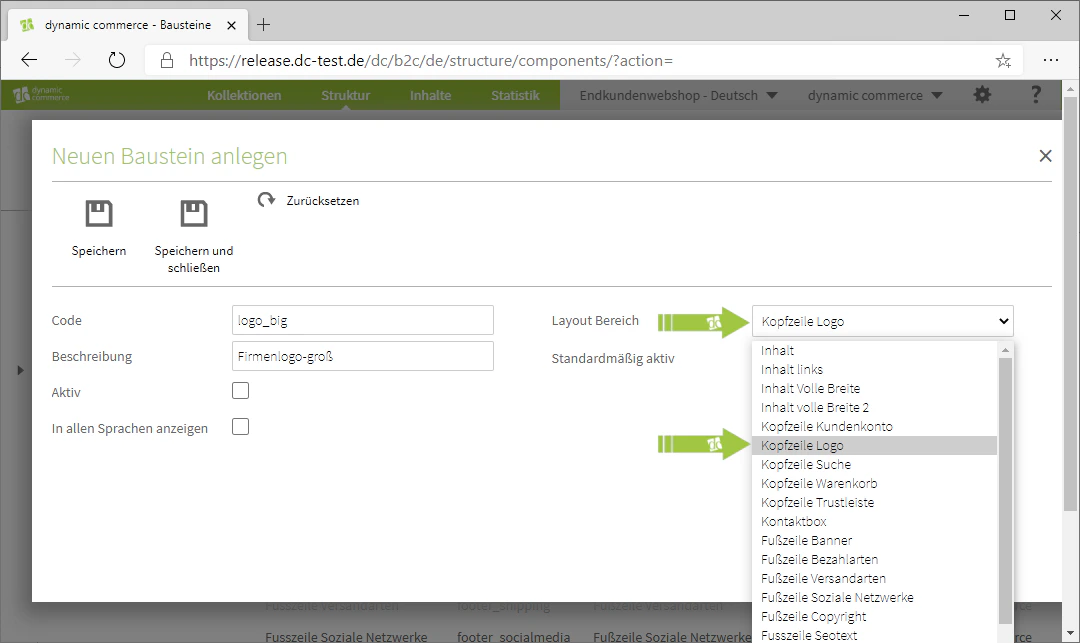
 ## Step 4: Select the Layout Area
After assigning the description and code, you now define the layout area. This area determines where the building block is displayed on the page.
Since our example involves the company logo, we select the area "Header Logo".
Depending on how your website is structured, you will have more or fewer options for which layout area this building block should be displayed in.
## Step 4: Select the Layout Area
After assigning the description and code, you now define the layout area. This area determines where the building block is displayed on the page.
Since our example involves the company logo, we select the area "Header Logo".
Depending on how your website is structured, you will have more or fewer options for which layout area this building block should be displayed in.
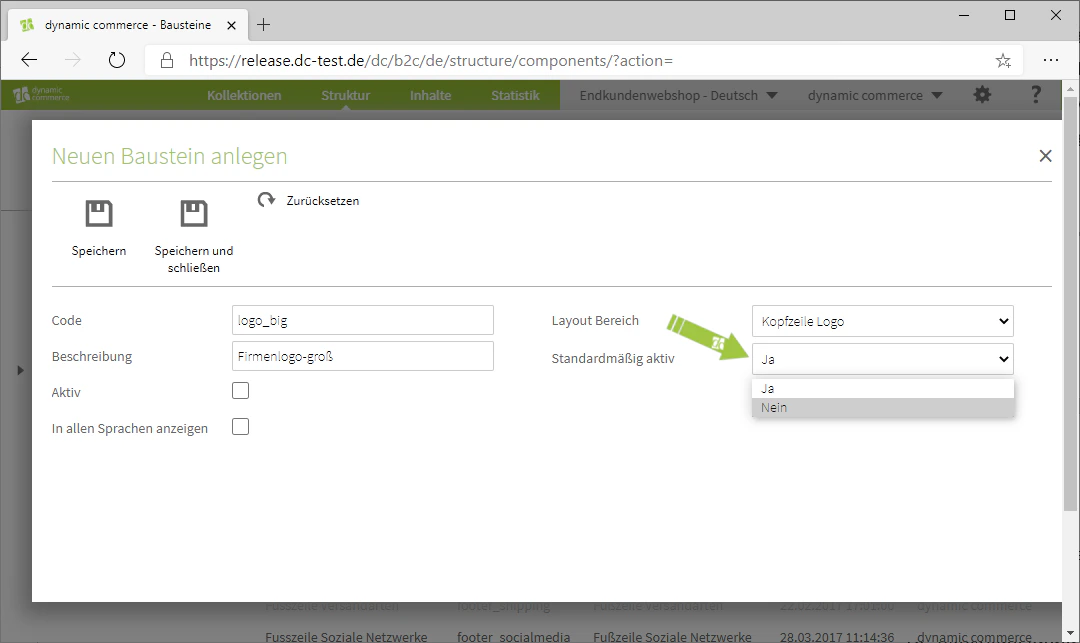
 ## Step 5: Set Active and Save
You now also have the option to declare this building block as "Active by default". This is done simply via a drop-down with "Yes" or "No" as options. If you declare the building block as active by default, it will always be active by default when creating a page, and the checkbox for the respective building block must first be unchecked for it to be inactive.
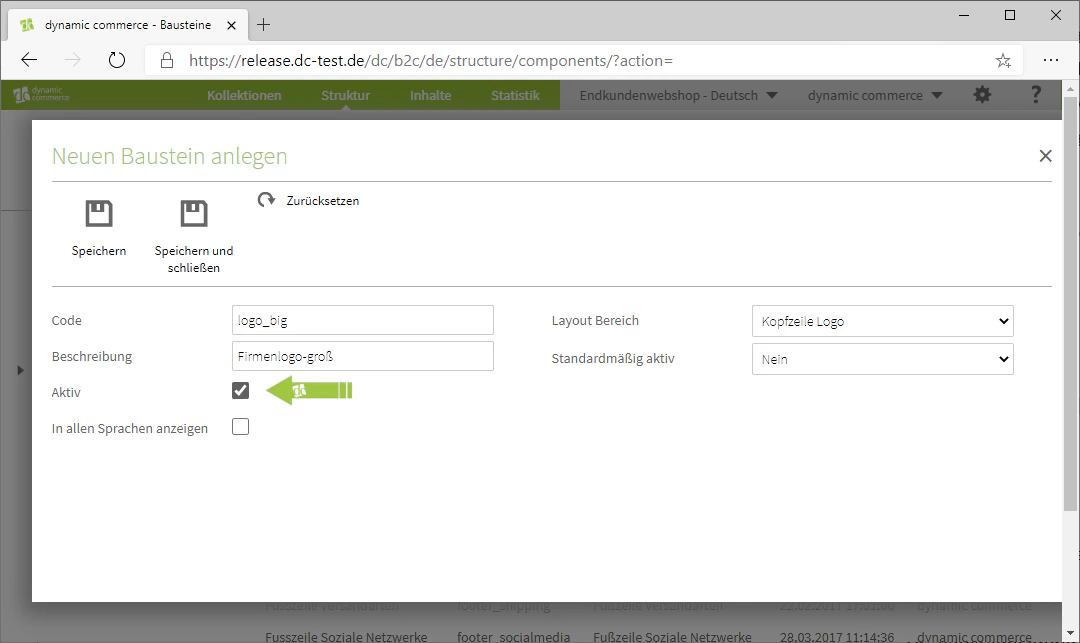
You should set the building block to active after making your selection by checking the field next to "Active".
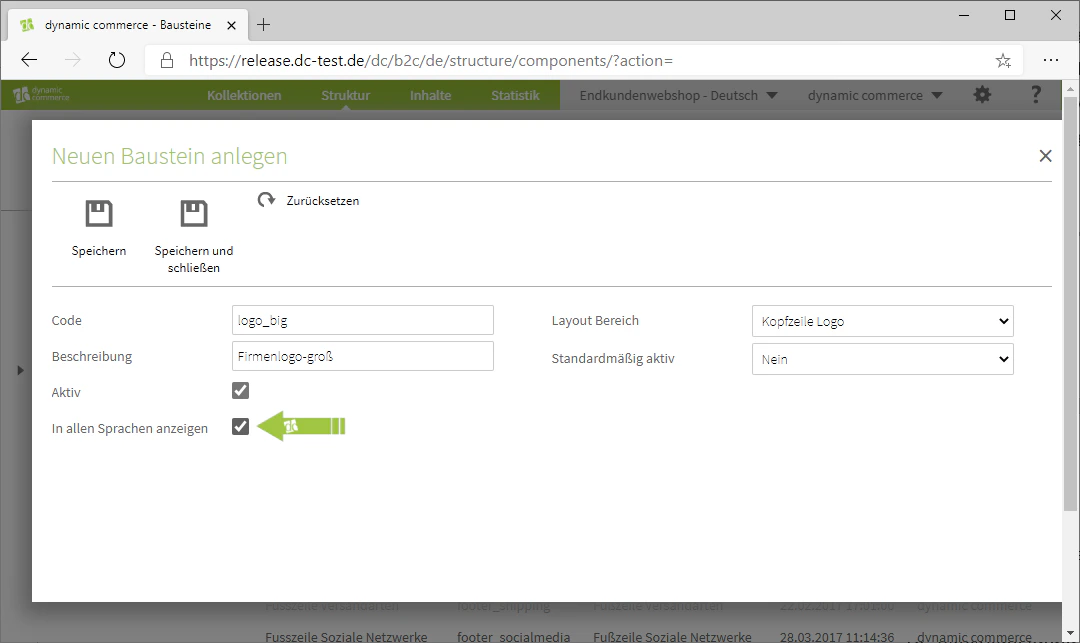
If you want this building block to be displayed in all languages in which your website operates, check the corresponding checkbox.
In our example, this is a company logo specifically for more specialised pages. Therefore, this building block should not be active by default. However, it should still be displayed in all languages.
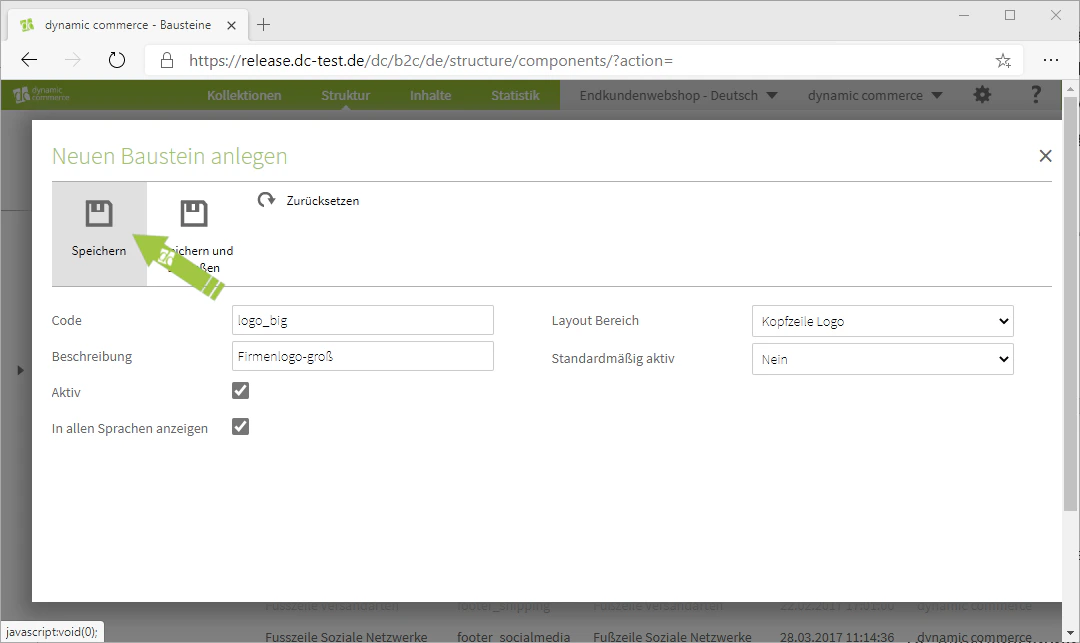
Now save the building block to have further settings displayed.
## Step 5: Set Active and Save
You now also have the option to declare this building block as "Active by default". This is done simply via a drop-down with "Yes" or "No" as options. If you declare the building block as active by default, it will always be active by default when creating a page, and the checkbox for the respective building block must first be unchecked for it to be inactive.
You should set the building block to active after making your selection by checking the field next to "Active".
If you want this building block to be displayed in all languages in which your website operates, check the corresponding checkbox.
In our example, this is a company logo specifically for more specialised pages. Therefore, this building block should not be active by default. However, it should still be displayed in all languages.
Now save the building block to have further settings displayed.
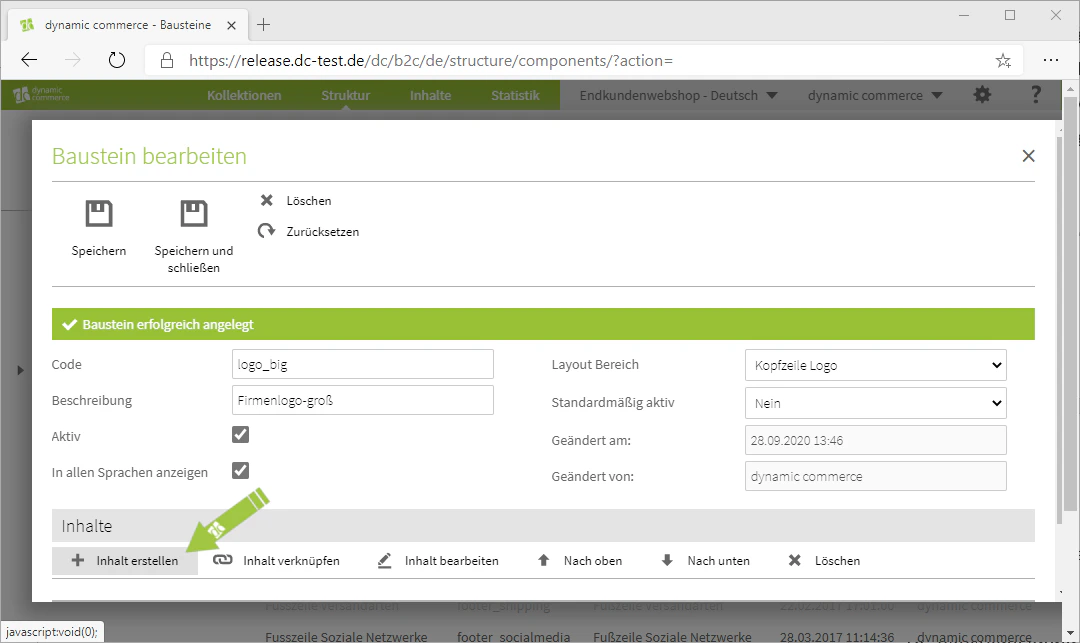
 ## Step 6: Create and Edit Content
After saving, you should open the "Content" section below the basic settings. Click on "Create Content" there.
A selection of content types should then open.
A detailed overview of the available modules can be found under [Content Types](/docs/en/dynamic-content/user-guide/inhaltsarten).
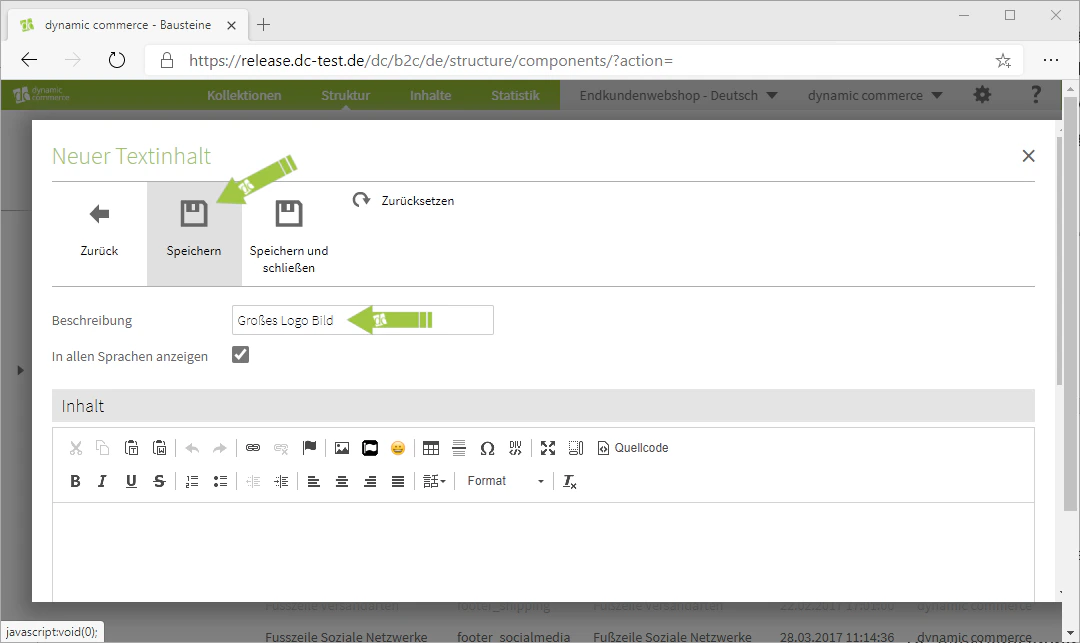
In our example, a simple text field into which we upload an image is sufficient for the creation. Therefore, we click on the "Texts" content type, enter a description, and select our new logo from the file browser. We then save this content.
You can find out how to upload files and images to the file browser under [Upload and Manage Files](/docs/en/dynamic-content/user-guide/dateien-verwalten).
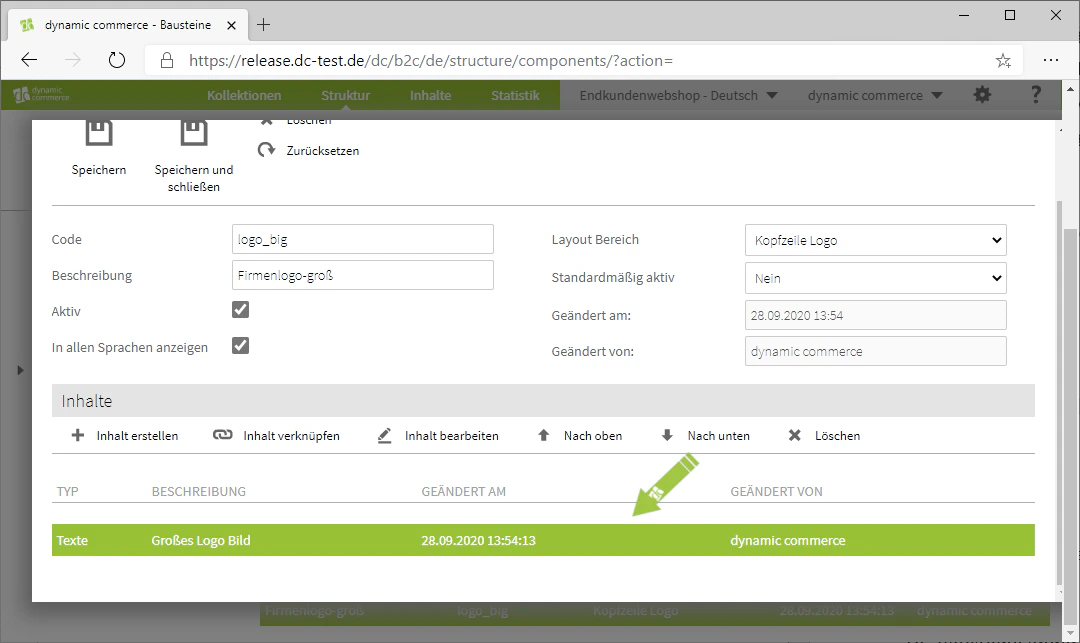
The content has thus been created and the large logo has been maintained. You can edit this content by double-clicking on it.
The creation of the building block is thereby also complete. You can use it when creating a page, as mentioned above.
## Step 6: Create and Edit Content
After saving, you should open the "Content" section below the basic settings. Click on "Create Content" there.
A selection of content types should then open.
A detailed overview of the available modules can be found under [Content Types](/docs/en/dynamic-content/user-guide/inhaltsarten).
In our example, a simple text field into which we upload an image is sufficient for the creation. Therefore, we click on the "Texts" content type, enter a description, and select our new logo from the file browser. We then save this content.
You can find out how to upload files and images to the file browser under [Upload and Manage Files](/docs/en/dynamic-content/user-guide/dateien-verwalten).
The content has thus been created and the large logo has been maintained. You can edit this content by double-clicking on it.
The creation of the building block is thereby also complete. You can use it when creating a page, as mentioned above.
 ## Related Topics
Create templates for recurring page structures.
Create and edit content on pages.
Overview of all available content modules.
Manage files and images in the file browser.
## Related Topics
Create templates for recurring page structures.
Create and edit content on pages.
Overview of all available content modules.
Manage files and images in the file browser.