> ## Documentation Index
> Fetch the complete documentation index at: https://docs.dc.ag/llms.txt
> Use this file to discover all available pages before exploring further.
# dynamic commerce - Set Up Webshop Payment Options
> Configure payment methods such as prepayment, invoice, or PayPal in the webshop.
Here we show you how to create various webshop payment options.
Fundamentally, payment options represent the different ways in which a customer can settle their outstanding invoices.
Any number of payment options can be defined per webshop.
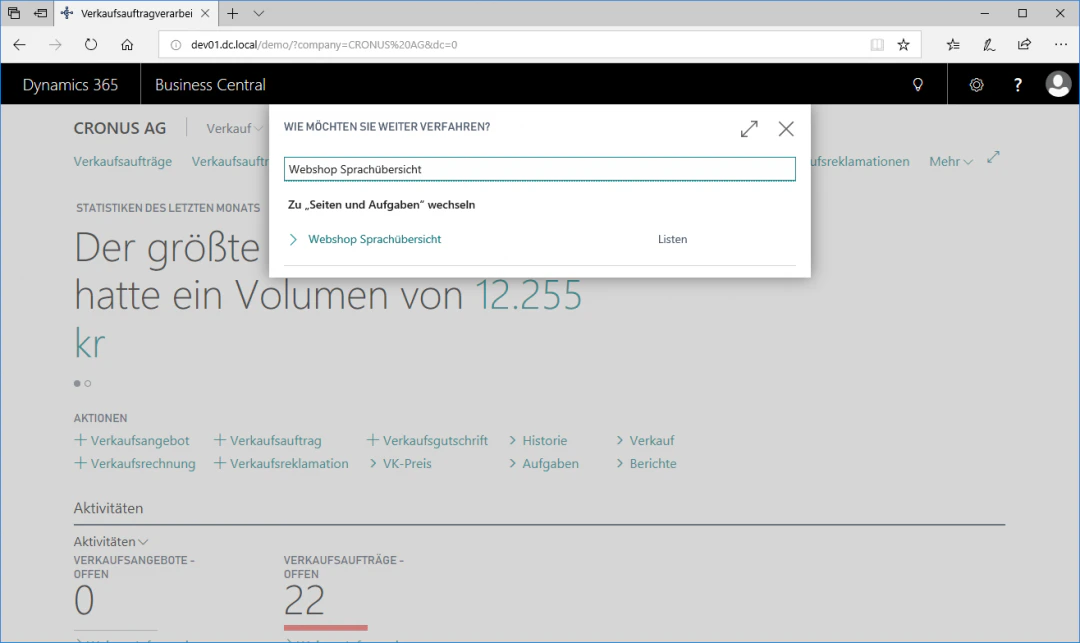
## Step 1: Open the Webshop Language Overview
Navigate to the Webshop Language Overview by entering "Webshop Language Overview" in the search.
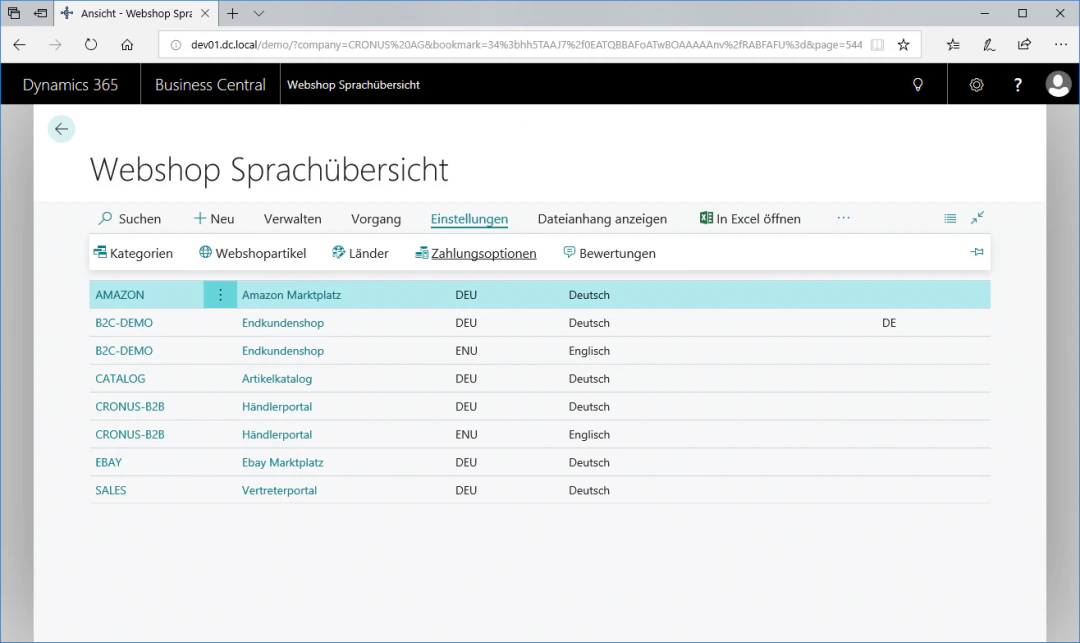
 ## Step 2: Open Webshop Payment Options
Click the FastTab "Payment Options" in the "Settings" menu ribbon to open the Webshop Payment Options.
## Step 2: Open Webshop Payment Options
Click the FastTab "Payment Options" in the "Settings" menu ribbon to open the Webshop Payment Options.
 ## Step 3: Create a Payment Option
To create a new payment option, select the FastTab "New". The new entry is inserted above the currently selected row. To enable faster creation and editing of a payment option, the payment option overview is already editable directly in the list. The options can therefore be entered and edited directly in the list by clicking "Edit List".
In our example, we create the payment option "PayPal" without a country-specific code. For this, we select the following settings:
Description: PayPal
Country Code: (leave blank)
Active: check the box
By leaving the country code blank, the payment option is available for all countries in the webshop.
If a specific country such as "DE" for Germany is selected, this payment option is only available in the selected country.
To activate the created payment option for the webshop, check the "Active" checkbox.
## Step 3: Create a Payment Option
To create a new payment option, select the FastTab "New". The new entry is inserted above the currently selected row. To enable faster creation and editing of a payment option, the payment option overview is already editable directly in the list. The options can therefore be entered and edited directly in the list by clicking "Edit List".
In our example, we create the payment option "PayPal" without a country-specific code. For this, we select the following settings:
Description: PayPal
Country Code: (leave blank)
Active: check the box
By leaving the country code blank, the payment option is available for all countries in the webshop.
If a specific country such as "DE" for Germany is selected, this payment option is only available in the selected country.
To activate the created payment option for the webshop, check the "Active" checkbox.
 ## Step 4: Define Fees
To specify whether additional fees apply for a payment option, enter the corresponding value in the "Fees" field. These applicable fees are only added to the invoice at the end. In our example, no fees apply, so we enter 0 in the "Fees" field.
## Step 4: Define Fees
To specify whether additional fees apply for a payment option, enter the corresponding value in the "Fees" field. These applicable fees are only added to the invoice at the end. In our example, no fees apply, so we enter 0 in the "Fees" field.
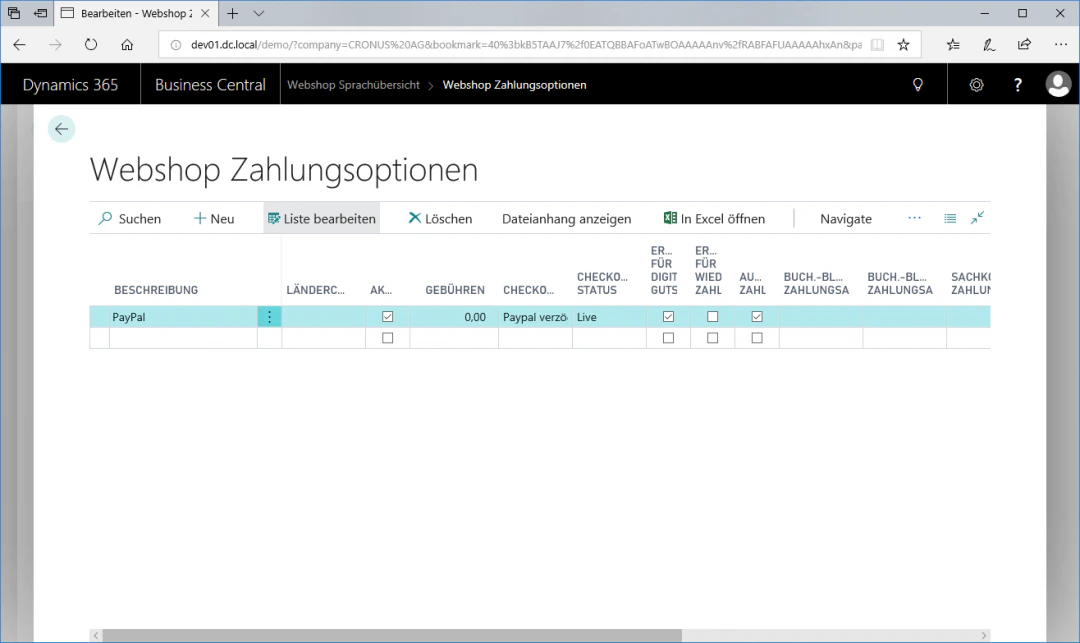
 ## Step 5: Define the Checkout Type
Under Checkout, you now determine the actual payment method. In our example, we select "PayPal deferred" in the Checkout field. Deferred means that the purchase amount is only reserved and not yet posted. The final posting takes place later when the order has actually been shipped.
## Step 5: Define the Checkout Type
Under Checkout, you now determine the actual payment method. In our example, we select "PayPal deferred" in the Checkout field. Deferred means that the purchase amount is only reserved and not yet posted. The final posting takes place later when the order has actually been shipped.
 ## Step 6: Define the Checkout Status
The Checkout Status determines whether requests to the online payment service are sent as test or live. In our example, we select "Live" in the "Checkout Status" field.
## Step 6: Define the Checkout Status
The Checkout Status determines whether requests to the online payment service are sent as test or live. In our example, we select "Live" in the "Checkout Status" field.
 ## Step 7: Activate Digital Voucher
To enable the purchase of digital vouchers with the respective payment option, check the "Digital Voucher Active" checkbox. Since this only makes sense for online payment methods, we check the box in our example.
## Step 7: Activate Digital Voucher
To enable the purchase of digital vouchers with the respective payment option, check the "Digital Voucher Active" checkbox. Since this only makes sense for online payment methods, we check the box in our example.
 ## Step 8: Define Subscription Orders
To enable subscription orders with the respective payment option, check the "Active for Subscriptions" checkbox. In our example, we do **not** check the box, as we do not want to enable recurring payments for PayPal.
## Step 8: Define Subscription Orders
To enable subscription orders with the respective payment option, check the "Active for Subscriptions" checkbox. In our example, we do **not** check the box, as we do not want to enable recurring payments for PayPal.
 ## Step 9: Automatic Payment Settlement
To ensure that incoming payments are automatically recorded in the background in financial accounting, we check the "Auto Payment Settlement" field in our example.
## Step 9: Automatic Payment Settlement
To ensure that incoming payments are automatically recorded in the background in financial accounting, we check the "Auto Payment Settlement" field in our example.
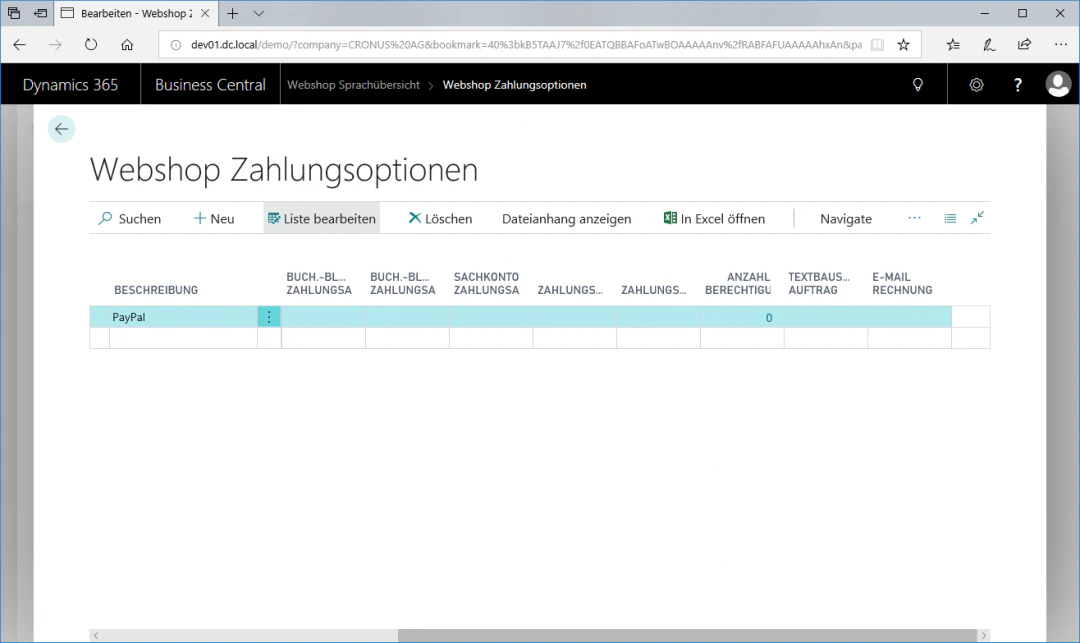
 ## Step 10: Insert Text Module into Order
To insert a text module, such as "DHL-Green", into an order, select a corresponding text module in the "Text Module Order" field. In our example, we leave this field blank.
## Step 10: Insert Text Module into Order
To insert a text module, such as "DHL-Green", into an order, select a corresponding text module in the "Text Module Order" field. In our example, we leave this field blank.
 ## Step 11: Text Module for Email Invoice
Under "Email Invoice", you can select a text module for the outgoing invoice email.
In our example, we also leave this field blank.
## Step 11: Text Module for Email Invoice
Under "Email Invoice", you can select a text module for the outgoing invoice email.
In our example, we also leave this field blank.
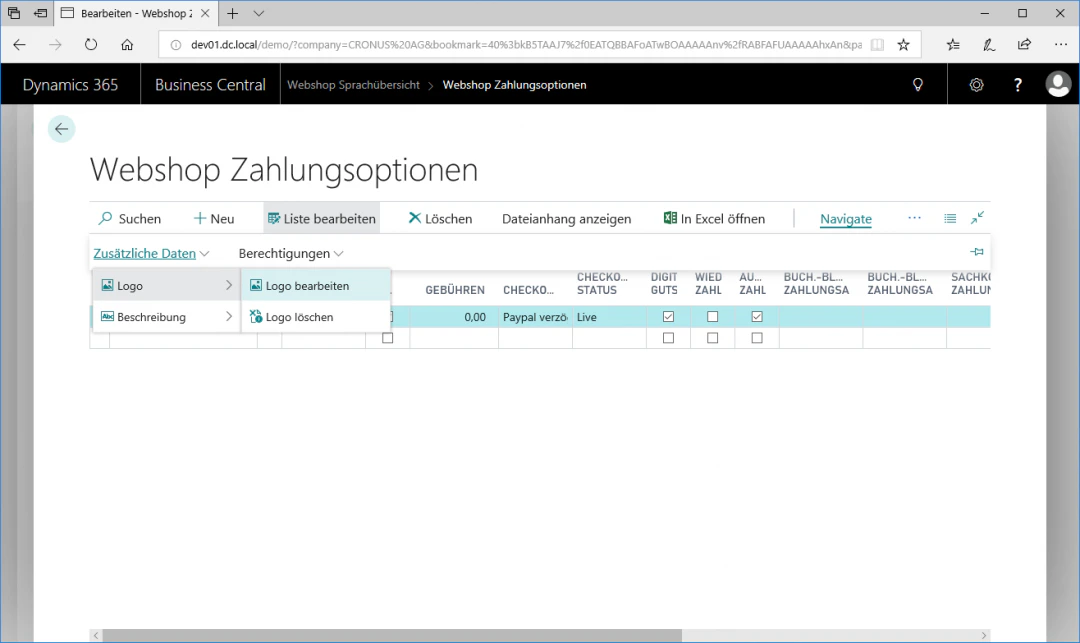
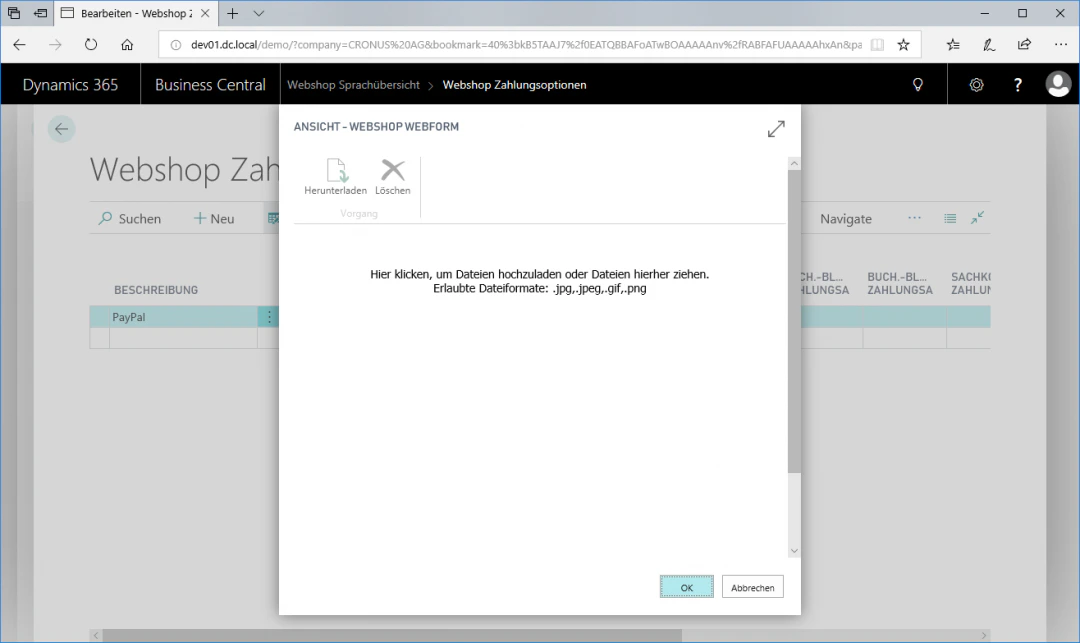
 ## Step 12: Assign an Image to the Payment Option
To assign an explanatory image or symbol to the payment option, navigate in the "Navigate" menu ribbon via "Additional Data" to the FastTab "Logo" and click "Edit Logo" there. Images in JPEG or PNG format can be inserted here, which are then automatically converted to the correct size.
## Step 12: Assign an Image to the Payment Option
To assign an explanatory image or symbol to the payment option, navigate in the "Navigate" menu ribbon via "Additional Data" to the FastTab "Logo" and click "Edit Logo" there. Images in JPEG or PNG format can be inserted here, which are then automatically converted to the correct size.

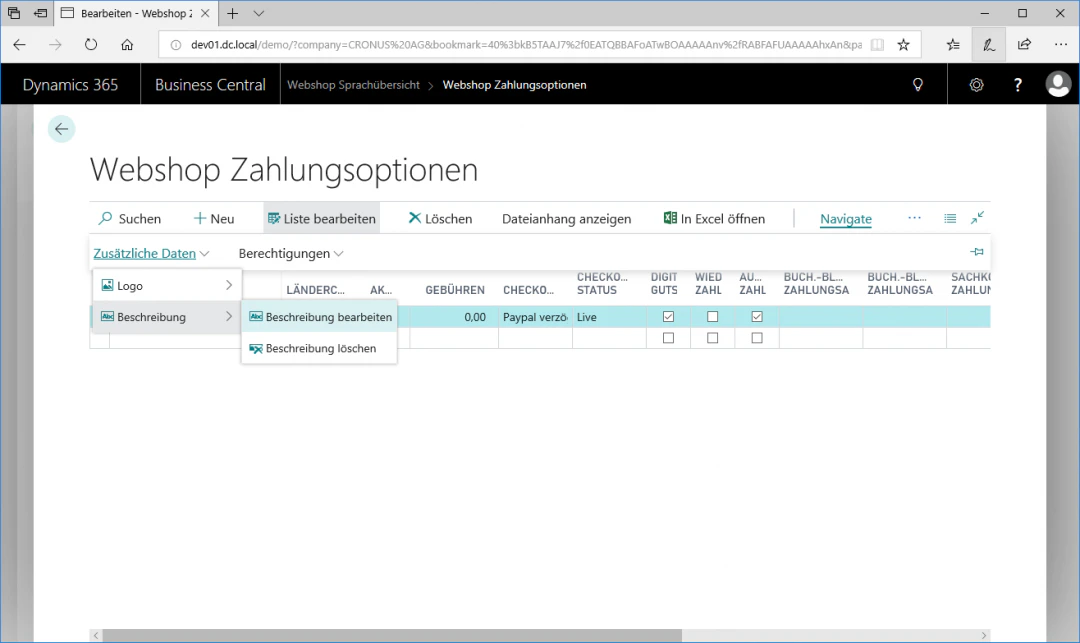
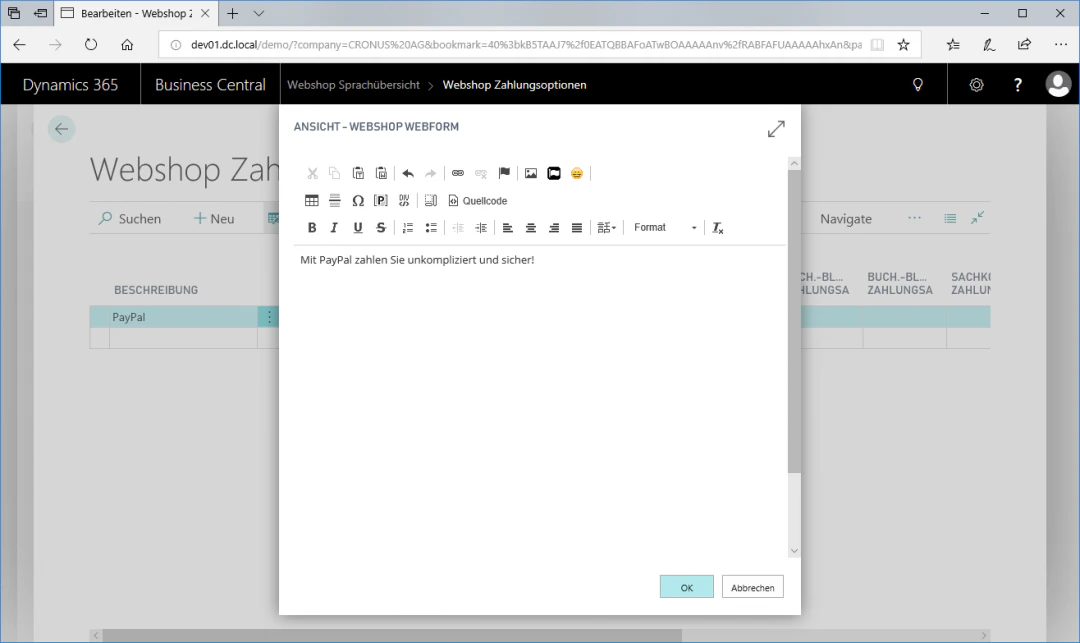
 ## Step 13: Assign a Description to the Payment Option
To define a description for the payment option, navigate in the "Navigate" menu ribbon via "Additional Data" to the FastTab "Description" and click "Edit Description" there. An editor opens in which you can enter and format text. We recommend writing a concise and meaningful short text here, such as "Pay with PayPal — simple and secure!".
## Step 13: Assign a Description to the Payment Option
To define a description for the payment option, navigate in the "Navigate" menu ribbon via "Additional Data" to the FastTab "Description" and click "Edit Description" there. An editor opens in which you can enter and format text. We recommend writing a concise and meaningful short text here, such as "Pay with PayPal — simple and secure!".
 ## Step 14: Update Payment Option
To synchronise the payment option with the webshop system, click the FastTab "Update" in the "Start" menu ribbon. This updates all payment options that have been changed since the last update.
All changed payment options are also automatically updated with the next full data update.
## Related Topics
Activate customers for login and purchasing.
Maintain items for the webshop.
## Step 14: Update Payment Option
To synchronise the payment option with the webshop system, click the FastTab "Update" in the "Start" menu ribbon. This updates all payment options that have been changed since the last update.
All changed payment options are also automatically updated with the next full data update.
## Related Topics
Activate customers for login and purchasing.
Maintain items for the webshop.