> ## Documentation Index
> Fetch the complete documentation index at: https://docs.dc.ag/llms.txt
> Use this file to discover all available pages before exploring further.
# dynamic commerce - Installation Power BI Dashboard
> Install the Power BI Dashboard for dynamic commerce and connect it to the web shop.
To install the dynamic commerce Power BI Dashboard, the app "dynamic commerce Power BI Dashboard" must first be installed from the Marketplace. Instructions for installing apps from the Marketplace can be found at [https://learn.microsoft.com/de-de/power-bi/consumer/end-user-apps](https://learn.microsoft.com/de-de/power-bi/consumer/end-user-apps).
## Connecting to Company Data
After installing the app and opening it, a message will appear: "You are viewing this app with sample data. Connect your data." Following the link will guide you through a wizard.
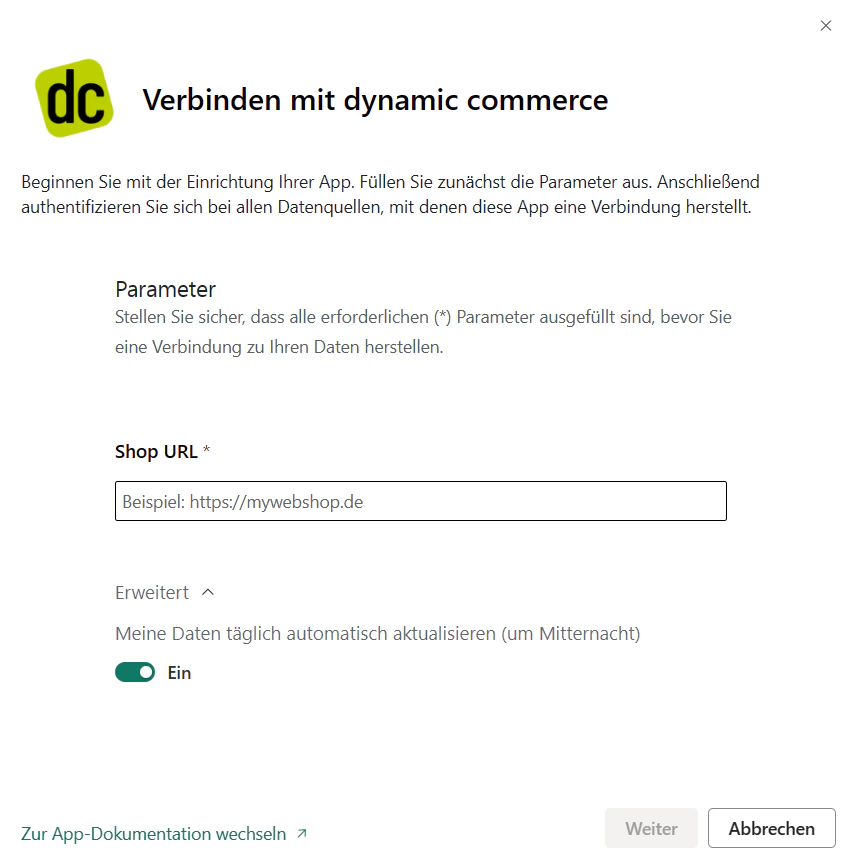 In the first step, you must enter the shop address of your dynamic commerce web shop — the same address you use to access the web shop. There should be no trailing slash at the end of the URL! Example: `https://brandshop.dc.ag`
In the second step, you must enter your credentials with username and password. The access credentials are provided by the responsible project manager or Customer Success Manager at dc AG.
After completing the wizard, the data will be refreshed and the setup is complete.
## Sharing the App with Colleagues
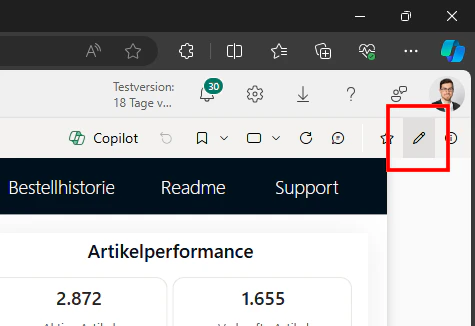
1. Click the "Edit app" button in the upper right corner above the dashboard.
In the first step, you must enter the shop address of your dynamic commerce web shop — the same address you use to access the web shop. There should be no trailing slash at the end of the URL! Example: `https://brandshop.dc.ag`
In the second step, you must enter your credentials with username and password. The access credentials are provided by the responsible project manager or Customer Success Manager at dc AG.
After completing the wizard, the data will be refreshed and the setup is complete.
## Sharing the App with Colleagues
1. Click the "Edit app" button in the upper right corner above the dashboard.
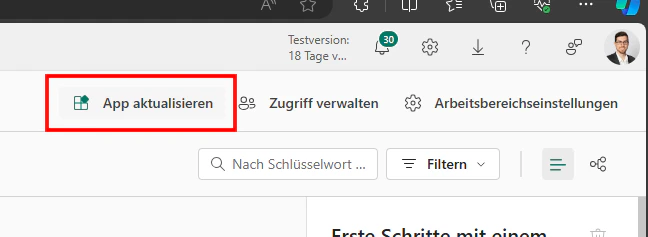
 2. You will then be redirected to the associated workspace. Click "Update app" there.
 3. Then navigate to the "Permissions" tab and enter the people who should be granted access to the app.
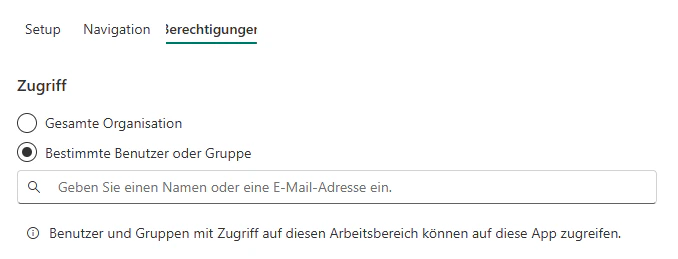 4. Check the box "This will automatically update this app" so that colleagues do not have to install the app themselves.
5. Click "Update app".
## Related Topics
Maintain articles for the web shop.
4. Check the box "This will automatically update this app" so that colleagues do not have to install the app themselves.
5. Click "Update app".
## Related Topics
Maintain articles for the web shop.