> ## Documentation Index
> Fetch the complete documentation index at: https://docs.dc.ag/llms.txt
> Use this file to discover all available pages before exploring further.
# Shipping Costs - Shipping Options
> Create, configure, and copy shipping options
Our extension allows you to store any number of shipping options in the system.
You can also link specific conditions to the shipping options, ensuring that it is not possible to process an order with the wrong shipping option.
Shipping options can only be maintained on a shipping group. It is therefore recommended to first create a shipping group — see [Shipping Groups](/docs/en/bc-shipping-costs/user-guide/versandgruppen).
How to add shipping options to an order is shown under [Calculation in Order](/docs/en/bc-shipping-costs/user-guide/berechnung-im-auftrag).
## Step 1: Navigate to Shipping Options
To access the shipping options, first navigate to the shipping groups.
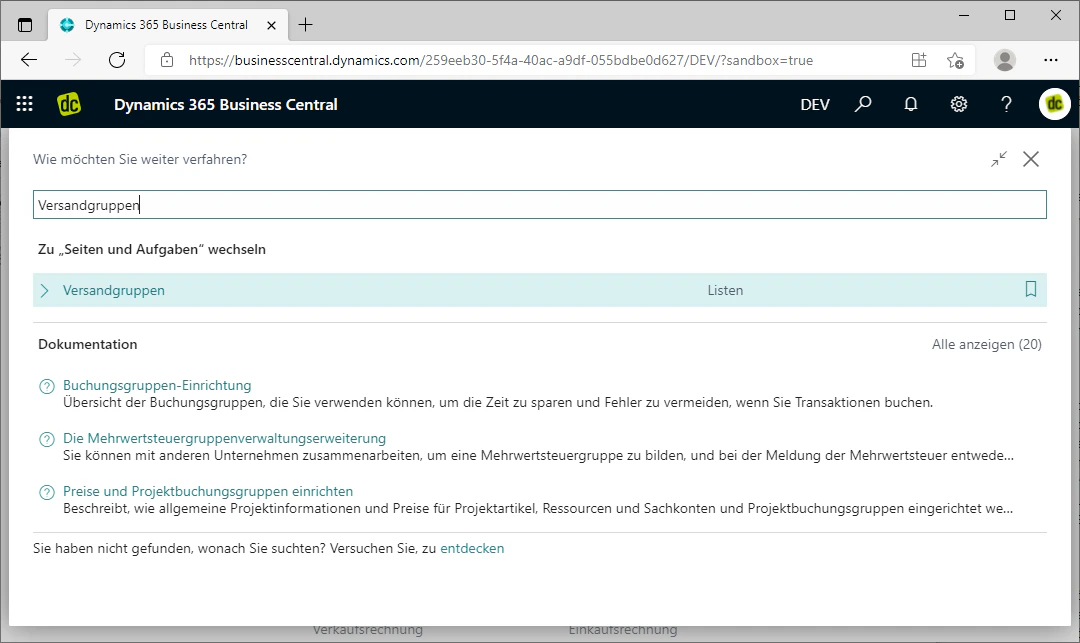
You can reach these by searching for "Shipping Groups" in the search bar and clicking on the corresponding search result. The "Shipping Groups" list should then open.
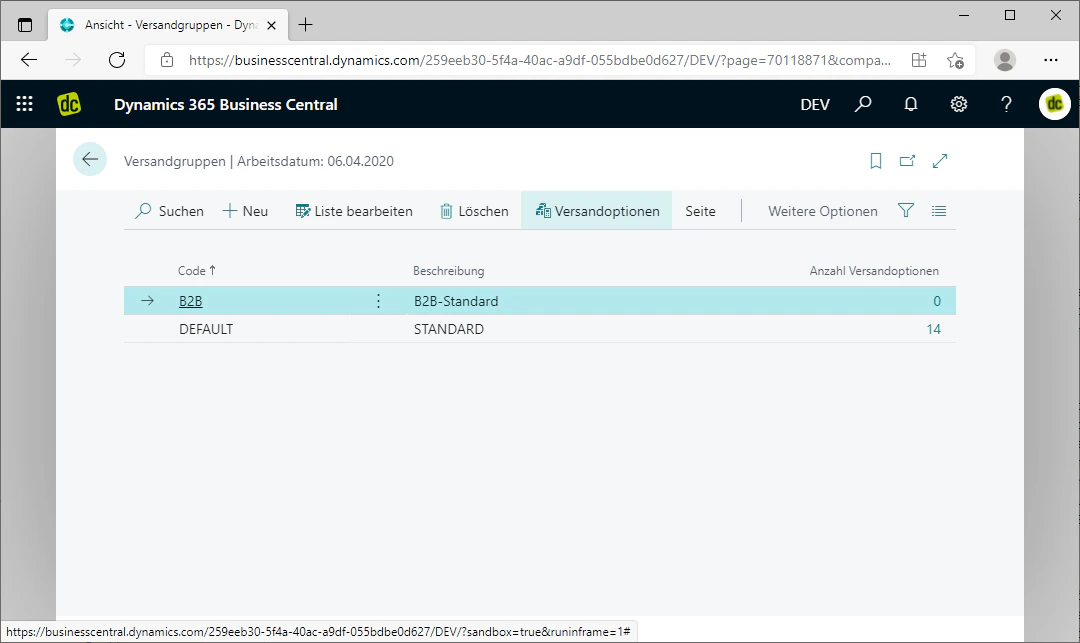
There, first select a shipping group by clicking on it — the one for which you want to create shipping options. You can tell which group is selected by the fact that it is highlighted in blue.
Then click on the FastTab "Shipping Options", which opens a list of the shipping options maintained on the shipping groups.
In our example, we want to maintain shipping options for the newly created shipping group "B2B".
 ## Step 2: Create a New Shipping Option
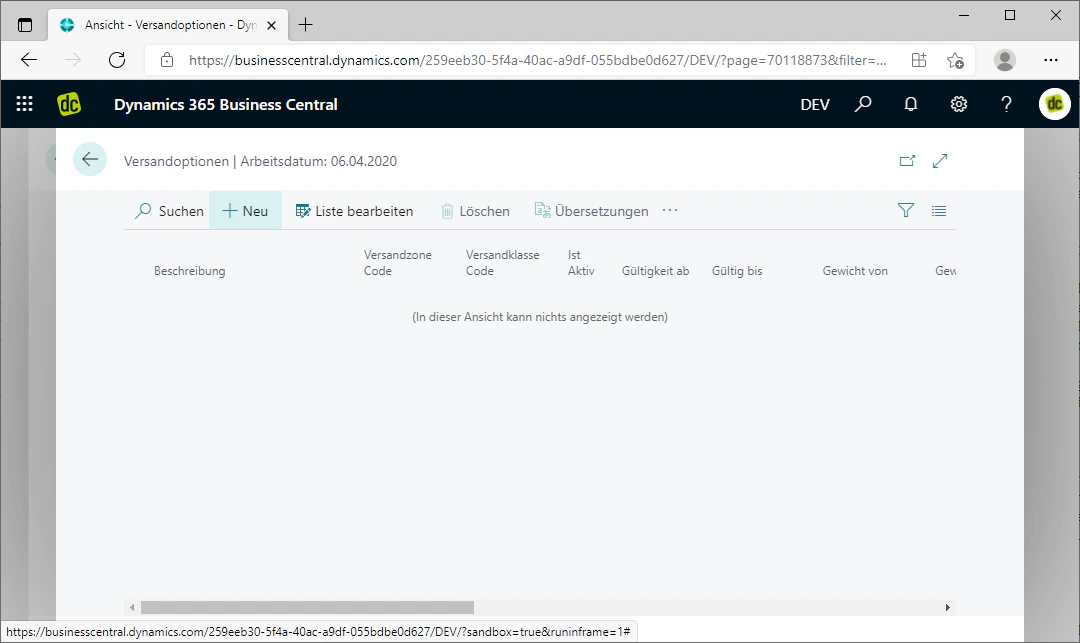
In the Shipping Options list, you can create a new shipping option for the shipping group by clicking the FastTab "New" in the menu bar at the top.
If shipping options already exist, this inserts a row in the list above the currently selected entry.
In the respective row, you can then configure the settings of the shipping option and assign various options, which we will explain below.
## Step 2: Create a New Shipping Option
In the Shipping Options list, you can create a new shipping option for the shipping group by clicking the FastTab "New" in the menu bar at the top.
If shipping options already exist, this inserts a row in the list above the currently selected entry.
In the respective row, you can then configure the settings of the shipping option and assign various options, which we will explain below.
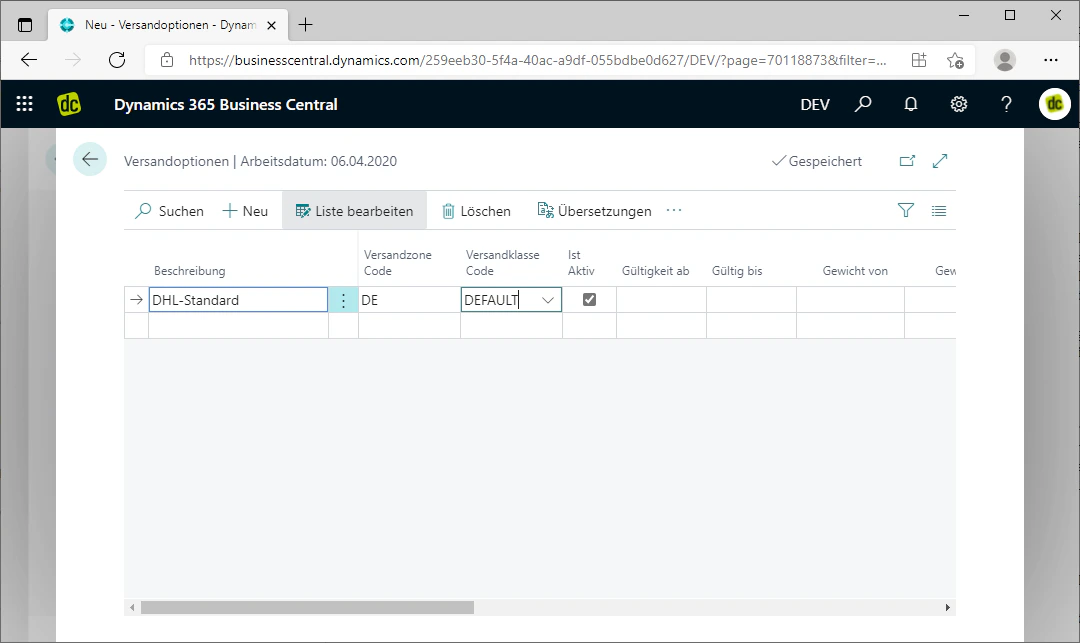
 ## Step 3: Select Description, Shipping Zones, and Shipping Class Code
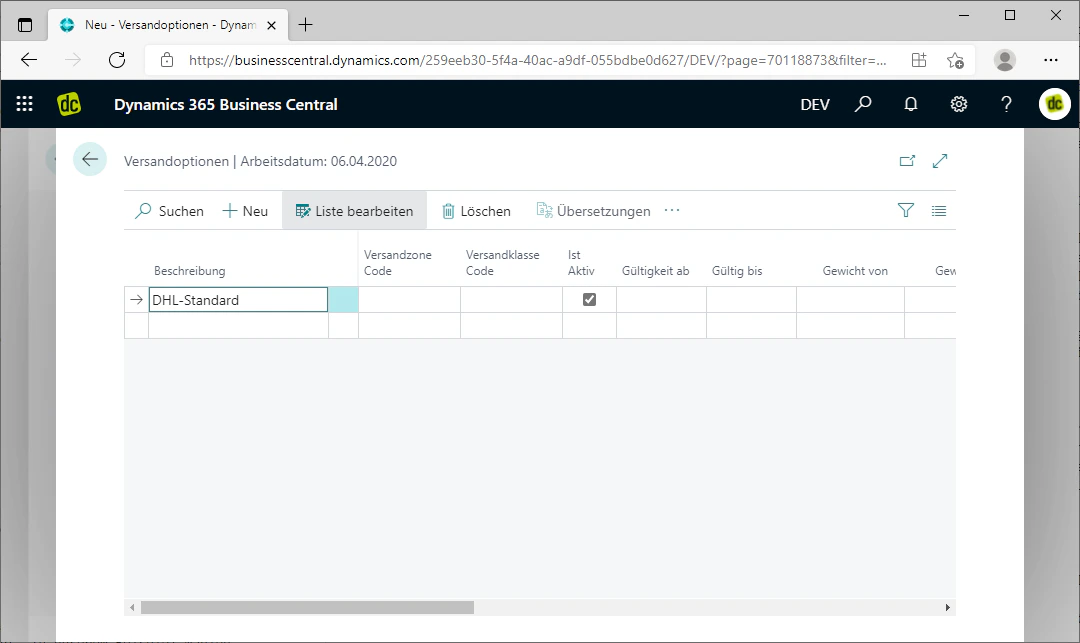
In the respective fields, first select a description for your shipping option.
This description will then be displayed later in your orders. In our example, we choose "DHL-Standard" as the description, as we want to create a shipping option for a standard delivery via DHL.
A shipping zone code from an already created shipping zone can then be added. The shipping option will then only be valid for that zone.
How to create a shipping zone is explained under [Shipping Zones](/docs/en/bc-shipping-costs/user-guide/versandzonen).
In the example, we select the shipping zone DE for Germany, as there are different conditions for domestic and international shipping.
A shipping class code can also be assigned. This means that when determining the valid shipping option matching the items in the order, the shipping option with the shipping class that has the highest priority is automatically selected. The other shipping options are then not taken into consideration.
Further information on shipping classes can be found under [Shipping Classes](/docs/en/bc-shipping-costs/user-guide/versandklassen).
Since in our example this shipping option should not receive any special prioritization, we select the shipping class code "Default" for the standard prioritization.
## Step 3: Select Description, Shipping Zones, and Shipping Class Code
In the respective fields, first select a description for your shipping option.
This description will then be displayed later in your orders. In our example, we choose "DHL-Standard" as the description, as we want to create a shipping option for a standard delivery via DHL.
A shipping zone code from an already created shipping zone can then be added. The shipping option will then only be valid for that zone.
How to create a shipping zone is explained under [Shipping Zones](/docs/en/bc-shipping-costs/user-guide/versandzonen).
In the example, we select the shipping zone DE for Germany, as there are different conditions for domestic and international shipping.
A shipping class code can also be assigned. This means that when determining the valid shipping option matching the items in the order, the shipping option with the shipping class that has the highest priority is automatically selected. The other shipping options are then not taken into consideration.
Further information on shipping classes can be found under [Shipping Classes](/docs/en/bc-shipping-costs/user-guide/versandklassen).
Since in our example this shipping option should not receive any special prioritization, we select the shipping class code "Default" for the standard prioritization.
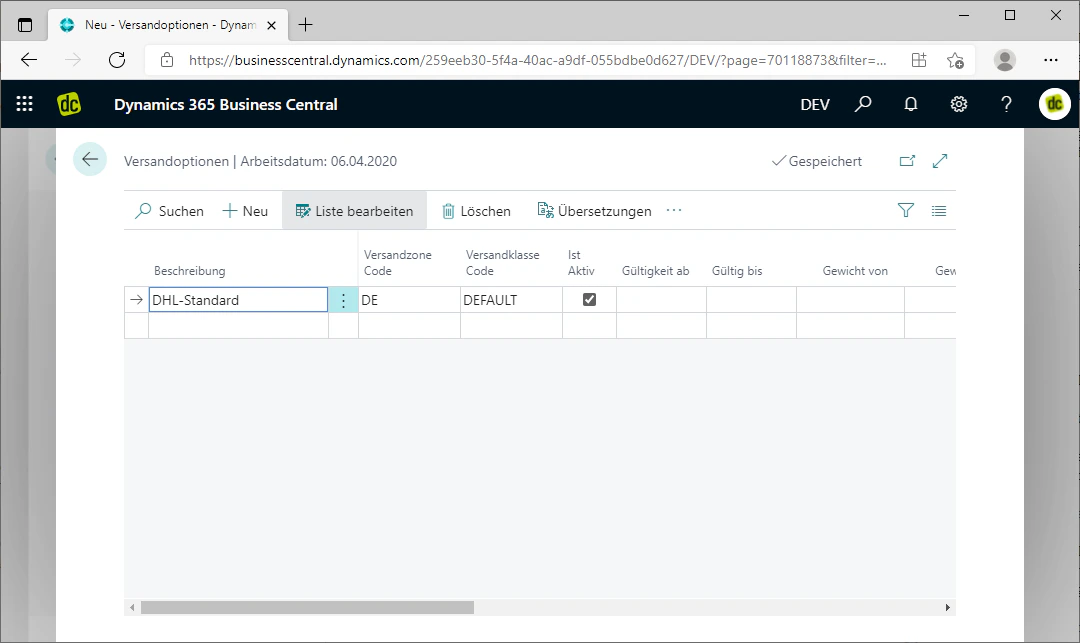
 ## Step 4: Activate and Deactivate Shipping Option
Using the "Is Active" field, you can manually activate and deactivate the shipping option.
Deactivated shipping options are not taken into consideration for an order.
If the checkbox in this field is checked, the shipping option is active. If it is not checked, the shipping option is deactivated.
Activation or deactivation can be performed simply by clicking on the respective field in the "Is Active" column.
## Step 4: Activate and Deactivate Shipping Option
Using the "Is Active" field, you can manually activate and deactivate the shipping option.
Deactivated shipping options are not taken into consideration for an order.
If the checkbox in this field is checked, the shipping option is active. If it is not checked, the shipping option is deactivated.
Activation or deactivation can be performed simply by clicking on the respective field in the "Is Active" column.
 ## Step 5: Filter by Validity, Weight, and Order Amount
You now have the option to further customize or filter the shipping option.
Using the two fields "Valid From" and "Valid To", the validity of the shipping option can be restricted to a specific time period. When calculating the shipping costs for an order, the shipping options are then filtered by work date according to these settings.
Leave these fields empty if the shipping option should be valid without restriction.
Since in our example this is a standard shipping option, it should be valid without restriction, which is why we leave these two fields empty.
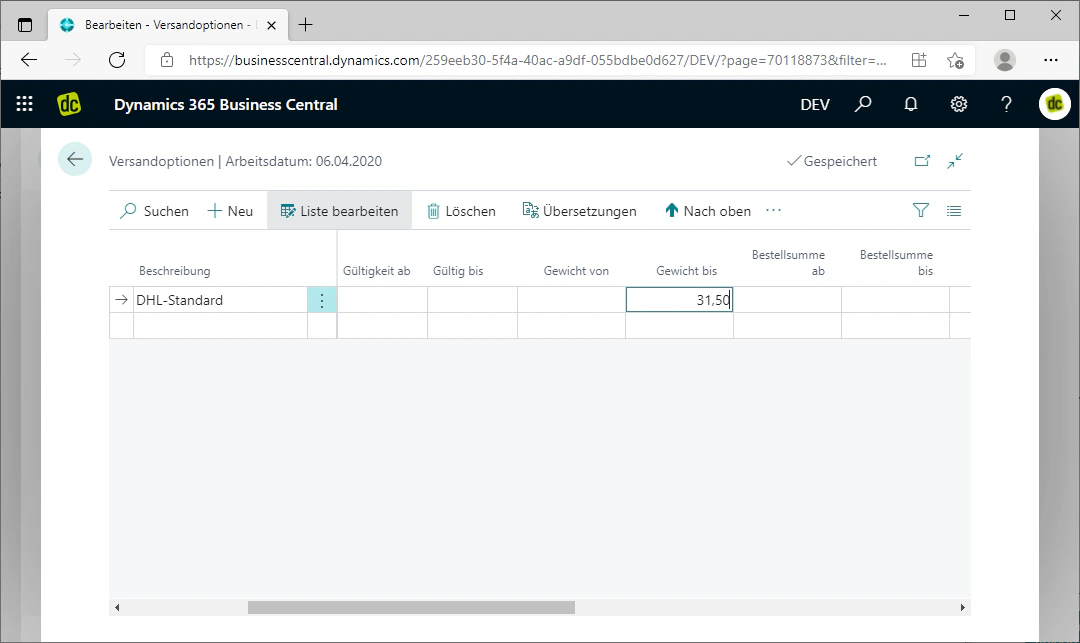
In the fields "Weight From" and "Weight To", a minimum or maximum weight in kilograms can be added to the shipping option. If the items in an order weigh less or more than specified, this shipping option will not be considered for the respective order.
In our example, we assign a maximum weight of 31.5 kg in the "Weight To" field, as this is the maximum weight for DHL parcels.
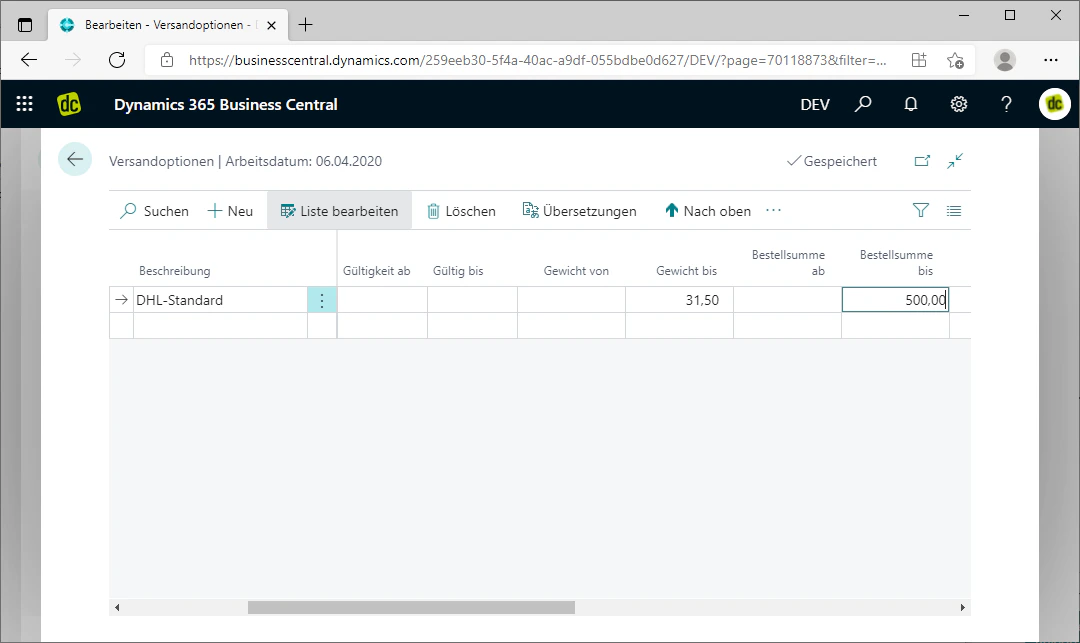
Additionally, the "Order Amount From" and "Order Amount To" fields can be used to restrict the order amount range within which this shipping option is available. If the order amount of an order falls outside the selected range, this shipping option will not be considered for the respective order.
In our example, we set a maximum order amount of €500, as standard parcels are only insured up to this value by default.
## Step 5: Filter by Validity, Weight, and Order Amount
You now have the option to further customize or filter the shipping option.
Using the two fields "Valid From" and "Valid To", the validity of the shipping option can be restricted to a specific time period. When calculating the shipping costs for an order, the shipping options are then filtered by work date according to these settings.
Leave these fields empty if the shipping option should be valid without restriction.
Since in our example this is a standard shipping option, it should be valid without restriction, which is why we leave these two fields empty.
In the fields "Weight From" and "Weight To", a minimum or maximum weight in kilograms can be added to the shipping option. If the items in an order weigh less or more than specified, this shipping option will not be considered for the respective order.
In our example, we assign a maximum weight of 31.5 kg in the "Weight To" field, as this is the maximum weight for DHL parcels.
Additionally, the "Order Amount From" and "Order Amount To" fields can be used to restrict the order amount range within which this shipping option is available. If the order amount of an order falls outside the selected range, this shipping option will not be considered for the respective order.
In our example, we set a maximum order amount of €500, as standard parcels are only insured up to this value by default.
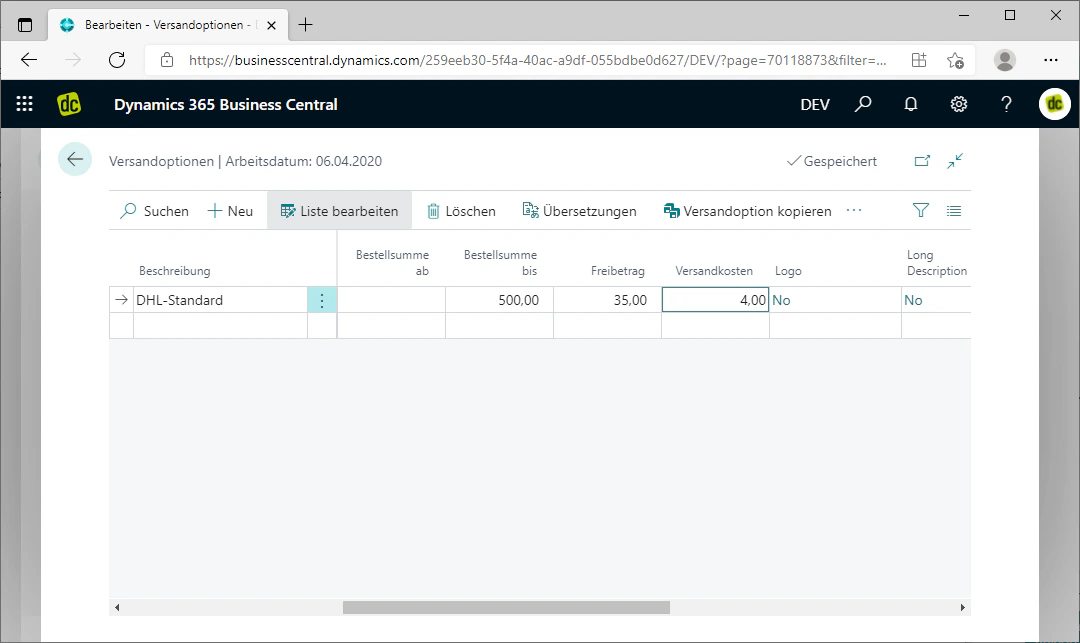
 ## Step 6: Maintain Shipping Costs and Free Shipping Threshold
Furthermore, you can use the "Shipping Costs" field to specify which shipping costs apply to this shipping option. These will then be inserted into the order when the shipping costs are calculated.
In the "Free Shipping Threshold" field, you can then specify an order amount from which this shipping option becomes free of charge, i.e., from which no shipping costs are incurred in the order.
In our example, we set shipping costs of €4.00 and a free shipping threshold of €35.00.
## Step 6: Maintain Shipping Costs and Free Shipping Threshold
Furthermore, you can use the "Shipping Costs" field to specify which shipping costs apply to this shipping option. These will then be inserted into the order when the shipping costs are calculated.
In the "Free Shipping Threshold" field, you can then specify an order amount from which this shipping option becomes free of charge, i.e., from which no shipping costs are incurred in the order.
In our example, we set shipping costs of €4.00 and a free shipping threshold of €35.00.
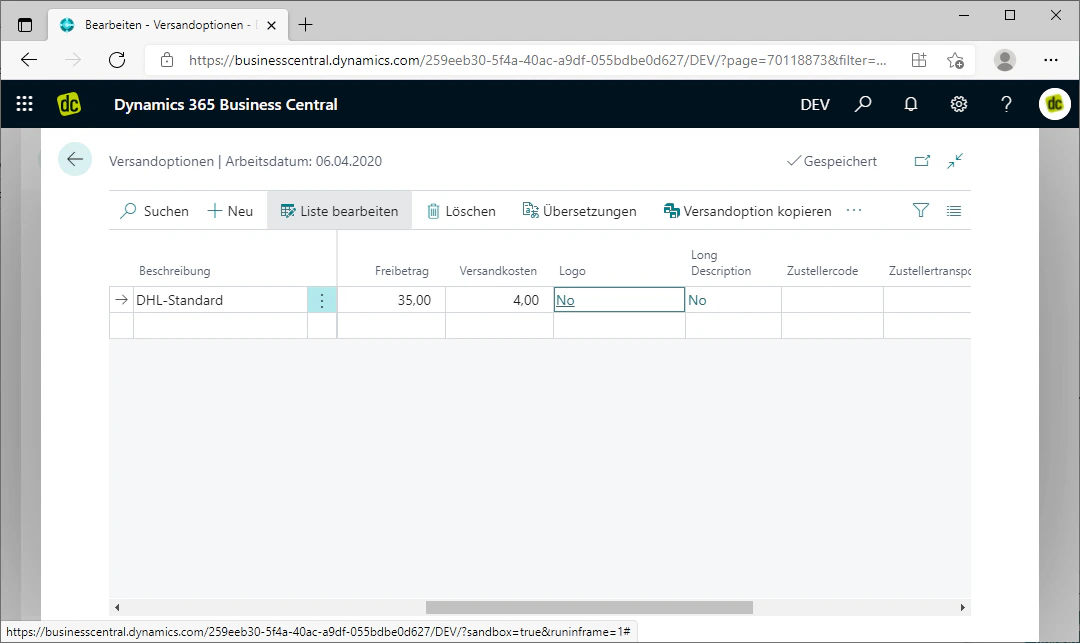
 ## Step 7: Maintain Logo and Description
You can now also add a logo and a description for the shipping option, which will then be visible in the order.
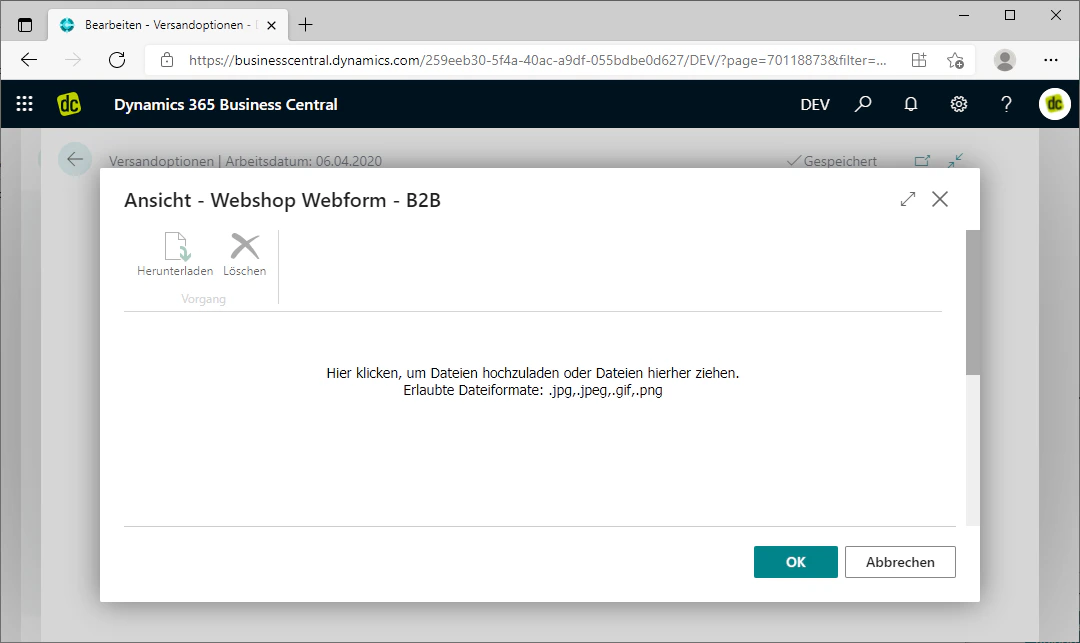
By clicking on the "No" displayed in the "Logo" field, you open an explorer. There you can upload images via drag & drop. These are then stored as the logo.
Click "OK" at the bottom to confirm the uploaded image.
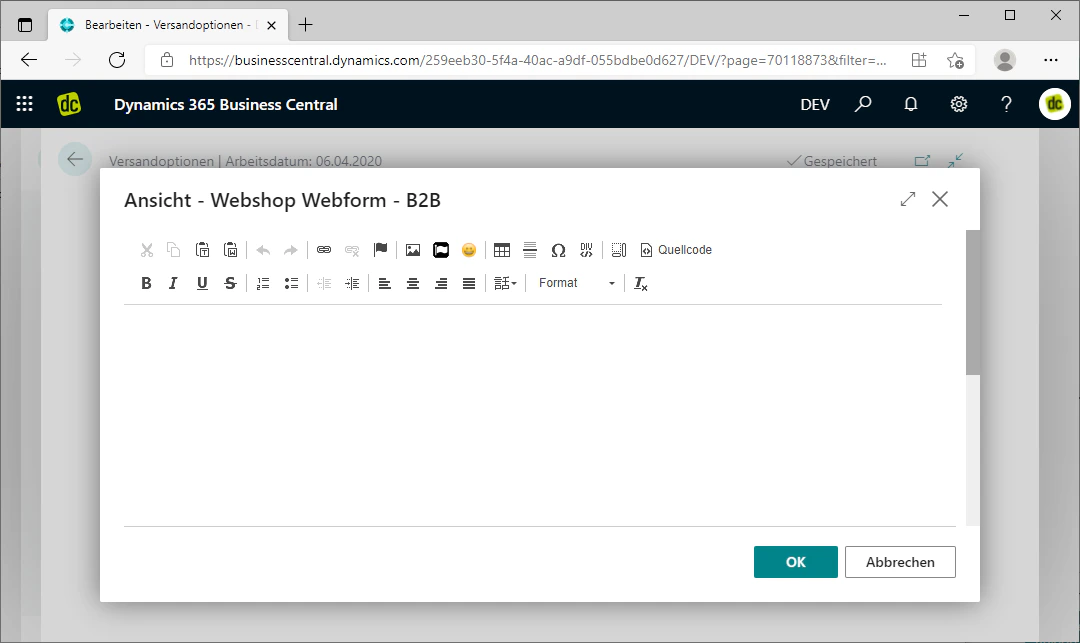
If you click "No" in the "Long Description" field, you open an editor in which you can add a longer description for the shipping option. You can format this text using the editor as you see fit.
Here too, confirm the text by clicking "OK" at the bottom.
## Step 7: Maintain Logo and Description
You can now also add a logo and a description for the shipping option, which will then be visible in the order.
By clicking on the "No" displayed in the "Logo" field, you open an explorer. There you can upload images via drag & drop. These are then stored as the logo.
Click "OK" at the bottom to confirm the uploaded image.
If you click "No" in the "Long Description" field, you open an editor in which you can add a longer description for the shipping option. You can format this text using the editor as you see fit.
Here too, confirm the text by clicking "OK" at the bottom.
 ## Step 8: Add Shipping Agent Code and Shipping Agent Service Code
To ensure that the correct shipping agent and the correct transport method are displayed in the order, you need to link them.
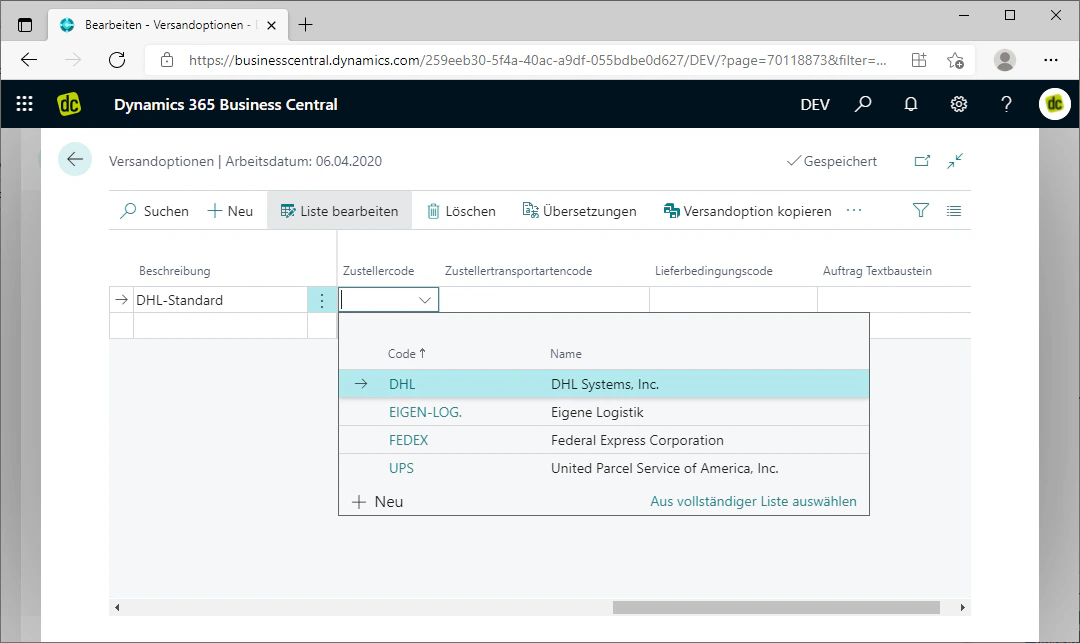
You link the correct shipping agent via the "Shipping Agent Code" field. Clicking on the field displays a list of the maintained shipping agent codes. From this list, you can simply select the correct one.
The shipping agent maintained in the shipping agent code will then be automatically inserted into the corresponding field in the order.
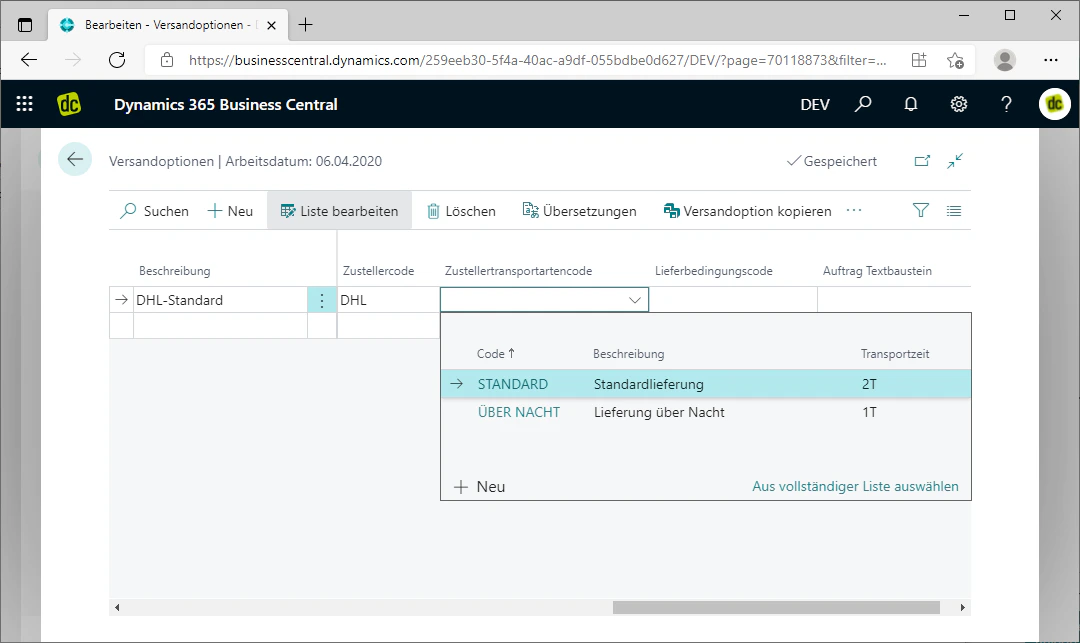
In the "Shipping Agent Service Code" field, you can select the correct service code as just described, in order to link the correct transport method to the shipping option.
This will also automatically insert the transport method into the corresponding field in the order.
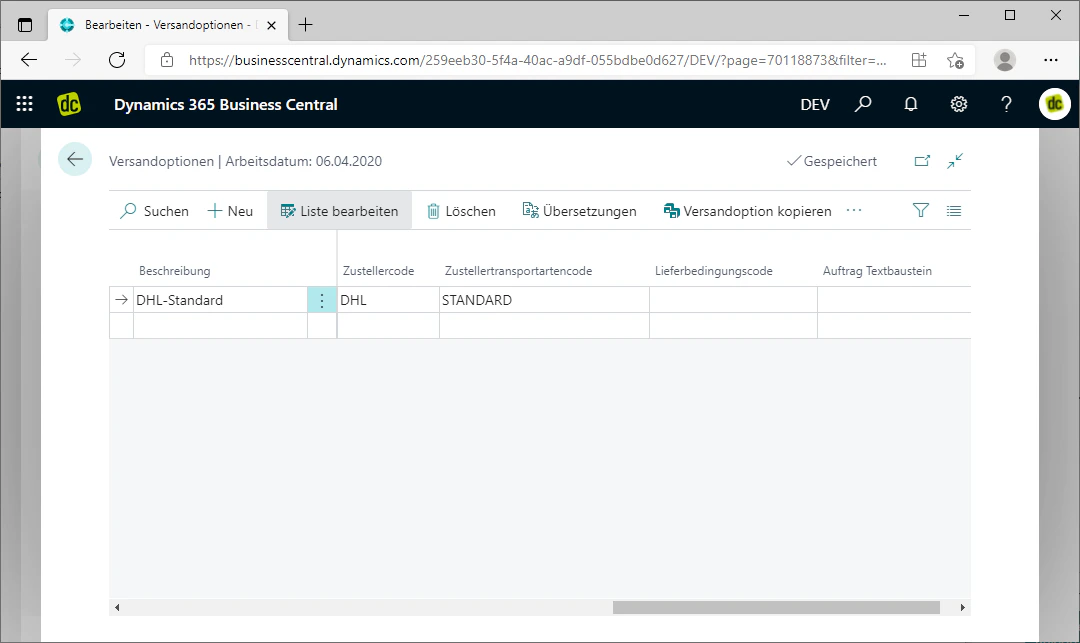
In our example, we select "DHL" as the shipping agent code and "Standard" as the shipping agent service code.
## Step 8: Add Shipping Agent Code and Shipping Agent Service Code
To ensure that the correct shipping agent and the correct transport method are displayed in the order, you need to link them.
You link the correct shipping agent via the "Shipping Agent Code" field. Clicking on the field displays a list of the maintained shipping agent codes. From this list, you can simply select the correct one.
The shipping agent maintained in the shipping agent code will then be automatically inserted into the corresponding field in the order.
In the "Shipping Agent Service Code" field, you can select the correct service code as just described, in order to link the correct transport method to the shipping option.
This will also automatically insert the transport method into the corresponding field in the order.
In our example, we select "DHL" as the shipping agent code and "Standard" as the shipping agent service code.
 ## Step 9: Link Shipment Method and Additional Text Blocks
There is also the option to link a shipment method and additional text blocks, which are then automatically added to the order.
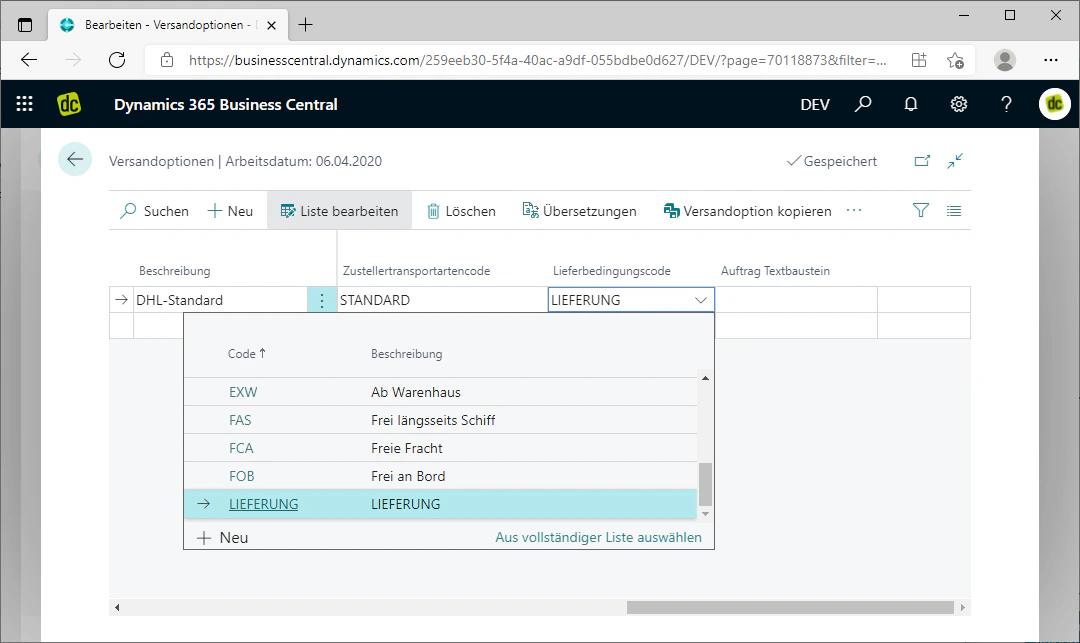
Using the "Shipment Method Code" field, you can link a shipment method. The text block stored in the shipment method code is automatically inserted as an additional line after the shipping cost line when the shipping option is added to an order. Provided you have made the necessary configurations there, this text block will also expand accordingly.
In our example, we select the shipment method for a delivery there.
Additionally, you can use the "Text Block Order" field to specify another text block code, through which a text block is linked. You can format this freely. It will also be inserted below the shipment method.
The shipping option is now fully created. Saving is not necessary, as every entry is saved automatically.
## Step 9: Link Shipment Method and Additional Text Blocks
There is also the option to link a shipment method and additional text blocks, which are then automatically added to the order.
Using the "Shipment Method Code" field, you can link a shipment method. The text block stored in the shipment method code is automatically inserted as an additional line after the shipping cost line when the shipping option is added to an order. Provided you have made the necessary configurations there, this text block will also expand accordingly.
In our example, we select the shipment method for a delivery there.
Additionally, you can use the "Text Block Order" field to specify another text block code, through which a text block is linked. You can format this freely. It will also be inserted below the shipment method.
The shipping option is now fully created. Saving is not necessary, as every entry is saved automatically.
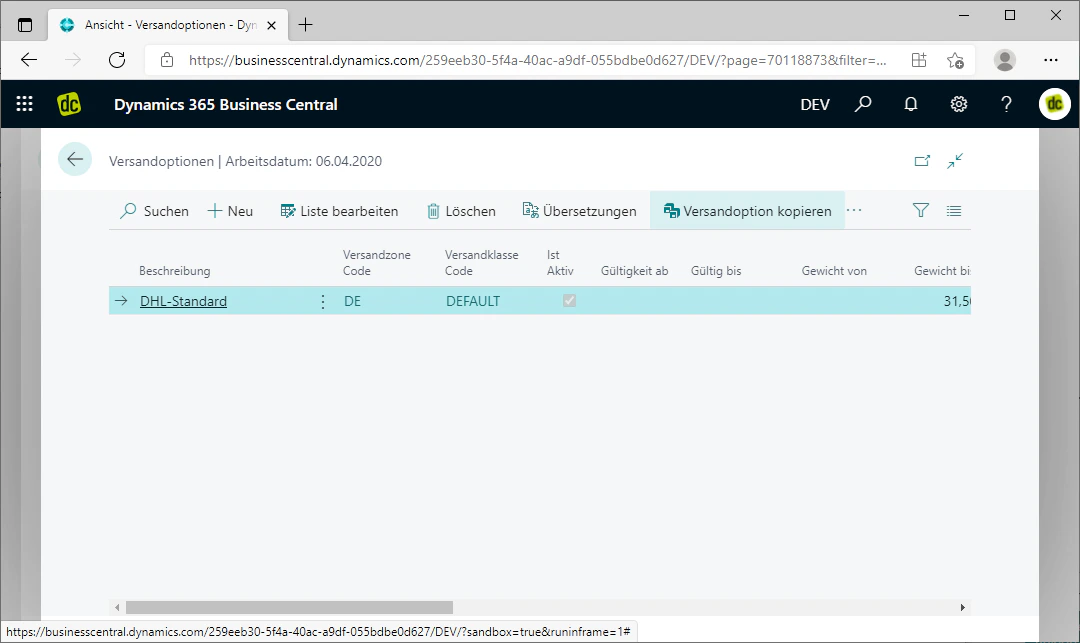
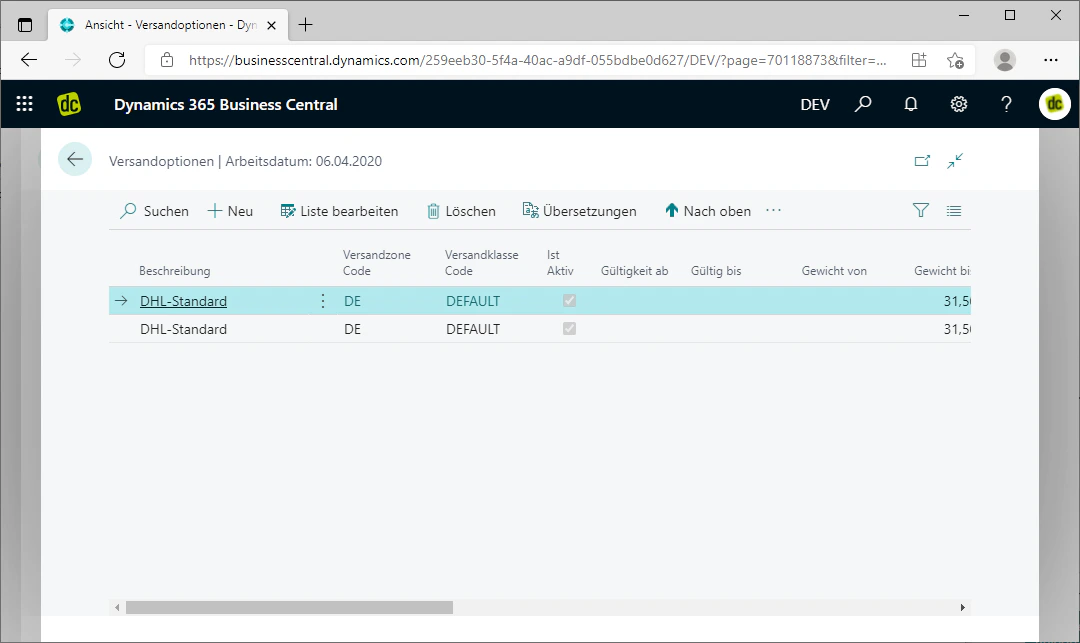
 ## Step 10: Copy Shipping Options
To minimize the effort when maintaining additional shipping options, our extension also provides the option to copy shipping options.
This works by clicking on the FastTab "Copy Shipping Option" in the menu bar. This copies the currently selected — i.e., highlighted in blue — shipping option.
## Step 10: Copy Shipping Options
To minimize the effort when maintaining additional shipping options, our extension also provides the option to copy shipping options.
This works by clicking on the FastTab "Copy Shipping Option" in the menu bar. This copies the currently selected — i.e., highlighted in blue — shipping option.
 ## Related Topics
Shipping options are always assigned to a shipping group.
Create shipping zones for countries or postal code areas.
Create shipping classes for filtering by item classification.
Calculate shipping options on the order and insert shipping lines.
## Related Topics
Shipping options are always assigned to a shipping group.
Create shipping zones for countries or postal code areas.
Create shipping classes for filtering by item classification.
Calculate shipping options on the order and insert shipping lines.